10 Vlog Editing Tips That Boost Retention in 2026
Other
You've spent hours shaping a vlog, but the strongest moment still sits four minutes into the timeline. The opening contains a slow greeting, a long walk to the location, and setup that made sense while filming but feels like friction to a mobile viewer. By the time the story reaches the surprising result, the audience has already left.
Good vlog editing doesn't mean cutting every breath or adding a transition to every beat. It means making the next second easy to earn. The workflow below moves from raw footage to finished short clips, covering hooks, pacing, audio, captions, reframing, storytelling, and batch production. It also leaves room for context, because educational vlogs, interviews, and tutorials can lose meaning when editors chase speed alone.
YouTube defines intro retention as the percentage of viewers still watching after the first 30 seconds, and recommends testing different openings when viewers leave early. Use that metric alongside the practical principles in this retention guide from AmaJova, then work through the timeline with a clear question: does each edit help the viewer understand or care about what comes next?
1. Lead With the Hook and Open Every Clip on Its Most Compelling Moment
The strongest line, visual, or reaction usually belongs at the beginning, not buried in minute four. For TikTok, Reels, and Shorts, start with the moment that makes the viewer need the explanation. A travel mishap short can open on the punchline, then show the morning departure. A podcast clip can begin with a guest's surprising claim before filling in the context.
Cut the opening to roughly one to three seconds before the key action or word. Starting slightly early preserves the natural entry into the sentence, but a long lead-in creates dead air. Write the hook as a question, a claim, or a visual promise, then check that the rest of the clip pays it off.
Practical rule: Watch the first three seconds with sound muted. If the frame doesn't communicate tension, emotion, movement, or a clear subject, rebuild the opening.
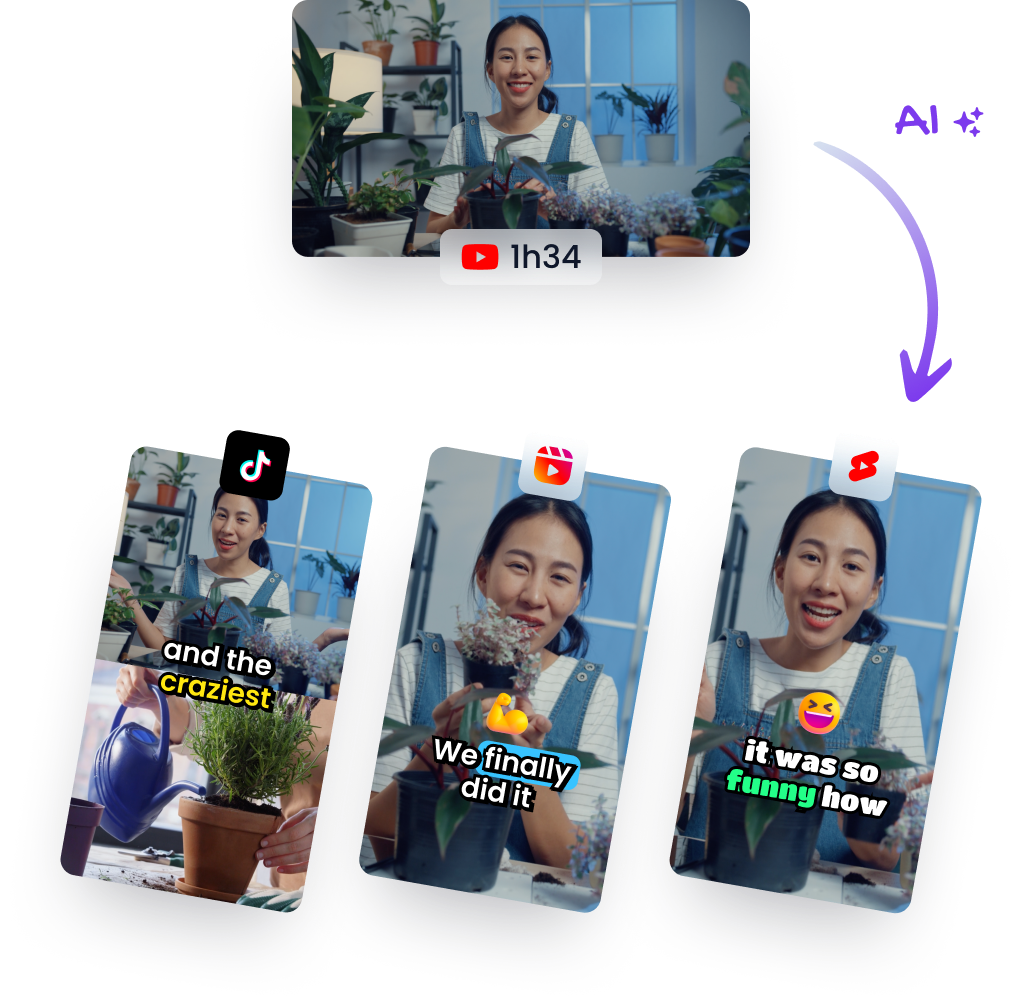
Klap's AI can scan long-form footage for engaging segments, but its first selection is a starting point, not a finished edit. Review the candidate clip, move the start point closer to the meaningful word or action, and remove any greeting that delays the premise. A two-hour recording may contain several useful moments, but each exported clip needs its own context.
Make one more test before export:
- Check the first frame: The subject should be visible immediately, not hidden behind a fade or title card.
- Check the promise: The opening claim must match the payoff.
- Check the silent version: On-screen action or text should support the hook without relying entirely on audio.
2. Tighten Pacing With Jump Cuts and Dead-Air Removal
A talking-head vlog often loses momentum between good sentences. The speaker pauses, restarts a thought, says “um,” repeats a phrase, or searches for the next word. A jump cut removes that waiting time so the edit moves from one useful idea to the next.
Start with a silence threshold of roughly 0.4 to 0.6 seconds for ordinary gaps. Don't apply it mechanically. Keep a natural pause before a punchline, a reveal, or an emotional statement. Removing every breath makes the speaker sound nervous and can flatten the rhythm.
A creator might turn a 90-second answer into 55 seconds by removing filler and repetition while preserving every substantive point. That's the difference between compression and vandalism. The rapid jump-cut style associated with Casey Neistat's vlogs works because each cut advances the story, not because the timeline contains constant motion.
Use the transcript view in your editor to find repeated phrases quickly. Descript can help with text-based cleanup, while most modern non-linear editors offer some form of transcript or silence detection. For fixed-camera footage, cover aggressive cuts with a punch-in, a reaction shot, or relevant B-roll. Don't add random zooms just to hide every edit.
Learn the basic mechanics in this jump cut definition from Klap, then apply the technique selectively:
- Remove low-information pauses: Cut gaps that don't create tension or meaning.
- Preserve expressive timing: Leave space where the speaker's delivery needs it.
- Change visual scale carefully: Use a modest punch-in or cutaway instead of constant digital movement.
- Read the cut aloud: If the sentence sounds unnatural after trimming, restore a beat or room tone.
3. Use J-Cuts and L-Cuts to Keep Audio Flowing Across Scenes
A hard cut changes picture and sound at the same instant. That can work for impact, but it often makes a vlog feel assembled rather than lived. J-cuts and L-cuts solve the problem by letting audio and video change at different points.
In a J-cut, the next scene's audio begins before the new picture appears. Use it when entering a location. A narrator can start describing a crowded market while the viewer still sees the previous street. The voice prepares the transition, then the market appears as the idea develops.
An L-cut keeps the previous scene's audio running over new footage. It's useful when leaving a location or showing a reaction. In an interview clip, the host's question can continue over the guest's face before the guest answers. The viewer sees the response forming without an abrupt audio break.
Split the audio from the video at the edit point, then slide the audio roughly 0.5 to 2 seconds before or after the picture. The exact offset depends on speech rhythm and the visual change. Match room tone across clips, especially when the source footage comes from different locations.
<iframe width="100%" style="aspect-ratio: 16 / 9;" src="https://www.youtube.com/embed/P6pXf9B0KUI" frameborder="0" allow="autoplay; encrypted-media" allowfullscreen></iframe>Premiere Pro, Final Cut Pro, and DaVinci Resolve all let you unlink audio and video so you can create these overlaps directly on the timeline. Don't use a J-cut to conceal confusing storytelling. The incoming audio should clarify where the story is going, not make the viewer wonder which scene they're hearing.
4. Design Captions and Vertical-First Text for Sound-Off Mobile Viewing
A viewer watching on a phone may read the captions more than the image. In the cited eye-tracking study, participants spent an average of 68% of viewing time looking at the subtitle area, with results ranging from 63% for Spanish subtitles to 75% for Arabic subtitles. Caption placement therefore belongs in the composition pass, not just the export checklist.
Keep captions concise, accurately timed, and easy to separate from the footage. Use strong contrast, but leave faces, demonstrations, and platform controls visible. Preview the vertical edit on an actual phone. A layout that works in a desktop viewer can collide with bottom captions, right-side buttons, or other mobile interface elements.
Automatic captions reduce transcription work, not editorial work. TikTok's accessibility guidance asks creators to select the video language and allows generated text to be edited or removed before saving. Check names, numbers, technical terms, punctuation, and speaker changes against the audio.
Use this caption pass:
- Edit for meaning: Remove transcription errors and filler that does not support the point.
- Break for reading: Use short phrases, often around two to four words at a time when delivery is fast.
- Highlight one idea: Apply keyword styling selectively. Animating every word makes the screen harder to follow.
- Protect the safe area: Keep captions above bottom controls and clear of the right-side interface.
- Keep the system consistent: Limit the design to two or three brand fonts and colors across the series.
For tutorials and educational vlogs, keep caption density low enough that text reinforces the explanation instead of competing with it. Captions should clarify speech, not reproduce every hesitation or crowd the demonstration.
Klap's caption editor lets you correct transcription, adjust styling, and review the text before export. Add a separate overlay for the hook or payoff, then keep one primary message on screen at a time. If the caption covers a hand movement, product detail, or facial expression, shorten it or move it before exporting.
5. Reframe and Grade for Vertical Consistency
Horizontal footage doesn't become a good vertical clip just because you export it at a different size. A 16:9 frame contains more width than a 9:16 composition can show, so the crop has to follow the subject. A two-person podcast may need the framing to switch between speakers. A travel vlog may need keyframes as the creator walks across the scene.
Instagram Reels publishing specifications summarized from Meta requirements recommend a 9:16 aspect ratio and 1080×1920 resolution, with supported durations from 3 seconds to 15 minutes and a maximum file size of 300 MB in this specifications guide. Keep faces, subtitles, logos, and evidence away from the extreme top and bottom edges, where interface elements can cover them.
Use Auto Reframe in Premiere Pro or Klap's reframing for the first pass. Then inspect the moments where tracking drifts, a second person enters, or the speaker turns away. Add keyframes instead of accepting a crop that leaves the subject half out of frame.
Color consistency matters just as much. Correct white balance and exposure before applying a LUT. Keep skin tones believable by checking faces on a waveform or vectorscope. DaVinci Resolve offers detailed grading tools, while CapCut and Premiere Pro provide practical built-in controls. If a LUT looks heavy, reduce its intensity rather than forcing every shot into the same dramatic style.
A consistent grade should make clips feel related, not make real locations look artificial.
Shoot in 4K when possible so a vertical crop retains useful detail. Preview the finished clip on a phone, especially when the source combines indoor, outdoor, and mixed-lighting scenes. For a deeper workflow, use this guide to vertical video editing with Klap.
6. Layer B-Roll and Cutaways to Hide Edits and Add Story Context
A jump cut can remove a pause, but B-roll can explain why the sentence matters. If a cooking creator talks about a sauce, show the ingredients, texture, pan, or finished plate. If a founder describes a product feature, cut to the interface or a close-up of the product instead of leaving the viewer on a static talking head.
Capture supporting footage with intent. Record a few seconds of the hands, location, object, reaction, or process that the narration names. You don't need a complicated shot list. You need enough visual evidence to cover edits and give the audience a reason to keep looking.
Cut the B-roll to the word it illustrates, not several beats after the explanation. If the speaker says “the door jammed,” show the door as the word lands. If the visual arrives late, the edit feels disconnected even when the footage is relevant.
Use these decisions while building the sequence:
- Cover the cut: Place B-roll over a jump cut when the camera position changes noticeably.
- Follow the sentence: Let the image answer or clarify the spoken idea.
- Vary distance: Mix wide location shots, medium action, and close details.
- Avoid visual noise: A random stock clip may hide an edit but weaken the story.
- Use cutaways for reactions: A glance, hand movement, or object detail can create a natural pause.
Royalty-free sources such as Pexels and Pixabay can help when original footage is missing, but stock footage should match the lighting, perspective, and claim being made. A generic city shot can establish place. It can't prove what happened in the vlog.
7. Balance Audio by Normalizing Loudness and Ducking Music
Viewers often forgive an imperfect frame. They're less patient with dialogue that disappears under music or jumps between quiet and loud locations. Start the audio pass with speech, not the soundtrack.
For a practical YouTube-oriented target, set dialogue peaks around -6 to -3 dBFS and integrated loudness near -14 LUFS. YouTube normalizes audio to roughly -14 LUFS, so a master far from that level can sound inconsistent after upload. Treat these as starting points, then listen on headphones, laptop speakers, and a phone.
Music should support the voice, not compete with it. Duck the background track by about 15 to 20 dB during speech, then let it rise slightly in pauses when the scene benefits from energy. Keyframes work well for deliberate control. Automatic ducking can speed up the first pass, but inspect every transition around laughter, overlapping dialogue, and short pauses.
Clean noise carefully. Strong noise reduction can make speech metallic, especially when the source contains room tone or a moving background. Apply a light pass, then compare it with the original. If the untreated clip sounds more natural, keep the room tone and solve the problem with level control.
Use royalty-free music from the YouTube Audio Library or TikTok's Commercial Music Library when licensing matters. Before export, listen for clipped peaks, sudden ambience changes, and music that returns too aggressively after a sentence. A viewer may not identify the technical fault, but they'll feel the friction.
8. Use Transcript-Based Editing to Cut Long-Form Video Faster
Long-form interviews, podcasts, and talking-head vlogs often contain hours of usable speech surrounded by repetition. A transcript lets you search the content before you scrub every frame. Find the sentence, select the surrounding section, and let the editor reflect that decision on the timeline.
Search for terms tied to strong moments, such as “secret,” “mistake,” “the best part,” or the central subject of the episode. This won't replace judgment. It narrows the search when the source is too large to review linearly.
A podcaster can locate several short quotes across a 90-minute episode by searching for a topic or phrase. An educator can remove repeated words from a lecture by deleting them in transcript view, then review the resulting cuts for rhythm and meaning. Correct transcription errors before making editorial decisions, especially when a misheard term could change the point.
Klap uses a related workflow when its AI identifies candidate segments from long-form video. Review each suggested boundary rather than accepting the generated cut blindly. Move the beginning earlier if the viewer needs context, or remove the setup when the opening already carries the promise.
Smooth text-based cuts with room tone or a short audio crossfade. Don't cover every edit with music. A consistent ambient bed often sounds more natural than a soundtrack that rises whenever a word disappears. The best transcript edit preserves the speaker's logic while removing the effort required to reach it.
9. Build Clips Around a Single Idea With a Clear Arc
A short clip becomes difficult to follow when it tries to summarize an entire episode. Choose one idea and give it a beginning, middle, and end. A useful structure is hook, setup, payoff, and closing beat.
For example, a 40-second clip can ask a question, answer it in two sentences, and end with a joke. A travel clip can show the problem, the fix, and the result in under 45 seconds. The viewer shouldn't need the original vlog open in another tab to understand why the moment matters.
Write a one-sentence summary before editing. If the sentence contains several unrelated claims, split the material into separate clips. This decision prevents a common repurposing mistake, where an editor preserves every interesting answer and produces a clip with no clear destination.
Use the ending as evidence that the opening earned attention. Finish on a result, reaction, joke, or specific call to action. Avoid fading out because the source footage ran out. If the clip ends on an unfinished thought, trim earlier or add the missing answer from the recording.
Klap's AI-generated clips can provide useful starting points, but refine them around one takeaway. For testing, compare clips in the 15 to 60 second range and review retention in platform analytics. The right length depends on the idea. A simple reaction may need little setup. A technical explanation needs enough time for the example and qualification to land.
Shorter is not automatically clearer. A 2025 claim reported that reducing educational videos from 10 minutes to 90 seconds improved Gen Z recall by 22% but reduced retention of complex concepts by 41% in the cited discussion. For high-complexity moments, preserve the example, cause-and-effect explanation, or qualification instead of cutting solely to reach a faster runtime.
10. Batch-Edit a Series and Repurpose With a Repeatable Workflow
Batch editing turns one long recording into a production system. Create a master project with your caption treatment, audio chain, grade, framing rules, end card, and export settings. Duplicate it for each selected clip instead of rebuilding the same decisions from scratch.
The most efficient sequence is review first, polish second. Upload a long video or YouTube link to Klap, let its AI generate candidate clips, then screen those candidates for a clear hook, single idea, accurate captions, and useful framing. Adjust the start and end points before applying the shared template.
A podcast episode may produce three clips with the same caption style and end card. An agency can turn a webinar into multiple candidates, reject repetitive moments, and keep the strongest versions for platform-specific testing. More output isn't automatically better. Industry analysis of nearly six million short-form videos reported signs of saturation on Instagram and YouTube, including a YouTube Shorts comparison where publishing volume rose 60.83% while reach fell 31.42% in the 2025 short-video report. Prioritize distinct, useful moments over duplicate edits.
Keep separate masters for vertical and horizontal publishing. Export vertical clips at 1080×1920 for mobile platforms, and retain a 1920×1080 version when the source also serves YouTube long-form. Review analytics by platform, then update the template when a particular opening, caption density, or framing choice consistently loses viewers.
Use Klap's batch video processing workflow to generate and screen candidates, then finish the selected clips with your own editorial standards. For teams that need additional production support, short-form video production help can supplement the internal workflow.

10-Point Vlog Editing Comparison
| Technique | 🔄 Implementation complexity | ⚡ Resource requirements & efficiency | 📊 Expected outcomes | 💡 Ideal use cases | ⭐ Key advantages |
|---|---|---|---|---|---|
| Lead with the Hook: Open Every Clip on Its Most Compelling Moment | 🔄 Medium, identify peak moments; minor trim adjustments | ⚡ Moderate, review time for long footage but AI speeds selection | 📊 Higher early retention and better distribution | 💡 Short-form repurposing, highlight clips, A/B opening tests | ⭐ Boosts watch-through; scalable with AI |
| Tighten Pacing with Jump Cuts and Dead-Air Removal | 🔄 Low, simple cut rules (silence threshold) | ⚡ High, quick to apply; shortens runtime substantially | 📊 Increased perceived energy and engagement | 💡 Talking-head vlogs, conversational answers, quick edits | ⭐ Raises pace/engagement; easy to learn |
| Use J-Cuts and L-Cuts to Keep Audio Flowing Across Scenes | 🔄 Medium, unlink and slide audio; timing finesse | ⚡ Moderate, little extra footage; requires timeline skill | 📊 Smoother transitions; more cinematic, conversational flow | 💡 Interviews, multi-location vlogs, narrative transitions | ⭐ Preserves audio continuity; subtle polish |
| Design Captions and Vertical-First Text for Sound-Off Mobile Viewing | 🔄 Medium, auto-caption + manual correction and styling | ⚡ Moderate, time for proofreading and formatting; templates help | 📊 Better reach for sound-off viewers; improved comprehension | 💡 Short-form mobile, accessibility-focused content, tutorials | ⭐ Increases accessibility & retention; brand consistency |
| Reframe and Grade for Vertical Consistency (9:16 + Color) | 🔄 Medium–High, tracking, keyframing, color correction skills | ⚡ Moderate, 4K recommended; auto-reframe + LUTs speed workflow | 📊 Polished, consistent vertical clips that read well on phones | 💡 Repurposing horizontal footage for Shorts/Reels, branded series | ⭐ Keeps faces readable; creates cohesive visual identity |
| Layer B-Roll and Cutaways to Hide Edits and Add Story Context | 🔄 Medium, plan and sync supplemental shots | ⚡ Lower efficiency, extra shooting or sourcing required | 📊 More visual variety; hides jump cuts and clarifies points | 💡 Single-camera vlogs, explainers, product demos | ⭐ Adds context and dynamism; natural way to mask edits |
| Balance Audio: Normalize Loudness and Duck Background Music | 🔄 Medium, loudness targets and ducking settings | ⚡ Moderate, requires listening checks and mastering per clip | 📊 Clear dialogue and consistent listening experience | 💡 Podcasts, vlog clips with music beds, voice-forward content | ⭐ Improves clarity; reduces viewer drop due to bad audio |
| Use Transcript-Based Editing to Cut Long-Form Video Faster | 🔄 Low–Medium, depends on transcript accuracy | ⚡ High, significant time savings for speech-heavy content | 📊 Faster quote discovery and quicker clip assembly | 💡 Podcasts, interviews, lectures, long-form repurposing | ⭐ Speeds editing; searchable highlights across hours of footage |
| Build Clips Around a Single Idea with a Clear Arc | 🔄 Low, editorial decision: pick one takeaway and trim | ⚡ High, short, focused clips are fast to produce and test | 📊 Higher completion and shareability; clearer messaging | 💡 Short-form social, quotable insights, micro-teaching | ⭐ Delivers complete, memorable clips; repeatable format |
| Batch-Edit a Series and Repurpose with a Repeatable Workflow | 🔄 Medium, initial template and checklist setup | ⚡ Very High at scale, templates and presets save time across many clips | 📊 Scaled output with consistent branding and faster publishing | 💡 Agencies, high-output creators, recurring shows | ⭐ Scales production efficiently; maintains consistent quality |
Turn One Long Vlog Into a Week of Clips
The fastest way to improve a vlog edit is to stop treating every decision as a separate creative emergency. Build one repeatable pass. First, review the raw footage for moments that already contain tension, a useful answer, a visual change, a reaction, or a complete story. Then remove setup that only mattered to you while filming.
Check the opening before you adjust color or transitions. The first three seconds should show the subject, claim, reaction, or visual problem immediately. On YouTube, inspect the intro metric, which measures how many viewers remain after the first 30 seconds. If the graph drops early, test a shorter greeting, move the central situation forward, or replace the chronological opening with the payoff.
Next, tighten the speech. Use a consistent silence threshold around 0.4 to 0.6 seconds as a starting point, but protect pauses that carry emotion or timing. Delete repeated phrases, false starts, and low-information transitions. Add a J-cut or L-cut when a scene change feels abrupt, then cover unavoidable visual jumps with B-roll that directly illustrates the sentence.
Run the audio pass before captions. Bring dialogue toward -14 LUFS and keep peaks in a controlled range. Duck music when someone speaks, reduce noise gently, and listen on a phone. If the voice remains clear without headphones, the clip is more likely to survive casual mobile viewing.
Proofread every caption line against the recording. Fix names, terms, numbers, and punctuation. Keep the text inside the vertical safe area and limit the screen to one primary message. Then reframe the image for 9:16, inspect subject tracking, and apply a matching grade after correcting exposure and white balance.
Short-form video is a strong repurposing target for marketers. HubSpot's video marketing data reports that 17.13% plan to increase investment in short-form video, 29.18% already use it in their roles, and 21% report that it delivers the highest ROI among video formats in its cited marketing statistics. That doesn't mean every long vlog should become a rapid clip. It means one recording can support several deliberate edits, each built around a different complete idea.
Choose one long vlog this week and run the full workflow. Generate candidate moments, select the clips with the clearest promises, rebuild each opening, cut dead air, balance the audio, proofread captions, reframe the image, and export platform-specific versions. Compare intro retention, average view duration, completion behavior, and early drop-offs in the platform analytics. The useful question isn't only which clip got the most views. It's which edit earned the next second without sacrificing understanding.
Klap can support this process by generating short-form candidates, adding captions, reframing footage, and letting you adjust boundaries before export. Keep the editorial judgment with the person who understands the story. Automation should produce more options to review, not remove the review itself.
Klap turns long-form uploads, podcasts, webinars, and YouTube videos into short clips with AI-selected moments, captions, reframing, resizing, and editable boundaries. Use Klap to create candidate vertical clips, then apply the hook, pacing, audio, caption, and retention checks from this workflow before publishing.