How to Clip a Video for Social Shorts That Actually Convert
Other
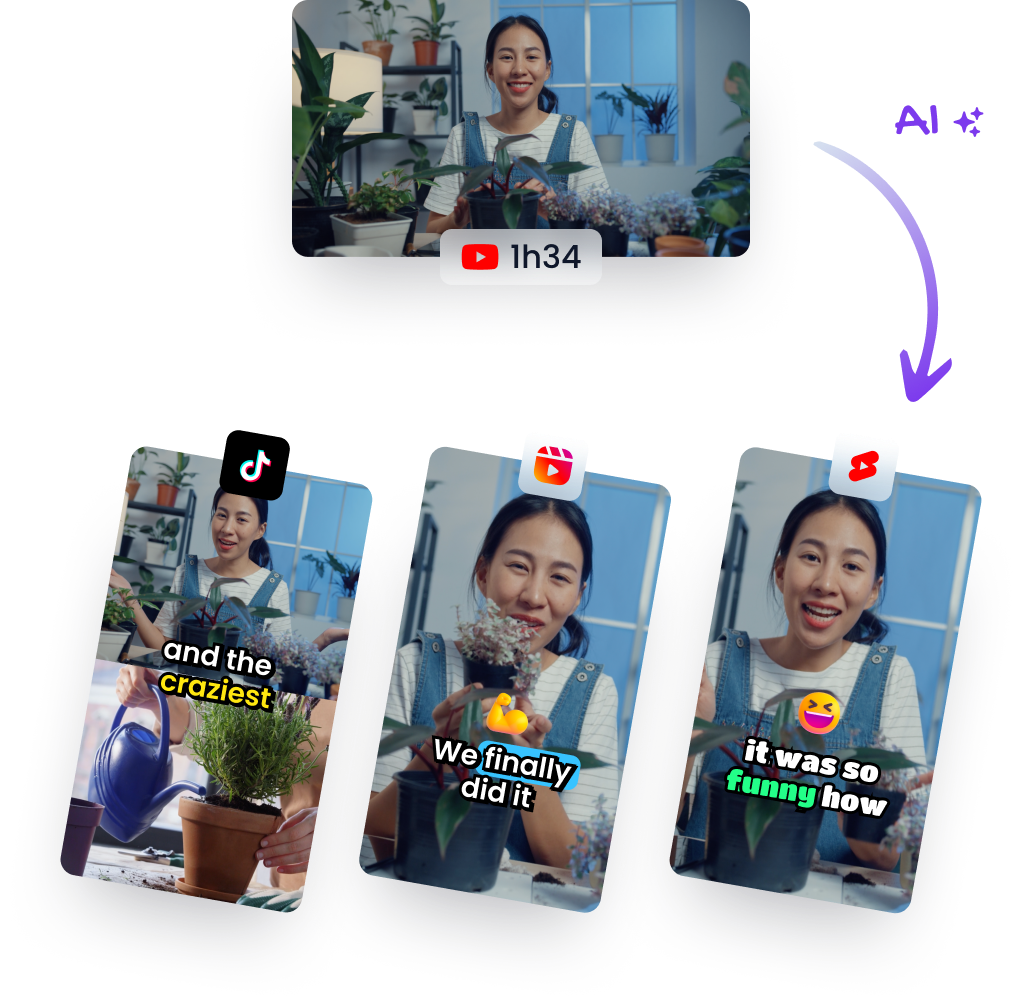
You're staring at a long interview, a podcast timeline, or a webinar export, and the posting calendar doesn't care that the good moments are buried in forty minutes of setup. The key question isn't whether you can trim a clip, it's whether you can shape a short that starts cleanly, lands a point fast, and still feels like part of a bigger story.
That's where most creators lose time. They keep treating how to clip a video like a mechanical cut job, then wonder why the result feels random, abrupt, or easy to scroll past. The clips that hold attention usually come from a deliberate pipeline, one that respects narrative continuity first and editing mechanics second.
The Clipping Problem Most Creators Get Wrong
A creator pulls in a one-hour interview, finds a funny line, chops it out, adds captions, and posts it. The clip gets a few views, but it doesn't travel because the opening lands cold and the ending doesn't earn the next second. The timeline was edited, but the story wasn't shaped.
That's the common failure point. People think clipping means “make it shorter,” when the job is deciding where the viewer should enter, what they need to understand, and when to leave them wanting more. YouTube's built-in Clip feature made short excerpting feel native by letting users share a 5 to 60 second segment directly from a video page, but it also shows the limit of the mechanical approach, since the excerpt still has to make sense on its own YouTube Clip feature.
The pipeline that works
A reliable short-form workflow usually moves through five stages. Selecting finds the moment, refining sets the true boundaries, reframing makes it readable in vertical format, captioning makes it usable on mute, and exporting makes it fit the platform.
Practical rule: If the clip only works after you explain it in the caption, it's probably not clipped tightly enough.
The bad habit is starting with the cut. The better habit is starting with the viewer's attention budget, then deciding what part of the source video deserves it. That shift sounds small, but it changes everything about what gets kept, what gets removed, and what gets reposted.
What Clipping Means Inside an Editor
Inside an editor, trim and cut are the two actions that matter most. Trim keeps a selected portion and removes the rest, while cut removes an unwanted section and leaves the surrounding content in place. Most editors, whether you're working in a browser tool or a desktop timeline, are built around those two moves.
That said, the actual work begins after the mechanical edit. A clean clip still falls flat if the opening drags, the middle loses the thread, or the ending cuts off the payoff before the viewer gets it. Good clipping keeps the sentence, joke, argument, or reveal intact while removing only the dead space around it.
YouTube's own clipping workflow makes the basic mechanics clear. Its desktop interface defaults to a 15 second excerpt, but you can drag the start and end points to extend or shorten the segment before adding a description and sharing it YouTube clip tutorial. That default is a useful reference point, since it reflects a common short-form starting point rather than a fixed rule.
The simplest way to think about it
A clip has in points and out points. The in point is where the viewer enters, and the out point is where the idea has finished paying off. If you only remember one editor habit, remember this one, because it keeps you from making edits that feel accidental.
YouTube also shows how platform-native clipping differs from full-editor clipping. The built-in clip loops from the original watch page and can be shared by embed, social networks, email, or a copyable link YouTube Clip feature. That works for quick repackaging, but it falls short of shaping a short optimized for TikTok, Reels, or Shorts.

A full editor gives you more control over pacing, continuity, and context. A platform clip gives you speed. The right choice depends on whether you need a fast excerpt or a short that can stand alone in a feed. For teams doing clip editing for virality, that distinction matters because the edit has to preserve the story, not just shorten the file.
Choosing Clip Boundaries That Keep the Story Intact
The clip that performs is usually the one that respects the shape of the original thought. If the speaker is building to a claim, the opening should include the setup, not just the punchline. If the payoff lands on the last word, the out point should stop there instead of trailing into a useless coda.
Most clips get weak because the cut points are chosen by duration, not by meaning. The result is a jump-cut feel that makes talking-head footage look chopped up, even when the edit is technically clean. A useful way to think about this problem appears in clip editing for virality, where the challenge is not just finding a moment, but making the moment feel complete enough to share.
A boundary test that saves a lot of rewrites
Before you lock any cut, ask three questions.
- Does the opening earn attention? If the first line is contextless, the viewer has to work too hard.
- Does the middle pay off the opening? If the point arrives too late, the clip feels padded.
- Does the ending create momentum? If the thought ends flat, the next clip doesn't get a lift.
That test works on podcasts, webinars, and interview footage because it's about narrative continuity, not format. It also keeps you from leaning on heavy transitions just to hide a weak boundary.
Don't fix a bad cut with effects first. Fix the cut, then decide whether the transition needs help.
If the speaker pauses naturally, use that breath. If they pivot topics cleanly, let that become the boundary. The goal isn't to remove every pause, it's to keep the thought intact so the viewer never feels dropped into the middle of a sentence.
Using AI Tools to Surface Candidate Clips Faster
AI is useful when you already know what a good clip looks like. It's a triage layer, not a replacement for judgment. The best workflow is simple, upload the source or paste the link, let the model scan spoken audio and visual cues, then review only the candidates that match your boundary rules.
Klap is one example of that kind of pipeline, since it takes long-form video and turns it into short-form clips with reframing and captions in the loop. Its AI video clipping tool is built for repurposing long videos into social-ready shorts, which makes it a practical fit when you're sorting through a big source file and need candidate hooks quickly.
What to delegate, what to keep human
Use AI for the first pass. Let it identify likely hooks, generate transcripts, and surface topics worth reviewing. Keep the final call on in and out points, because that's where continuity lives and where retention usually gets won or lost.
VEED's automatic clip maker shows how this category works in practice, since it asks for a video that's longer than two minutes and has spoken audio before it can generate clips VEED automatic clip maker. That tells you something important, AI clipping works best when there's enough speech for the model to detect structure.
If the tool gives you a “viral” moment that starts mid-setup, don't accept it blindly. Tighten the boundary, check the first sentence, and make sure the clip still makes sense without extra explanation. AI can save a lot of sorting time, but the final edit still needs an editor's eye.
Reframing and Captioning for Vertical Shorts
A horizontal clip can be excellent and still fail in a feed if the speaker is too low in frame or the captions collide with platform UI. Once the boundaries are set, the next job is to make the clip readable at phone size. That means choosing whether to reframe manually, use auto-reframe, or keep the shot wide because the B-roll matters.
Vertical formatting is now part of the clip itself, not an optional polish step. The reason is simple, modern short-form viewing is usually quiet, so the edit has to carry meaning visually as well as verbally. That's why a lot of short-form tools now pair reframing with subtitles and mobile-first layouts, instead of treating them as separate steps clipping and short-form workflow guide.
The vertical checklist that prevents ugly exports
- Keep the speaker centered: If the face drifts, use manual repositioning or face-tracking so the subject doesn't get clipped.
- Protect the safe zone: Leave room for app controls, captions, and UI overlays.
- Respect meaningful B-roll: If the cutaway supports the point, don't crop it into nonsense.
- Match captions to the hook: Put the key phrase on screen early, not after the point has already passed.
A vertical clip should read instantly with the sound off and still make sense when the sound comes back on.
For layout work, tools that specialize in aspect-ratio conversion can save time, especially when you're repurposing one source into several distribution formats. Klap's guide on how to convert video aspect ratio is relevant here because the main problem isn't just cropping a frame, it's keeping the subject and the message aligned in 9:16.
Export Settings That Match Each Platform
A clip can hold together in the timeline and still fall apart on export. Compression can soften the picture, captions can sit too close to UI, and a file that looks fine on desktop can read poorly once it hits a phone feed. Export for the destination, then verify the result on that platform instead of relying on one preset for every short.
PlatformResolutionLength capCodecCaption rendering
TikTok
1080x1920 vertical
Not specified in the verified data
H.264 for compatibility
Burned-in captions usually work best for repurposed shorts
Reels
1080x1920 vertical
Not specified in the verified data
H.264 for compatibility
Burned-in captions usually work best for repurposed shorts
Shorts
1080x1920 vertical
Up to 3 minutes
H.264 for compatibility
Burned-in captions usually work best for repurposed shorts
That table covers the baseline. The practical side is repeatability, because teams that repurpose a lot of footage need settings that survive batch work, re-uploads, and platform recompression without constant tweaks. 30fps is a safe default in that workflow, since it keeps the file easy to handle across most short-form exports, and burned-in captions reduce the chance that the platform, the app UI, or the viewer's device will mangle the text.
If you need a cleaner handoff between aspect-ratio changes and final delivery, resolution scaling guidance is useful context. It helps keep the frame readable after reframing, especially when a source cut has to live in 9:16 without losing the subject or the caption area.
For teams planning distribution at scale, scaling with Short Ads in 2026 is the better lens for the channel side. The export settings themselves should stay boring and consistent, because a clip that arrives in good shape, reads clearly in a vertical feed, and avoids cleanup after upload is usually the one that gets published on time.
Optimization Tips That Lift Completion Rates
A short clip lives or dies in the first few seconds. If the hook is muddy, the captions are late, or the opening starts in the middle of an unfinished thought, people leave before the point lands. That's why the polish pass matters, because the edit that looks “good enough” in a timeline often loses the feed.
Four failures I see most often
Muddy captions. The text is out of sync, too small, or visually noisy. The fix is boring but effective, use a cleaner style, shorten the line length, and make the subtitle timing match the spoken cadence.
Awkward reframing. The forehead gets clipped, the chin is too low, or the speaker drifts toward the edge. The fix is to re-center the face and check the safe zone on a phone-sized preview before export.
A cold opening. The clip starts mid-sentence and the first line doesn't explain why anyone should care. The fix is to move the in point earlier or swap in a different hook from the same segment.
Over-trimmed pacing. Every natural pause gets removed, so the clip feels rushed and unnatural. The fix is to leave a breath at the turn of the idea, especially in talking-head and interview footage.
If a clip feels frantic, you probably edited out the viewer's chance to process the point.
The best post-publish habit is a short feedback loop. Look at the first day of performance, not to chase raw attention, but to see whether the clip held together. Completion, saves, and shares tell you far more about edit quality than a vanity spike does.
A repeatable clipping workflow is what turns editing from guesswork into a production system. You choose the moment, shape the boundary, fit the frame, and export for the platform, then use the next upload to sharpen the one after that.
If you're turning long interviews, webinars, or podcasts into short-form content every week, Klap can help you automate the first pass without giving up editorial control. It's built for turning source videos into social clips, so you can spend more time tightening the story and less time hunting through timelines.