How to Convert Video Aspect Ratio for Perfect Social Media Clips
Other
Changing your video's aspect ratio simply means adjusting its shape to fit different screens. You can do this by cropping it, adding black bars (a method called padding), or using smart AI tools to reframe the action. The goal is to make your video look intentionally crafted for whatever screen it’s on, from a wide YouTube player to a vertical TikTok feed.
This ensures you avoid those awkward black bars that signal to viewers you've just reposted old content.
Why Aspect Ratio Is Your Secret Weapon for Social Media
It’s easy to dismiss aspect ratio as a minor technical detail, but if you get it wrong on a platform like TikTok or Instagram, your content is likely to fail. A video that doesn’t fit the screen feels out of place, and research shows that most people will scroll right past before your message lands.
This isn't just about screen dimensions; it's about understanding and respecting the viewing culture of each platform.

The Unstoppable Rise of Vertical Video
The video landscape has shifted dramatically. While the classic 16:9 widescreen format still dominates YouTube, the explosion of mobile devices has crowned a new champion: vertical video.
This isn't a small trend. Vertical HD (1080×1920) uploads surged by an incredible 51% in just one year. This represents a fundamental change in how we consume content.
Consider this: people hold their phones vertically more than 94% of the time. Asking them to rotate their phone to watch your video adds an unnecessary step. Content that fits their natural grip feels more native, personal, and is significantly more engaging.
Getting the aspect ratio right is a non-negotiable skill for any modern creator. It’s the difference between looking like a native part of the platform and an outsider who doesn't understand the space.
Common Video Aspect Ratios and Where to Use Them
To make your life easier, here’s a quick-reference guide to the most common aspect ratios. Use this table to choose the right format for each platform so your content always looks professional and performs its best.
Aspect Ratio (Ratio)Resolution (Pixels)Best ForPrimary Platforms
9:16
1080 x 1920
Full-screen vertical video
TikTok, Instagram Reels & Stories, YouTube Shorts
16:9
1920 x 1080
Standard widescreen for long-form content
YouTube, Vimeo, TV/Film
1:1
1080 x 1080
Square video for in-feed posts
Instagram Feed, Facebook Feed, LinkedIn
4:5
1080 x 1350
Vertical in-feed video that takes more space
Instagram Feed, Facebook Feed
Memorizing these will help you grab and hold attention from the very first frame.
Winning the Attention Game
When someone is scrolling their feed, you have less than three seconds to make an impression. A video with awkward black bars or with the main subject poorly cropped is an immediate signal that the content wasn't made for them or their platform of choice.
Here’s the actionable insight: mastering aspect ratio conversion gives you a competitive edge.
- Maximize Screen Real Estate: A perfect 9:16 video on TikTok or Reels fills the entire phone screen, creating an immersive experience that's impossible to ignore.
- Boost Professional Credibility: Content that fits the platform looks polished and professional. This subtle detail builds trust with your audience.
- Gain Algorithmic Favor: Social media algorithms are designed to promote a positive user experience. Videos in the native format often receive a visibility boost because they lead to higher watch times.
Ultimately, understanding aspect ratios is less about technical rules and more about respecting your audience's time and viewing habits. Creators who adapt their videos to fit seamlessly into the vertical scroll are the ones who capture and retain attention.
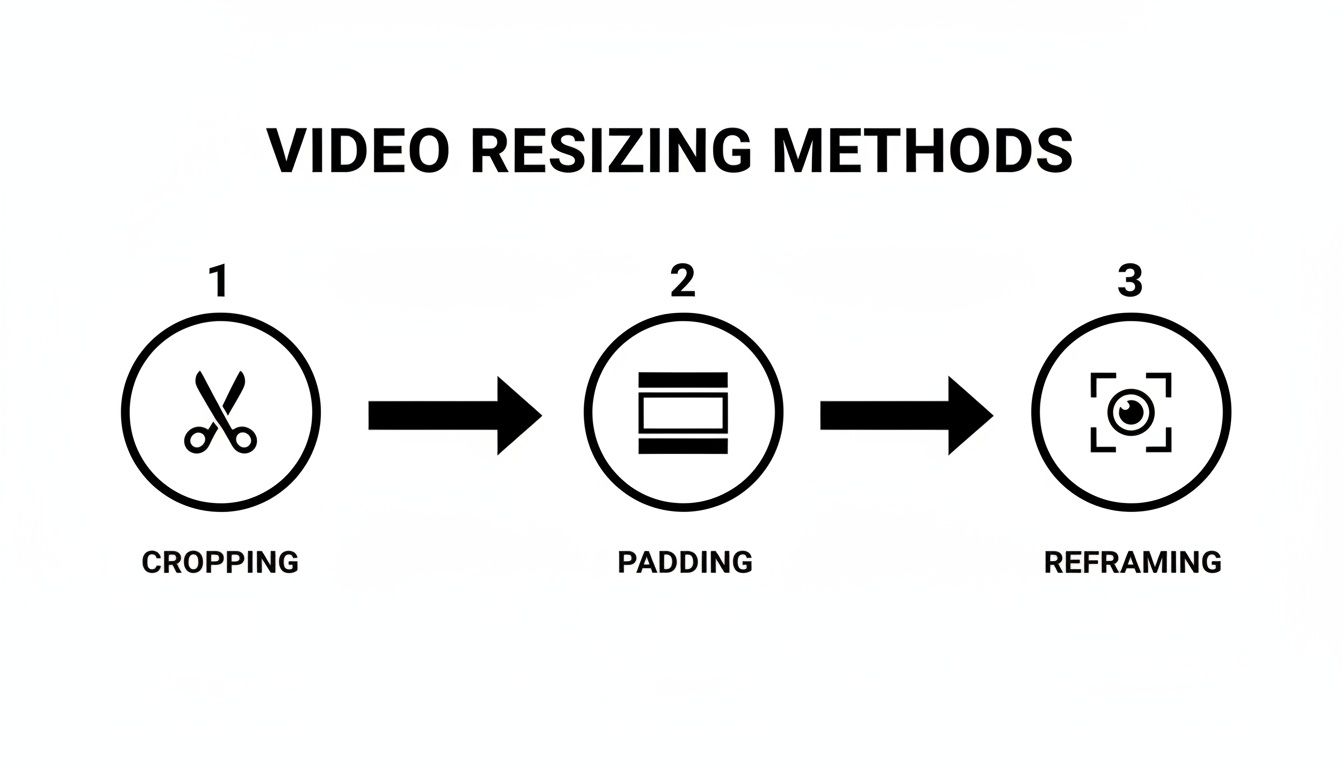
Your Toolkit for Resizing Videos
Before you can perfect your video's aspect ratio, you need to understand the tools at your disposal. Think of these as different techniques in a video editor's toolbox—each has a specific purpose, and choosing the right one is critical for a good result.
Let’s walk through the four main ways to resize your videos, from quick fixes to the gold-standard method used by professionals.
The Quick and Dirty Method: Cropping
Cropping is the most straightforward approach. It’s like taking scissors to a photograph; you simply cut off the sides of your 16:9 video until it fits a vertical 9:16 frame. It's fast, but it’s a high-risk gamble.
Why? You’re permanently discarding visual information. If you crop a two-person interview, you might completely remove one person from the shot. It’s a blunt instrument that only works if your subject is perfectly centered and remains stationary.
The Black Bar Solution: Padding
Padding, also known as pillarboxing or letterboxing, is another common shortcut. Instead of cutting your video, you place your original 16:9 clip onto a 9:16 background. This fills the empty space above and below with black bars (or sometimes a blurred, duplicate version of your video).
This method preserves the entire original frame, but it comes at a steep cost: it screams "repurposed content." Those black bars are a clear sign the video wasn't made for the platform, which can hurt engagement on platforms like TikTok where users expect an immersive, full-screen experience.
The Distortion Risk: Scaling
Scaling involves stretching or squeezing a video to force it into new dimensions. For instance, you could stretch a 16:9 video vertically to fill a 9:16 screen. While it eliminates black bars, the result almost always looks distorted and unnatural.
Subjects appear elongated and thin, and the entire scene feels warped. Honestly, you should avoid this method unless you are aiming for a specific artistic effect. Otherwise, it looks unprofessional and distracts from your message.
The Gold Standard: Reframing
This brings us to reframing, which is by far the most professional and effective method. Instead of a static crop, reframing dynamically adjusts the frame to follow the action in your video.
Think of it like having a virtual camera operator who actively tracks the main subject. When a person moves or speaks, the frame follows them, ensuring the viewer's attention is always directed to the most important part of the scene.
This approach makes your clip feel as though it was originally shot for a vertical screen, even if the source was a widescreen video. It creates a seamless, native experience that boosts watch time. While manual reframing is extremely time-consuming, modern AI tools like Klap are designed to do this automatically, delivering professionally reframed clips without the manual labor.
The Hands-On Guide to Manual Reframing
If you're prepared to take full control, manual reframing gives you the ultimate say over how your final video looks. You become the director, guiding the viewer's focus frame by frame.
Let's walk through the process of converting a standard 16:9 widescreen video into a polished 9:16 vertical clip using popular editors like Adobe Premiere Pro or CapCut. The core idea is to treat your new vertical canvas as a camera’s viewfinder, actively following the key action from the original wide shot.
Setting Up Your Vertical Project
First, you need to set up a proper vertical canvas. Simply dropping your 16:9 clip into a new project won't work.
Your first actionable step is to create a new sequence that is 1080 pixels wide by 1920 pixels high. This establishes the perfect 9:16 aspect ratio. Once your canvas is ready, import your widescreen footage. It will appear small with black bars above and below—this is the correct starting point.
As you can see, cropping is a simple cut, while padding adds letterboxes. Reframing, however, is about actively redirecting the viewer's focus within the new frame.
The Art of Keyframing the Action
With your 16:9 clip sitting inside your 9:16 sequence, the real work begins.
You’ll need to scale up your footage until the video’s width matches your vertical frame. From there, use the position controls to slide the video left or right to center your subject. This is where keyframes become essential. A keyframe is a marker you place on the timeline that locks the video's position at a specific moment.
Here’s a practical workflow:
- Set your starting point. At the first frame, position the video to perfectly center your subject, then set your initial position keyframe.
- Follow the movement. Play the video until your subject moves. Pause at that moment, drag the video to re-center them, and your software will automatically add a new keyframe.
- Rinse and repeat. Continue this process every time the subject moves. The editing software will smoothly animate the motion between your keyframes, creating a natural-looking camera pan that follows the action.
Pro Tip: Anticipate the movement. If you see someone is about to walk to the right, you can set a keyframe that leads them slightly. This makes the camera movement feel more intentional and professional.
The Honest Truth About Manual Work
While keyframing offers complete creative freedom, it's important to be realistic about the effort involved. For a simple 30-second clip of a person speaking directly to the camera, you might only need five or six keyframes.
But for a 10-minute podcast clip with two people in constant conversation? You could be looking at hundreds of tiny keyframe adjustments to keep the focus shifting naturally between speakers. This work isn't just time-consuming; it's a tedious process that demands immense focus.
This is precisely why AI-powered tools have become so popular. Once you've experienced the grind of manual reframing, you gain a deep appreciation for the time and energy saved by automation, especially when you need to convert video aspect ratios at scale.
Using AI to Automate Your Video Workflow
If you’ve ever spent hours meticulously setting keyframes just to make a video fit a vertical screen, you understand the inefficiency. Manually converting even a single video can consume a significant portion of your day. This is where AI tools enter the picture, offering a smarter, faster way to get the job done and reclaim your time.
The demand for this efficiency is skyrocketing. The global video processing market was valued at $1.2 billion in 2023 and is projected to reach $3.5 billion by 2030, growing at a compound annual growth rate of 13.50%. This isn't just a fleeting trend; it's a fundamental shift in content creation. You can read more about the video processing market growth here.
AI Does More Than Just Crop
Smart tools like Klap don't just blindly crop your video. Instead, their AI analyzes the content. It identifies who is speaking, tracks movement, and understands the context of what’s happening in the frame.
The result is perfectly reframed vertical clips that feel like they were shot that way from the start. No more static, awkward crops that miss half the action. The AI-powered frame dynamically follows your subject, ensuring your clips are not just resized, but genuinely engaging.
The AI-Powered Workflow Is Simple
Forget struggling with complex editing software. The entire purpose of these tools is to simplify your workflow. You don't need to be a professional video editor to achieve professional results.
The process is typically this straightforward:
- Provide your video: Upload a file or, for even greater ease, paste a YouTube link.
- Let the AI work: The tool analyzes your video, identifies the most engaging moments, detects speakers, and generates a series of short clips.
- Review and post: In minutes, you receive a collection of ready-to-share vertical videos, complete with smart reframing and animated captions.
This screenshot illustrates the simplicity. You just drop in a link, and the platform handles the complex task of turning one long-form video into a library of short-form content.
The real magic here is leverage. One long video can become ten or more social media clips, all perfectly reframed for vertical screens with almost zero manual effort. It fundamentally changes the economics of content creation.
Get Your Time Back and Put Out More Content
The most significant benefit is the time you save. What used to be a full day of tedious editing can now be accomplished in the time it takes to grab a coffee.
This efficiency provides several strategic advantages:
- Massively reduce editing time: Stop wasting hours on repetitive manual keyframing.
- Maintain brand consistency: Every clip can be generated with consistent branding, captions, and style, ensuring a professional look across all platforms.
- Increase content velocity: You can significantly increase your posting frequency, keeping your audience engaged without burning out.
Ultimately, using AI to convert video aspect ratios isn't just a shortcut. It’s a strategic decision that allows you to work smarter, maintain high quality, and invest your valuable time in creating great content rather than getting bogged down in repetitive technical tasks.
Pro Tips For Flawless Video Conversions
Getting the aspect ratio right is a huge step, but the small details are what separate a clunky, repurposed clip from polished, professional content that feels native to each platform.
To avoid common pitfalls, here are some actionable insights I’ve gathered over years of editing to ensure your videos always look intentional, not like an afterthought.
Think About Vertical Before You Hit Record
The most effective way to get amazing vertical clips is to plan for them from the start. This concept is known as "shooting for the edit," and it simply means considering your future 9:16 crop while you're still filming in 16:9.
As an actionable tip, try to keep your main subject relatively centered in the widescreen frame. This provides ample room for reframing later, preventing important action from being awkwardly cut off at the edge of the vertical shot.
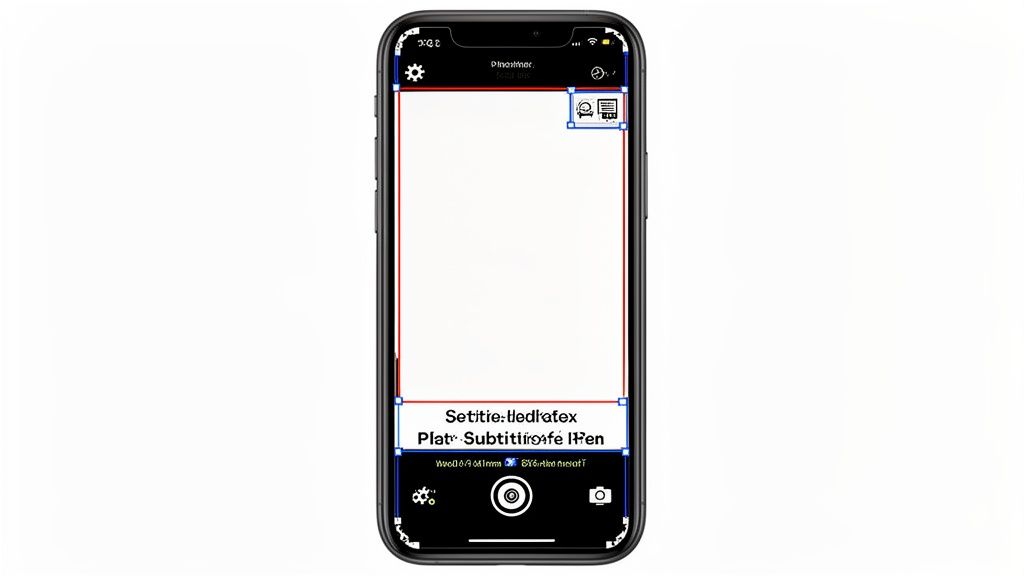
Mind The UI And Subtitle Placement
Every vertical platform—TikTok, Reels, Shorts—overlays its user interface (UI) on top of your video. These are the like, comment, and share buttons, along with the user's profile information, typically located at the bottom and right side of the screen.
If you place your subtitles or captions too low, they will be completely obscured. A key best practice is to position your text higher, in the lower-middle third of the screen, to ensure readability. This is critical, especially since a staggering 63% of branded content on mobile is viewed with the sound off. You can explore more data on mobile viewing habits to see why this is so important.
A good rule of thumb is to always leave "safe zones" around the edges when converting a video. This buffer ensures crucial graphics, text, or subtitles aren't covered by the platform's interface.
Handling On-Screen Graphics And Export Settings
What about graphics that are already part of your 16:9 video? A lower-third graphic or a logo in the corner is almost guaranteed to be cropped out. The best strategy is to add any new graphics after you’ve changed the aspect ratio, designing them specifically to fit the new vertical frame.
Finally, don't let poor export settings ruin your hard work. Nothing signals "amateur" more than a fuzzy, pixelated video filled with compression artifacts.
For a crisp, clean look on platforms like TikTok and Instagram, I've found these settings deliver consistently great results.
Recommended Export Settings For Social Media
This quick guide will help you nail the technical side, ensuring your videos upload in the highest possible quality without being degraded by compression algorithms.
SettingInstagram Reels / TikTok (9:16)YouTube Shorts (9:16)Instagram Feed (4:5 or 1:1)
Resolution
1080x1920
1080x1920
1080x1350 or 1080x1080
Frame Rate
24, 30, or 60 FPS (match source)
24, 30, or 60 FPS (match source)
24 or 30 FPS
Codec
H.264 (AAC for audio)
H.264 (AAC for audio)
H.264 (AAC for audio)
Bitrate
10-15 Mbps (VBR)
10-20 Mbps (VBR)
8-12 Mbps (VBR)
File Format
MP4
MP4
MP4
Stick to these guidelines for excellent quality without creating huge files. For most vertical content, a 1080x1920 resolution with a variable bitrate between 10-15 Mbps is the sweet spot.
Your Top Questions About Aspect Ratios, Answered
Even after you've mastered the basics, a few common questions often arise. Let's address the most frequent ones I hear from creators so you can handle any conversion challenge with confidence.
Will Converting My Video Ruin The Quality?
Not if you do it correctly. The primary cause of quality loss isn't the act of cropping or reframing; it's almost always due to incorrect export settings.
The golden rule is to always start with the highest resolution source file available, ideally 1080p or 4K. When you export, use a bitrate appropriate for the target platform. If you're unsure, an AI tool like Klap is invaluable because it automatically applies optimized encoding settings, removing the guesswork.
What's The Best Aspect Ratio For Instagram?
This depends entirely on where you're posting on the platform. There isn't one single "best" ratio; the key is to choose the right one for the specific placement.
- For Reels and Stories: Use 9:16. This is non-negotiable. It's the native full-screen format, and anything else looks out of place.
- For the main feed: While you have options, 4:5 is the proven winner. It occupies more vertical screen space than a 1:1 square or a 16:9 widescreen post, which means it commands more attention as users scroll.
Can I Convert A Video With Multiple People In It?
Absolutely, but this scenario highlights the challenge of manual reframing. You'll have to constantly set keyframes to follow the conversation, or awkwardly zoom out to try and keep everyone in the shot. It’s a significant amount of work.
This is a perfect use case for an AI reframing tool. A smart editor like Klap can automatically detect who is speaking and shift the focus to them, creating a dynamic clip that mimics the work of a professional camera operator.
How Do I Deal With On-Screen Text And Graphics?
This is a critical consideration. If your original 16:9 video includes text or logos near the edges, a 9:16 crop will almost certainly cut them off.
The best practice is to plan for this during filming by keeping all essential visuals within a central "title-safe zone." If you're working with existing footage, your best options are to either recreate the graphics for the vertical format or use a tool that allows you to fine-tune the frame to keep them visible.
Tired of wrestling with keyframes? Klap’s AI automatically finds the best moments in your long videos and turns them into perfectly reframed, captioned clips for social media. Turn your videos into viral shorts with Klap today!
