How to Take Clips from a YouTube Video: A Practical Guide
Other
The quickest way to take clips from a YouTube video is by using its built-in "Clip" feature for short segments or leveraging an AI tool to automatically generate dozens of social-ready shorts. For those who want full creative control, downloading your own video and slicing it up with a desktop editor is the best path.
Why Clipping YouTube Videos Is a Modern Content Superpower
In a world drowning in content, attention is the ultimate currency. Knowing how to take clips from a YouTube video isn't just a technical skill anymore—it's a critical strategic advantage for any creator looking to build an audience. The concept is simple but powerful: transform one long-form video into an entire library of short, engaging clips.
This strategy doesn't just give you more content; it creates more opportunities to connect with people on platforms where attention spans are short and discovery happens in a flash. Instead of betting everything on a single video finding its audience, you can deploy ten or twenty micro-videos, each with a unique hook designed to stop the scroll.
Maximize Your Content's ROI
Think of your main YouTube video as a content goldmine. Every minute is packed with potential moments of insight, humor, or value that can easily stand on their own. When you clip these moments, you're not just recycling content; you're extracting every ounce of value from the effort you've already put in.
This approach lets you:
- Reach New Audiences: Platforms like TikTok, Instagram Reels, and YouTube Shorts have their own distinct communities. Creating clips tailored for these platforms introduces your content to people who might never find your long-form videos.
- Supercharge Engagement: Short-form clips are engineered for quick likes, comments, and shares. This surge in interaction sends powerful positive signals to algorithms, boosting your overall visibility.
- Test and Learn Faster: What does your audience truly care about? By releasing multiple clips from one video, you can effectively A/B test different hooks, topics, and formats. The data you get back is invaluable for planning future content you know will resonate.
Today’s viewers crave digestible, high-impact content. Turning one 20-minute video into ten 45-second clips gives you ten unique chances to capture attention, not just one.
Tapping Into a Growing Content Ecosystem
The sheer scale of YouTube makes this strategy more critical than ever. The platform currently hosts an estimated 4 billion videos, with over 500 hours of new content uploaded every single minute. With the average video length hovering around 11.7 minutes, there is a virtually limitless supply of raw material ready to be repurposed.
This massive volume demonstrates that creators are consistently producing long-form content perfect for clipping. You can dig into these YouTube statistics to see the data for yourself.
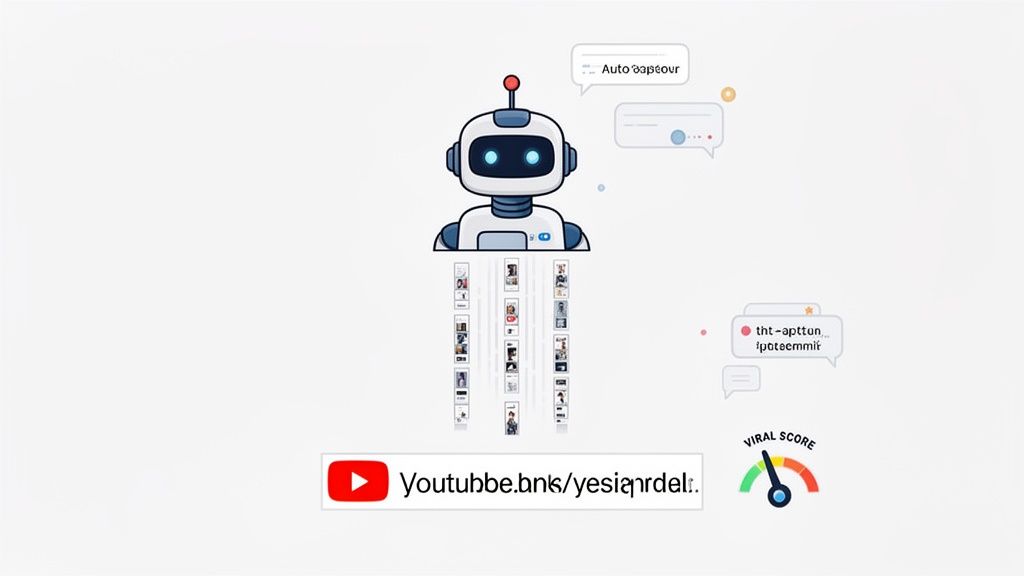
Here’s a look at how a tool like Klap uses AI to instantly find and create shareable clips from a single video link.
This interface shows how one long video can be broken down into dozens of distinct, high-potential short clips—each with its own title, engagement score, and ready-to-use captions.
The Hands-On Approach: Manually Clipping Your Videos
For creators who demand absolute precision and want total control over every frame, nothing beats clipping videos by hand. It definitely requires more work than automated tools, but it empowers you to craft a clip that perfectly matches your vision. This is the go-to method for detailed storytelling or nailing a specific creative flair.
The process begins with securing your source material. If it’s your own content, you can download the original file directly from your YouTube Studio dashboard. This step is crucial, as it ensures you’re working with the highest quality footage—a non-negotiable for a professional-looking final product.
Starting with YouTube's Built-In Tools
Believe it or not, YouTube gives you a couple of simple ways to get started without needing any other software. These are perfect for quick, no-fuss edits.
- The 'Clip' Feature: You’ve probably seen this button right below the video player. It lets you snag a 5 to 60-second segment of any public video (as long as the creator has it enabled). It's great for sharing a quick moment on social media or in a message, but it’s not for creating downloadable video files you can edit further.
- YouTube Studio Editor: For your own videos, the editor inside YouTube Studio lets you trim the beginning, middle, or end. It’s not a full-blown editing suite by any means, but it gets the job done for simple cuts. If you need something with a bit more oomph but still want to work online, a dedicated video trimmer can help you make more precise cuts.
Actionable Insight: YouTube’s native tools are great for quick shares and basic trims. But if you want to create high-quality, vertical shorts that are ready for other platforms, you’ll need to roll up your sleeves with a dedicated video editor.
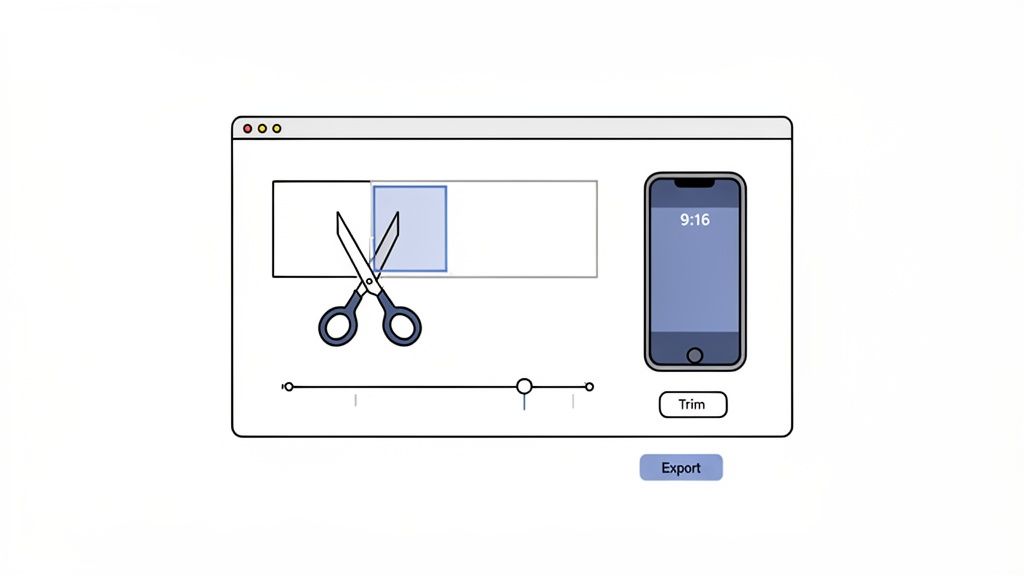
Using Local Editors for Full Creative Control
This is where the real magic of manual clipping happens. Using dedicated video editing software on your computer is how you can truly transform a horizontal YouTube video into a vertical short that stops the scroll.
Many creators lean on powerful and free options like DaVinci Resolve or CapCut. Whatever you choose, the workflow is pretty much the same.
- Download Your Video: First things first—grab that original video file from your YouTube Studio.
- Set Up a Vertical Project: In your editor, create a new project with a 9:16 aspect ratio, which is 1080x1920 pixels. This is the gold standard for TikTok, Reels, and Shorts.
- Import and Find Moments: Drop your video onto the timeline and start scrubbing through it. You're hunting for those golden moments—a powerful quote, a funny reaction, or a game-changing tip.
- Cut and Refine: Use the "blade" or "razor" tool to slice out the segment you want. Be ruthless. Trim the start and end points right down to the frame to make sure the clip is punchy and gets straight to the good stuff.
This hands-on method takes more time, no doubt. But the reward is a custom-made clip that perfectly captures your vision. Of course, having the right tools for the job is essential, so it’s worth exploring the best video editing software to see what fits your style.
Use AI Clipping Tools to Work Smarter, Not Harder
Let’s be real: manually scrubbing through a long video to find a few viral moments is a huge time sink. While doing it all by hand gives you total creative control, it’s not always the most practical way to create clips, especially if you need to churn out content consistently.
This is where AI-powered tools come in and completely change the game.
Imagine turning hours of tedious editing into just a few minutes of review. That's exactly what these platforms offer. Instead of you hunting through timelines, you just drop in a YouTube link, and the AI gets to work. It scans every second of your video to find the segments with the highest shot at going viral.
How AI Actually Finds the Good Stuff
These tools aren't just guessing. They're making smart, data-backed decisions based on a sophisticated process that’s incredibly simple on your end.
Here’s a peek under the hood at what an AI tool analyzes:
- The Transcript: It reads the entire dialogue, looking for powerful questions, bold statements, and interesting topic shifts that can stand alone as a hook.
- Audio Cues: The technology listens for changes in a speaker's tone, moments of laughter, or spikes in energy that signal something engaging is happening.
- Visual Analysis: It also watches for scenes with significant visual changes or expressive speakers, making sure the clip is as interesting to watch as it is to hear.
By layering all this data, the AI can isolate the most promising gems from your long-form content. For anyone looking to speed up their workflow, a tool like Klap AI is becoming a must-have. The hours it saves are enormous.
From Raw Video to Ready-to-Post Shorts in Minutes
Finding the right moments is only half the battle. The real magic of AI clippers is that they automate all the tedious editing tasks that follow. This is where you see massive efficiency gains.
Once the best clips are identified, the AI handles the heavy lifting to get them social-media-ready:
- Smart Reframing: It automatically takes your horizontal 16:9 video and reframes it to a vertical 9:16 format, intelligently keeping the speaker or main action perfectly centered.
- Dynamic Captions: Since up to 85% of social media videos are watched on mute, the AI generates and animates captions to keep those silent viewers glued to the screen.
- Viral Scoring: Many tools even give each clip a "viral potential" score, helping you decide which ones to post first for the biggest impact.
To really see the difference, it helps to compare the old way with the new.
Manual Clipping vs AI-Powered Clipping
FeatureManual Method (e.g., DaVinci Resolve)AI Method (e.g., Klap)
Clip Identification
Manually watch and mark timestamps.
AI automatically finds viral moments.
Time Investment
Hours per long video.
Minutes per long video.
Reframing
Manual keyframing to keep subject centered.
Automatic face/action tracking.
Captioning
Manual transcription and timing.
Auto-generated and styled captions.
Output Volume
1-2 clips per hour.
10-20 clips in under 30 minutes.
Skill Requirement
Intermediate to advanced editing skills.
Beginner-friendly, no editing needed.
The table makes it clear: AI isn't here to replace your creativity, but to handle the repetitive, time-draining tasks.
The real advantage of using AI is speed and scale. You can generate a dozen high-quality, platform-ready clips from a single hour-long video in the time it would take to manually create just one.
This automated workflow is a huge win for creators and marketers trying to stay consistent. As you look into different AI tools, it’s worth seeing how they stack up. For example, check out detailed comparisons to see which platform fits your needs by exploring https://klap.app/alternatives/opus-clip. Ultimately, AI clipping frees you from the grunt work so you can focus on strategy and actually talking to your audience.
Optimizing Your Clips for Maximum Platform Reach
Knowing how to take clips from a YouTube video is only half the battle. The real win comes when you optimize those clips for the platforms where they’ll actually live. A fantastic clip can easily get lost in the noise if it isn't formatted to grab attention on a mobile screen in seconds.
The modern viewer experience is fast, vertical, and often silent. That means your optimization game needs to be just as sharp. Every choice, from aspect ratio to caption style, directly impacts whether someone stops scrolling or just keeps on swiping.
The Non-Negotiables of Short-Form Video
Before you even think about hitting that export button, a few things have to be locked in. These aren't just friendly suggestions; they're the foundation of what makes a short-form video work today. Without them, you're fighting an uphill battle against platform algorithms and what viewers have come to expect.
- Go Vertical (9:16): This one is non-negotiable. Your clip absolutely must be formatted in a 1080x1920 resolution to fill the entire screen on a phone. A horizontal video with big black bars is a dead giveaway that the content wasn't made for the platform, and people will scroll right past it.
- Burned-In Dynamic Captions: With a huge chunk of users watching videos on mute, captions are everything. Studies show dynamic, animated captions that highlight words as they're spoken can significantly boost viewer retention. They make your content accessible and visually interesting, even with the sound off. You can learn more about how to add captions to YouTube Shorts to get the biggest impact.
- A Powerful 3-Second Hook: You have less than three seconds to convince someone to stick around. Your clip has to start with a question, a bold statement, or something visually jarring. Don’t waste that precious time with slow intros or branding.
The goal is to make your content feel native to the platform. A perfectly optimized clip shouldn't look like a repurposed YouTube video; it should feel like it was made specifically for TikTok, Reels, or Shorts.
Perfecting Your Export Settings
Once your clip is edited and ready to go, the final step is exporting it with settings that keep the quality crisp without creating a massive file. Sloppy export settings can make even the best content look amateurish.
Take YouTube Shorts, for example. It's become an absolute powerhouse, generating over 70 billion daily views and boasting some of the highest engagement out there. To even compete on that level, your technical quality has to be on point. You can read more about these impressive video marketing statistics and what they mean for creators.
Here’s a quick checklist for pristine exports:
- Resolution: 1080x1920 pixels
- Frame Rate: 30 or 60 FPS (Frames Per Second) for that smooth motion
- File Format: MP4 is the universal standard that works everywhere
- Bitrate: A variable bitrate (VBR) is usually your best bet to balance quality and file size
A Crash Course in Copyright and Fair Use for Video Clips
Knowing how to clip a YouTube video is a technical skill. But knowing when you can legally do it is what keeps you out of trouble as a creator.
It's simple: clipping your own stuff is always 100% safe. But once you start using footage from other creators, you're stepping into the world of copyright law and a little concept called Fair Use.
This whole area can feel pretty intimidating, but the idea behind it is actually straightforward. Copyright exists to protect a creator's original work. Fair Use is the legal carve-out that lets you use bits and pieces of that work without asking, but only under very specific circumstances—specifically, when you're transforming it.
So, What Makes a Clip "Transformative"?
This is the million-dollar question. You need to ask yourself: "Am I adding my own commentary, criticism, or creative spin here, or am I just re-uploading someone else's work for clicks?"
The difference is everything. Just grabbing a funny moment and posting it as-is? That’s not transformative, and it’s a quick way to get a copyright strike.
But, if you use that same clip to break down why it's funny, to make a parody, or to teach a lesson, you’re likely covered by Fair Use.
- Commentary and Criticism: Think video essays, movie reviews, or reaction videos. You're using clips to support your own original analysis.
- Parody: Creating a funny imitation of the original work is a classic example of transformative use. It's about using the original to create something new and comedic.
- Education: A professor using a snippet from a documentary to illustrate a historical event is a perfect example. The clip is being used for a new, educational purpose.
Fair Use isn't a hard-and-fast rule; it's more of a balancing act. The law weighs your purpose and creative input against the rights of the original creator. The more you add and the more you transform the original, the stronger your defense against a copyright claim.
Once you've handled the legal side and made your clips, this flowchart gives you a quick mental check to see if they're actually ready to perform on social media.
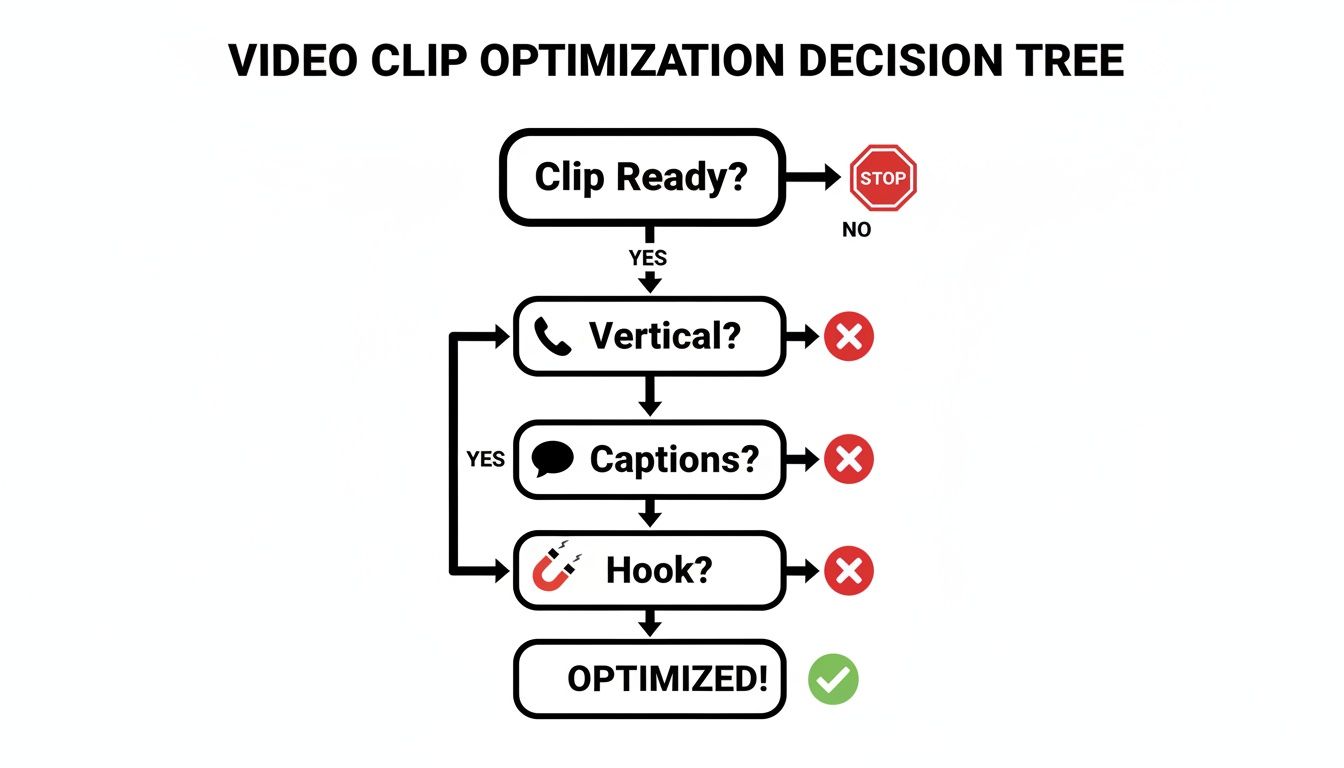
As you can see, it's not just about the content. Getting the basics right—like vertical formatting, captions, and a killer hook—is what makes or breaks a clip's performance.
A Practical Fair Use Checklist for Creators
To keep yourself out of hot water, run your clips through this quick four-point check. These are the same factors courts use to decide these cases.
- The Purpose and Character of Your Use: Is your video for educational purposes, or are you trying to sell something with it? Are you transforming the original with commentary, or just replaying it? Non-commercial, transformative uses are your safest bet.
- The Nature of the Original Work: It's generally less risky to use clips from factual content like news reports or documentaries. Using clips from highly creative works—think a blockbuster movie or a hit song—is much more likely to get you into trouble.
- The Amount of the Work You Used: Less is more. A 10-second reaction from a 20-minute podcast is much easier to defend than a full 3-minute scene from a movie. Only use what's absolutely necessary to make your point.
- The Effect on the Original's Market Value: This one's a big deal. Does your clip replace the need for someone to watch the original? If your "Top 10 Funniest Moments" compilation means people don't have to watch the actual video, you're harming the creator's market—and your Fair Use argument gets a lot weaker.
By thinking through these points before you hit publish, you can repurpose content much more responsibly and steer clear of most copyright headaches.
Frequently Asked Questions About Clipping YouTube Videos
Diving into video clipping brings up a ton of questions, especially when you're just trying to get your workflow sorted. Here are some straight-to-the-point answers to the most common hurdles creators face.
What Is the Best Free Software for Clipping Videos?
When you're working on a budget but refuse to compromise on quality, two free tools really shine.
DaVinci Resolve is a powerhouse. We're talking professional-grade editing, color grading, and audio tools, all packed into a surprisingly robust free version. If you want that polished, cinematic feel for your clips, this is your go-to.
Then there's CapCut, which is built from the ground up for social media. It's incredibly intuitive on both desktop and mobile, and its auto-captions, trendy effects, and quick vertical formatting make it a favorite for anyone creating content for TikTok and Reels.
How Do I Maintain Video Quality When Clipping?
Nothing kills engagement faster than a blurry, pixelated clip. The secret to keeping things crisp is to start with a high-quality source file and stick to the right export settings.
- Always grab your original video file directly from YouTube Studio. Third-party downloaders almost always compress your video, wrecking the quality before you even start.
- When you're ready to export, use a 1080x1920 resolution for vertical platforms like Shorts, Reels, and TikTok.
- Make sure your frame rate is set to 30 or 60 FPS (frames per second). This ensures your video plays back smoothly on mobile devices.
The golden rule is simple: start with a high-res source and export using settings that match what the platforms want. Never, ever try to upscale a low-quality video—it just makes the artifacts and blurriness even worse.
Is It Legal to Use Clips from Other Videos in a Compilation?
This is where things get a bit tricky. You can only use clips from someone else's video if your work qualifies under Fair Use. That means your new video has to be "transformative."
Just stringing together a bunch of funny moments or cool scenes without adding your own commentary, criticism, or educational angle is a straight-up copyright violation. To stay on the right side of the law, make sure you're adding significant new meaning. A video essay analyzing an editing technique is transformative; a "best of" compilation is not.
How Long Should My Video Clips Be?
The perfect clip length is all about the platform you're posting on. Short-form content has completely rewired audience attention spans, making every second count. Today, video accounts for nearly 80% of all internet traffic, and many top marketers point to YouTube Shorts as a massive driver of organic growth. You can dive deeper into these trends in this report on the rise of short-form video.
Here’s a quick cheat sheet for clip length:
- TikTok: Keep it between 15-30 seconds. The algorithm loves short, punchy content that people rewatch.
- Instagram Reels: The sweet spot is under 60 seconds. You can push it to 90, but you’ll see a major drop-off in viewers after that first minute.
- YouTube Shorts: The hard limit is 60 seconds. Pack as much value as you can into that timeframe to get the best results.
Your goal is to deliver one complete, satisfying idea within the ideal time frame for each platform.
Ready to stop spending hours hunting for viral moments? Klap uses AI to instantly find the best hooks in your videos and automatically generates dozens of polished, social-ready clips with dynamic captions. Turn your videos into viral shorts today at Klap.app.
