Master YouTube to Instagram: Reels & Posts for 2026
Other
You've probably got this problem right now. A solid YouTube video goes live, you know there are at least a handful of sharp moments inside it, and then the clip never makes it to Instagram because pulling it out feels like a separate project.
That's where most creators lose momentum.
The practical YouTube to Instagram workflow isn't about squeezing one more task into your week. It's about treating every long-form video as raw material for a batch of short, platform-native assets. The people who do this well don't just cut random excerpts. They choose the right moments, re-edit them for Instagram, package them properly, and publish them in a way that feels native instead of recycled.
Why Repurposing From YouTube to Instagram Is a Growth Superpower
A creator posts a strong YouTube video, gets solid watch time, then leaves the best 30 seconds buried inside a 12-minute upload. That is wasted distribution.
YouTube and Instagram do different jobs in the same content system. YouTube holds the full argument, story, or tutorial. Instagram gets the sharpest angle in front of people fast, often before they ever decide to watch something longer.
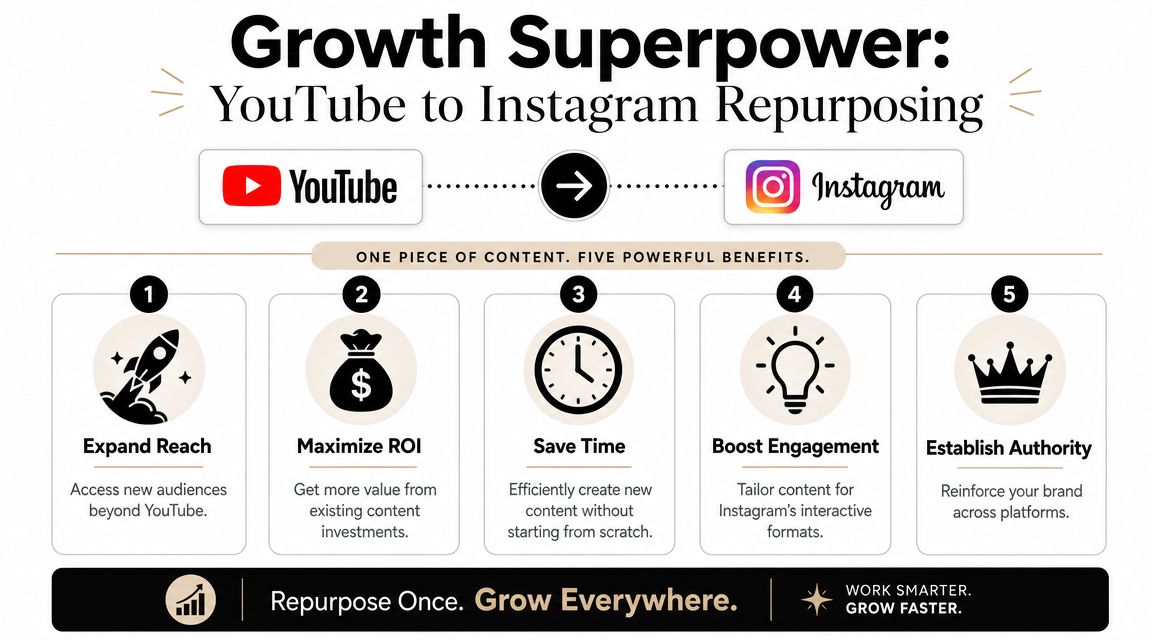
That shift is bigger than simple recycling. Good repurposing gives one idea multiple chances to get discovered, and each format plays a different role. The long-form video builds authority. The Reel earns attention. Stories keep the topic alive. A teaser post can pull people back to the original upload.
A key advantage is strategic, not just efficient. Creators who grow across both platforms stop asking, "How do I cut this video down?" and start asking, "Which moment can stand alone, create a reaction, and still feel native to Instagram?" That question usually decides performance before any editing starts.
If you want a cleaner operating model, treat content repurposing as a repeatable publishing workflow, not a leftover task you get to if there is time. The YouTube upload is the source asset. Instagram is one of the distribution channels built from it.
One source asset, multiple discovery points
Repurposing from YouTube to Instagram works because it improves reach and efficiency at the same time:
- More entry points. Some people will never click a full YouTube upload, but they will watch a Reel in-feed and remember the creator.
- Better return on production time. Research, scripting, recording, and editing a long video takes real effort. Pulling more value from that work is smart operations.
- Stronger message retention. A point often needs to appear more than once, in more than one format, before it sticks.
- A better fit for platform behavior. Long-form depth rarely transfers well without re-editing. Short-form clips can carry the same idea in a format Instagram rewards.
There is a trade-off, though. A clip that works on YouTube because of context often falls flat on Instagram because viewers meet it cold. That is why repurposing is not a copy-paste job. The best creators rebuild the moment for the platform.
The Shift to Mobile-First Video
Short-form distribution got more competitive, and Instagram has become less forgiving of lazy reposts. A raw horizontal excerpt with no hook, no framing, and no original angle often reads as recycled content, even if the source material is strong.
That is the part many guides miss. Instagram does not just want shorter video. It wants a version of the idea that feels new in its own feed context. Sometimes that means a tighter opening line. Sometimes it means reframing the takeaway, adding on-screen text, or cutting to a stronger emotional beat than the one that worked in the YouTube timeline.
For the technical side of clipping YouTube for social media, basic tools are easy to find. The bigger growth advantage comes from judgment. Pick the moment that already has tension, clarity, or surprise, then package it like a native Instagram post instead of a trimmed leftover.
Creators who get the most from YouTube to Instagram usually do not publish more ideas. They distribute the same good idea with more precision.
Finding Your Gold The Art of Choosing the Right Clips
The clip decision happens before the edit.
Most weak Reels come from a bad selection process, not bad software. If you take any random minute from a YouTube video, trim it, and post it, it usually feels like a fragment. Instagram wants something that lands fast and stands on its own.
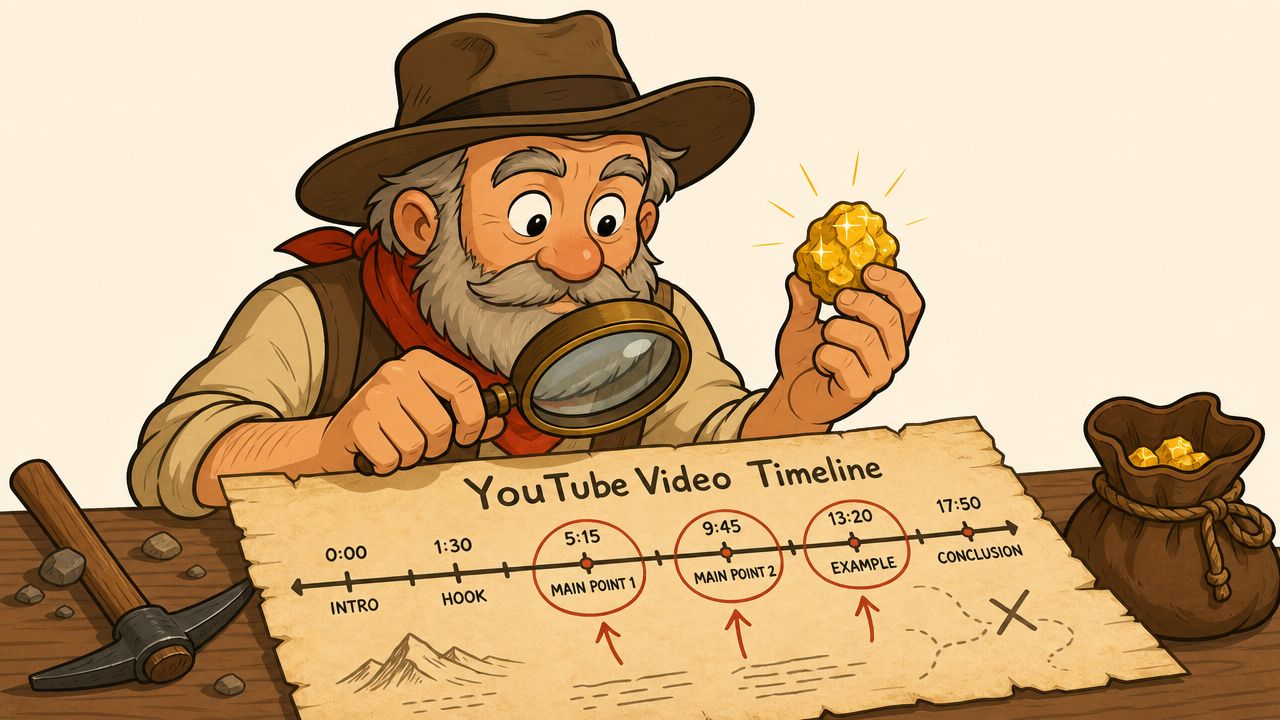
A better approach is to rewatch your long-form content with short-form judgment. You're not asking, “What part can I cut?” You're asking, “What moment already contains tension, clarity, or payoff?”
If you want a basic technical refresher on clipping YouTube for social media, that Framesurfer guide is useful. The bigger issue, though, is knowing what deserves to become a clip in the first place.
What makes a moment clippable
Look for segments that have these traits:
- A clear hook. The first line creates curiosity, conflict, surprise, or a strong opinion.
- A single idea. The viewer can understand the point without needing the previous five minutes.
- A payoff. The clip resolves with an answer, lesson, reveal, or conclusion.
- Natural energy. Your tone sharpens, your pace changes, or the guest says something unusually direct.
- Standalone context. You can add a short title or caption and the clip still makes sense.
The best moments often come from places creators overlook. An objection you answer in passing. A quick story that proves a larger point. A sentence where you say the thing more bluntly than usual.
Strong clips are usually discovered, not manufactured. They already exist in the long-form footage.
A simple selection filter
Before editing anything, run each candidate clip through this checklist:
- Would this stop someone who doesn't know me?
If the answer is no, it may be valuable in a full YouTube video but weak as an Instagram entry point. - Can this idea survive alone?
If the clip depends on setup that happened much earlier, skip it or rewrite the opening with on-screen text. - Is there a sentence people would repeat?
Reels spread when the core idea is easy to retell. - Can I tighten it without losing meaning?
If a clip only works at full length, it probably isn't an Instagram clip yet.
What usually fails
Some footage looks important in your timeline but underperforms on Instagram:
Weak clip typeWhy it struggles
Slow introductions
They assume patience Instagram viewers don't give you
Long context-setting
The payoff arrives too late
Dense explanations
They ask for too much attention too quickly
Mid-thought excerpts
They feel borrowed instead of complete
A good YouTube to Instagram workflow starts with curation, not cutting. If the source moment isn't compelling, no amount of resizing, captions, or trendy packaging will save it.
The Manual Workflow Resizing and Editing Your Clips
Every creator should understand the manual version, even if they eventually automate most of it. It teaches you where quality gets lost and why some clips look polished while others feel cheap.
The first rule is simple. Start from the original video file, not a YouTube download, and definitely not a screen recording. To minimize Instagram's compression and match its native format, the best practice is to use the original source file, export as MP4 with H.264, and reframe to 9:16 at 1080×1920, as outlined in Swiftia's guide to posting YouTube videos on Instagram.
The baseline edit process
Manual repurposing usually looks like this:
- Pull the source file into your editor
Premiere Pro, Final Cut Pro, DaVinci Resolve, and CapCut can all handle this well. - Build a vertical sequence
Set the project to 9:16 so you're designing for Instagram from the start, not trying to squeeze it in later. - Reframe the subject
A horizontal YouTube shot rarely survives a center crop untouched. You often need to keyframe the frame position to keep faces, gestures, or visual demos in view. - Trim hard
Most first cuts are too slow. Remove throat-clearing, repeated phrases, and any sentence that doesn't advance the point. - Export with the right settings
MP4, H.264, 1080×1920. Keep the workflow simple and platform-native.
Where manual editing gets tedious
The tedious parts aren't glamorous. They're the tiny decisions.
You scrub the timeline to find the hook. You decide whether to cut before or after a breath. You reposition the frame every time the speaker leans. Then you fix subtitles, check line breaks, and preview how the opening frame looks in-feed.
Editing rule I trust: If a clip feels slightly too long in the timeline, it's usually definitely too long on Instagram.
Here's a useful split between what deserves manual attention and what doesn't:
- Worth doing by hand
Hook placement, final trims, cover-frame choice, and any clip where timing is the whole point. - Usually not worth overdoing
Fancy transitions, heavy motion graphics, and effects that distract from a strong spoken idea.
If your goal is audio-first repurposing, transcript extraction, or alternate sound workflows, tools for tasks like convert YouTube to MP3 can be handy in adjacent parts of the process. But for Instagram video output, the visual source quality matters most. Starting with a compressed copy and then asking Instagram to compress it again is where a lot of creators effectively ruin the result.
Manual workflow trade-offs
Manual advantageManual cost
Full creative control
Slow review and clipping
Precise reframing
Repetitive timeline work
Custom pacing
More decisions per clip
Better feel for nuance
Hard to scale consistently
Manual editing works. It's also the reason many good YouTube moments never get published on Instagram at all.
The Automated Workflow Using AI to Go Faster
Automation becomes useful the moment your backlog gets bigger than your available editing time.
The jobs that eat time in YouTube to Instagram repurposing are predictable. You have to scan a long video for promising moments, cut them into self-contained segments, resize them for vertical viewing, and add captions that still read cleanly on a phone. That's exactly where AI editors now help.
One practical guide reports that with an AI editor workflow, creators can generate 8–12 reusable Instagram clips from a single long video, and the effective pattern is to isolate the hook, trim to the shortest coherent segment, and add dynamic captions for viewers who watch with sound off, according to BH Tech Review's workflow breakdown.
What AI is actually good at
AI repurposing tools are most useful when they handle repetitive structure well:
- Highlight detection. They scan the full video for speaker changes, topic shifts, and moments that resemble standalone beats.
- Auto reframing. They keep the subject centered in a vertical crop without manual keyframing on every shot.
- Caption generation. They create subtitles quickly, which is one of the most time-consuming cleanup jobs by hand.
- Batch output. They produce multiple candidate clips at once so you can choose rather than build from zero.
That doesn't mean the machine does the full creative job. You still need judgment. You decide whether a candidate clip feels sharp enough, whether the opening line is strong enough, and whether the caption style suits your audience.
One tool in this category is Klap's auto video creator workflow, which takes a long-form video or YouTube link, identifies potential short clips, reframes them for vertical formats, and prepares subtitle-ready outputs for social posting. Used well, tools like that turn the process from timeline labor into review and selection.
Where automation wins and where it doesn't
Automation wins when volume matters. If you publish consistently, the bottleneck isn't your ability to trim one excellent Reel. It's your ability to do it every week without dropping the habit.
It loses when the clip depends on very fine pacing, complex visuals, or a joke that only works with exact beat timing. In those cases, you'll still want to step in manually.
A lot of teams also use adjacent AI workflows when the clip is part of a paid strategy. If you're building creative variations for campaigns, a resource on AI Instagram ad creation can help you think about adaptation beyond organic posts.
This shows the workflow in action:
The real shift
The biggest gain from AI isn't just speed. It's consistency.
When editing is painful, creators cherry-pick one clip from a YouTube upload and stop there. When the system produces multiple usable drafts, you can test different angles from the same source video. One clip can lean educational. Another can push curiosity. Another can act as a teaser back into your longer content.
That's how YouTube to Instagram turns from occasional repurposing into an actual content engine.
Perfecting Your Post Captions Subtitles and Thumbnails
A solid clip can still underperform because the packaging is weak.
Instagram viewers don't experience your video in isolation. They see a cover frame, the first words on screen, the subtitle style, the opening seconds, and the caption around it. If those pieces feel careless, the edit underneath doesn't get a fair shot.
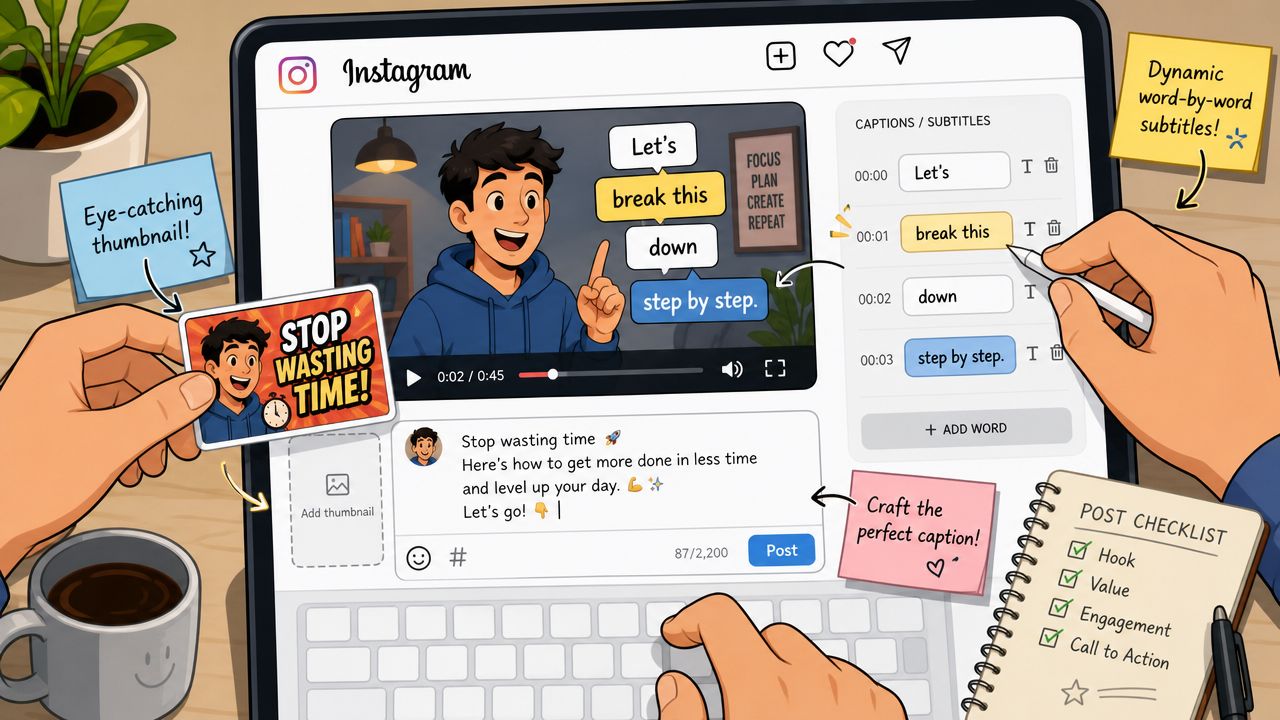
Subtitles need to do more than transcribe
Dynamic captions work because they reduce effort for the viewer. They also help when someone watches in a noisy place, in silence, or with low attention.
The common mistake is treating subtitles like a legal transcript. That makes the screen dense and slow to read. Cleaner subtitle edits usually work better:
- Short lines that match speech rhythm
- Useful emphasis on key words, not every word
- High contrast so text survives bright backgrounds
- Safe placement away from Instagram interface clutter
If you need a practical walkthrough for subtitle formatting, this guide on how to add captions to videos is a good reference point.
A caption file can be accurate and still feel unreadable. Instagram subtitles have to be edited for pace, not just correctness.
Write captions that add context
The written Instagram caption shouldn't just repeat the spoken script. It should give the post a second layer.
Good post captions often do one of these jobs:
- Frame the clip by explaining who it's for
- Add missing context that didn't fit inside the short video
- Ask for a response when the topic invites discussion
- Create a bridge to your profile, offer, or longer content
Weak captions usually summarize what the viewer just heard. That wastes the space.
Pick a cover that earns the click
The cover image for a Reel matters more than many creators admit. It affects how your grid looks, how recognizable your content becomes, and whether someone taps when they discover the post later.
A strong cover usually includes:
ElementWhat to aim for
Main visual
A clear face, gesture, or focal object
Headline text
A short promise or tension point
Contrast
Readable text and obvious subject separation
Consistency
A style your audience starts to recognize
If I'm choosing between a technically cleaner frame and a more expressive frame, I'll usually pick the expressive one. On Instagram, clarity beats polish when people are scrolling fast.
Posting and Optimizing for Instagrams Algorithm
Publishing is where a lot of repurposed clips start looking too much like exports and not enough like Instagram content.
That distinction matters because Instagram's algorithm increasingly prioritizes original content, and creators who add unique edits or creative value instead of merely cross-posting may perform better and avoid being deprioritized, based on the discussion in this video about Instagram's algorithm change.
Make the clip feel native
A YouTube excerpt becomes more Instagram-native when you adapt the presentation, not just the dimensions.
Try this:
- Rewrite the opening text so it hooks a cold Instagram viewer, not a returning YouTube subscriber.
- Adjust the pacing by trimming more aggressively than you would on YouTube.
- Use a fresh caption angle instead of copying your YouTube description.
- Customize the cover so it fits your Instagram grid and browsing behavior.
- Add light platform context through Stories, replies, or follow-up posts.
What works better than straight reposting
A direct repost can still be useful, but it usually isn't the strongest version. Better results tend to come from transformed clips that preserve the core idea while changing the delivery.
Repurposed content should feel borrowed from your own library, not duplicated from another app.
The simple test is this. If someone sees the clip on Instagram first, does it look like it was made for Instagram? If yes, you're close. If it looks like a leftover from YouTube, keep editing.
If you want to turn YouTube videos into Instagram-ready clips without doing every trim, crop, and caption manually, Klap is built for that workflow. You can start with a long-form video or YouTube link, generate short vertical cuts, review the best moments, and publish faster without losing control over the final edit.
