How to Make Video Edits That Get Noticed
Other

Learning how to make video edits that stick is less about technical wizardry and more about smart storytelling and an efficient workflow. It’s a creative process of planning your message, cutting your clips with purpose, polishing your audio, and making sure everything looks perfect on whatever screen it's viewed on.
The New Rules for Making Video Edits That Go Viral
The old days of locking yourself in an editing suite for weeks are over. In a world where the average human attention span is just over 8 seconds, making great video edits is all about speed, smart choices, and a workflow that doesn’t slow you down. This isn't about knowing every single button in your software—it's about knowing what actually makes people stop scrolling.
Modern video demands content that hooks you in seconds. A fast, repeatable editing system isn't just a nice-to-have; it's what keeps you relevant. The pressure to consistently publish high-quality content is real, and you can’t afford to burn hours on clunky, inefficient methods.
What Today's Viewer Actually Wants
People don't watch videos like they used to. They want fast, valuable content that respects their time. This has completely changed what a "good" edit even means. You have to deliver value, whether that’s a laugh or a lesson, within the first 3 seconds.
A successful video edit is no longer measured by its technical flair, but by its ability to hold attention. If you lose your audience in the first few moments, the rest of your hard work doesn't matter.
This forces every creator and marketer to be ruthless with their editing. Every single cut, transition, and sound needs to have a job: keep the viewer watching and push the story forward.
The Building Blocks of a Modern Edit
Instead of getting bogged down in a sea of features, focus on getting a few core elements right. A strong edit is built on clarity and purpose, not complexity.
Here are the pillars of any video edit that works today:
- A Clear Story: Even a 15-second clip needs a beginning, middle, and end. Your edit must guide the viewer through a coherent idea, no matter how short.
- Strategic Pacing: The rhythm of your cuts is everything. Rapid-fire cuts build excitement, while letting a shot breathe creates emotion. The key is to vary the pace to keep viewers engaged.
- Crisp Audio: Viewers will forgive grainy video, but they will click away immediately if the audio is bad. In fact, 62% of viewers are more likely to have a negative perception of a brand that publishes a poor-quality video.
- Intelligent Repurposing: The smartest creators aren't working harder; they're working smarter. Turning one long video into dozens of polished clips is how you multiply your output without burning out. This is where AI-powered platforms like Klap have completely changed the game.
Building Your Edit from a Solid Foundation
A great video edit doesn’t start when you drag a clip into your software. It starts way before that, with a solid game plan. This prep work is what separates a clean, creative workflow from a chaotic mess that leaves you frustrated for hours.
Skipping this stage is like trying to build a house without a blueprint. You might end up with something standing, but it won’t be what you envisioned, and the process will be inefficient. Every decision you make here—from the video’s main goal to how you name your files—shapes the final product.
Define Your Objective and Audience First
Before you even think about camera angles, ask yourself two simple questions: What is this video for, and who am I making it for? The answers are your guide for every cut you’ll make. A video designed to drive sales for an e-commerce store will look completely different from one meant to tell a heartfelt brand story.
Knowing your audience is just as crucial. Are you creating a quick, meme-heavy clip for Gen Z on TikTok or a detailed tutorial for industry pros on YouTube? This single decision dictates your tone, pacing, and the entire visual style of the edit.
A well-defined objective is your most important editing tool. It tells you what to cut, what to keep, and when the video has successfully done its job. Without it, you're just assembling clips without a purpose.
Thinking about your viewer ensures your creative choices land. For example, a hyper-fast edit with aggressive jump cuts and sound effects might perform well with a younger audience but could alienate viewers looking for a serious, in-depth explanation.
Storyboard Your Ideas Visually
You don’t need to be a professional artist to storyboard. For a short social clip, a simple shot list on your phone or a few rough stick-figure sketches is more than enough. The real goal here is to map out the flow of your video before you even hit record.
This simple exercise forces you to think about your video as a sequence. It helps you spot gaps in the story ahead of time, ensuring you get all the shots you need. It’s the ultimate defense against that sinking feeling you get when you’re deep in an edit and realize you’re missing a critical angle.
Source Compelling Footage
At the end of the day, your edit is only as good as the raw footage you have to work with. Your main footage, what we call A-roll, is usually your primary subject, like a person talking to the camera. But it’s the B-roll—the extra, supplemental footage—that truly brings a story to life.
Here's how to think about sourcing your media:
- Shoot Your Own B-Roll: Always capture more than you think you’ll need. Get wide shots, tight shots on hands or objects, and multiple angles of the same action. This variety is what gives you creative freedom in the edit.
- Use Stock Footage: High-quality stock footage from sites like Pexels or Artgrid can fill in gaps and add a layer of polish. Just make sure to find clips that match the lighting and color of your main footage for a seamless look.
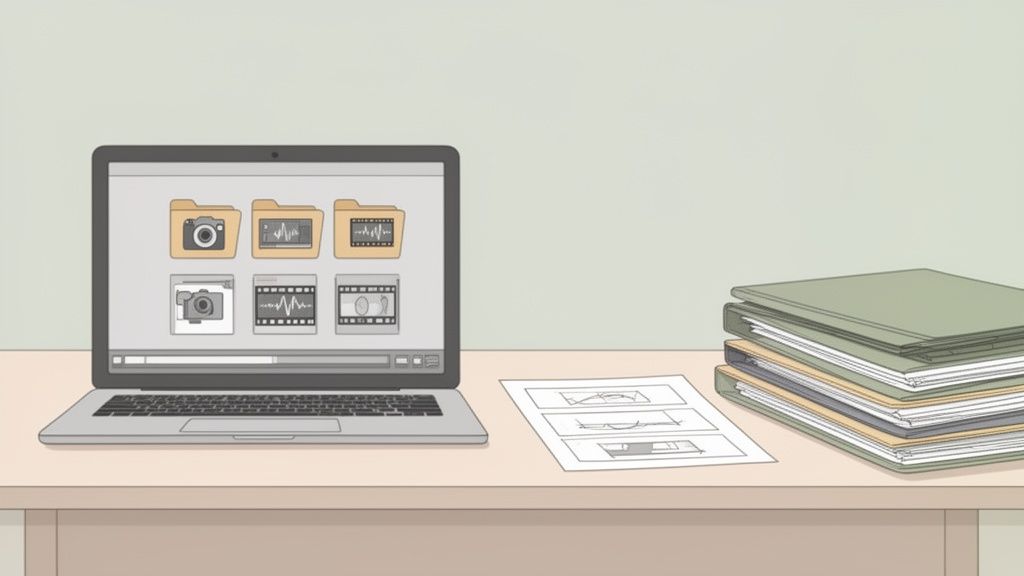
- Organize Everything: This is the unglamorous but absolutely essential final step. A messy media folder is a huge time-waster. Before you import a single file, create a clean, logical folder structure.
A simple, pro-level system looks something like this:
Folder NameContent
01_PROJECT FILES
Your main editing software file (e.g., a Premiere Pro or Final Cut project).
02_FOOTAGE
All raw video clips, sorted into subfolders like "A-Roll" and "B-Roll."
03_AUDIO
Your music tracks, voice-overs, and any downloaded sound effects.
04_GRAPHICS
Logos, lower thirds, and any other visual overlays.
05_EXPORTS
A dedicated home for all your final, rendered videos.
This kind of organization means you never waste a minute hunting for that one specific file. Pair this with a consistent naming system (like ProjectName_Scene01_Take02.mp4), and you've built a professional foundation that will make every single edit faster and smoother.
Alright, you've got all your footage organized and ready to go. Now comes the fun part—the heart of the edit, where your story really starts to take shape.
This stage is all about building the rough cut. Don't aim for perfection here. The goal is structure, narrative, and rhythm. You’ll be piecing together your main footage (the A-roll) to create a coherent sequence that will serve as the backbone of your video.
Think of it as building a skeleton. You're laying down the most essential parts first to create a solid foundation. You'll identify the most powerful moments from your raw clips and arrange them in an order that feels compelling and keeps the viewer hooked.
Finding Your Golden Moments
Before you even think about dragging clips into your timeline, take a step back and review everything you've shot. Watch your A-roll and B-roll, keeping an eye out for those "golden moments"—the parts that feel powerful, deliver key information with punch, or carry the most emotional weight. These are your narrative building blocks.
A simple way to do this is by "logging" your footage. As you watch, just mark the start and end points of the clips you know you want to use. Most editing software lets you add markers or create sub-clips, which makes this process incredibly fast.
This initial selection is a non-negotiable step if you want to make video edits that feel tight and purposeful. By focusing only on your best material from the get-go, you avoid cluttering your timeline with weak footage that you’ll just end up cutting later anyway.
Mastering the Art of Pacing
Pacing is the heartbeat of your video. It's the rhythm of your cuts, and it dictates how your audience feels from one moment to the next. Get it right, and you can build excitement, create tension, or let an emotional beat land with real impact.
- Fast Pacing: Think rapid cuts between different shots or angles. This is your go-to for injecting energy and excitement, making it perfect for product reveals, action sequences, or those high-energy social media hooks that need to grab attention in seconds.
- Slow Pacing: Sometimes, you need to let a shot breathe. Holding on a clip for a few extra seconds gives the viewer time to absorb what they're seeing and connect emotionally. This works wonders for customer testimonials, sweeping scenic shots, or heavy story moments.
The most effective video edits use a dynamic range of pacing. A constant barrage of quick cuts is exhausting, while a video full of slow takes will put your audience to sleep. The magic is in the contrast.
Imagine a product launch video. You might kick it off with a series of quick, exciting cuts showing off different features, then slow down for a close-up on the product’s slick design. That shift in pace is what makes the viewing experience so much more engaging.
Using J-Cuts and L-Cuts for a Seamless Flow
Want to make your edits feel more professional and less clunky? The J-cut and the L-cut are two of the most powerful techniques in your editing toolkit. They’re named for the shape they make on the timeline, and they work by creating smoother transitions where the audio and video change at different times.
What is an L-Cut? An L-cut is when the audio from your first clip continues to play over the video of the second clip. Picture someone talking, and as they finish their sentence, the camera cuts to show what they’re describing while we still hear their voice. It creates a natural, documentary-style feel.
What is a J-Cut? A J-cut is simply the opposite. The audio from the next clip starts playing before the video actually cuts to it. For example, you might hear a crowd cheering for a split second before you cut from a speaker on stage to a wide shot of the audience. This builds anticipation and pulls the viewer smoothly into the next scene.
Learning these two simple cuts is fundamental for anyone looking to make video edits that look polished and professional. They help you avoid jarring transitions and make your entire story feel more connected and fluid.
Speaking of quality, the demand for great video content is exploding. The U.S. video production market is projected to skyrocket from USD 31.24 billion in 2025 to USD 181.24 billion by 2033—that's a staggering 480% increase, all driven by our insatiable appetite for digital content. But with this boom comes rising production costs, making an efficient workflow more critical than ever. You can read more about this market expansion on Globenewswire.
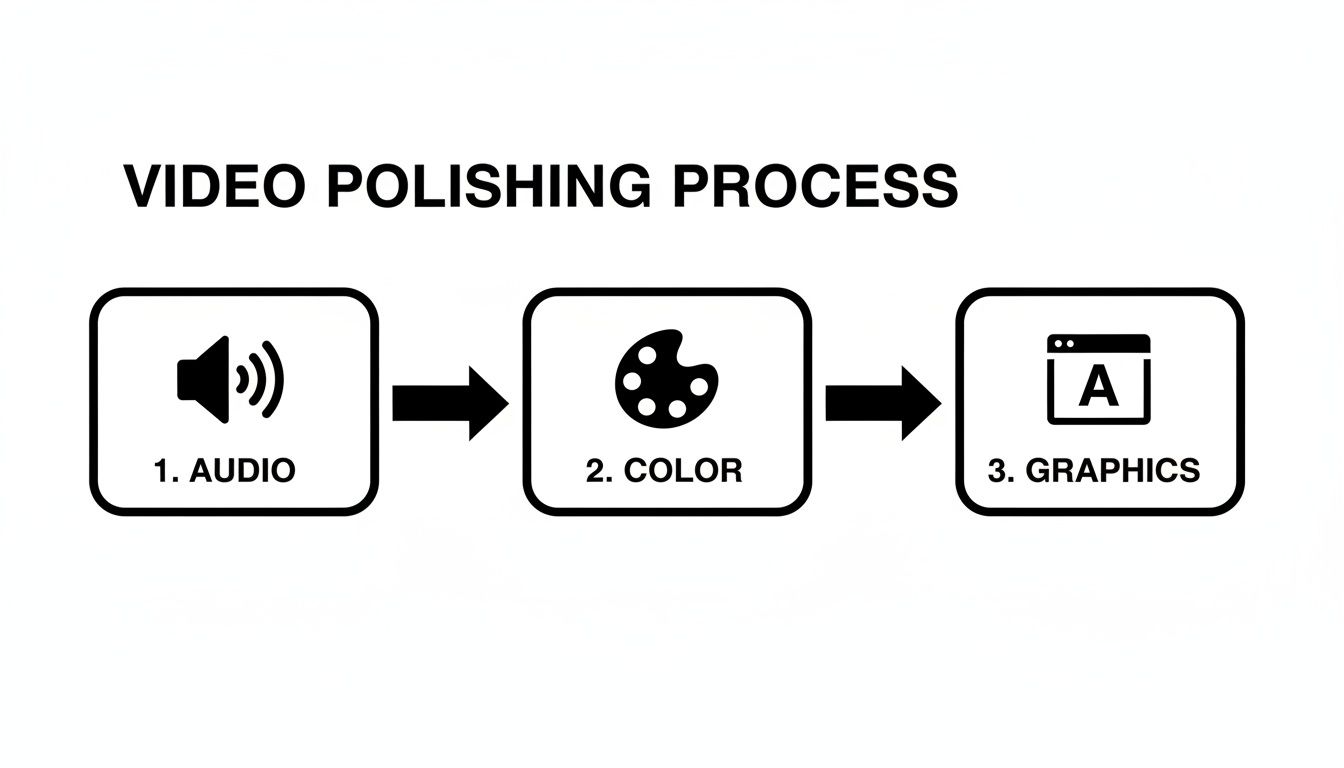
Polishing Your Video with Audio Color and Graphics
Your rough cut is done. The story is there, the pacing feels right, but something is still missing. This is where you separate the amateurs from the pros—by adding the final polish that makes your video feel complete.
This stage is all about three things: perfecting your audio, dialing in your color, and adding graphics that grab attention.
Mastering Your Audio Mix
Let’s be honest: viewers will put up with slightly grainy footage, but bad audio? That's an instant dealbreaker. In fact, research shows that 62% of viewers will abandon a video simply because the audio quality is poor.
You can have the most beautiful visuals in the world, but if your audio is a muddy mess of background noise and dialogue you can barely hear, you've already lost your audience. Getting your sound right is non-negotiable.
Here are a few actionable tips to make your audio crisp and clear:
- Kill Background Noise: Almost every video editor has a noise reduction tool. Use it. A single click can eliminate distracting sounds like an AC hum, computer fan, or distant traffic, making your dialogue instantly cleaner.
- Balance Your Levels: Your dialogue should always be the hero of your audio mix. A good starting point is to set your main voice track between -6dB and -12dB. Then, tuck your music and sound effects underneath it, usually around -20dB to -25dB, to support the message, not compete with it.
- Use Audio Ducking: This is a huge time-saver. Available in most editors, audio ducking automatically lowers the music volume whenever someone speaks. It keeps your dialogue front and center without you needing to manually tweak volume levels every few seconds.
A great audio mix isn't about making everything loud; it's about creating clarity and hierarchy. Guide your viewer's ear by making the most important sounds prominent and using background elements to build atmosphere.
Bringing Your Visuals to Life with Color
Next up, let's talk color. This isn't just about making things look pretty; it's about making your footage look consistent and professional. The process is broken into two key steps: color correction and color grading.
Color correction is the technical part. It’s about fixing issues and making your footage look natural—as if you were seeing it with your own eyes. This is always your first move.
Your goals here are simple:
- Fixing White Balance: Make sure the whites in your video are actually white. This removes any weird color tints (like a shot looking too blue or yellow) and makes all the other colors look accurate.
- Adjusting Exposure: If a clip is too dark, brighten it. If it's too bright and "blown out," bring it down. The goal is a balanced image where you can see details in both the shadows and the highlights.
Once your clips are corrected and look neutral, you get to have some fun with color grading. This is where you apply a specific "look" to evoke a mood. Think of the cold, sterile blues in a sci-fi film or the warm, dreamy glow of a travel vlog.
This is your chance to give your video a cinematic personality that ties everything together. If you're looking for ideas, you can find great pre-made filters and color tools in many of the best TikTok editing apps, which are perfect for inspiration.
Enhancing Your Story with Text and Graphics
Finally, let’s cover the visual elements you layer on top. We live in a world where up to 85% of videos on social media are watched on mute. That means on-screen text isn't a bonus—it's an absolute necessity.
Adding dynamic captions, titles, and other graphics makes your video more engaging and ensures your message gets across, even when the sound is off.
But creating all these graphics manually is a huge time sink. Here's a quick look at how much more efficient this process becomes when you use an AI-assisted tool like Klap.
Manual Editing vs AI-Assisted Editing (Like Klap)
The table below breaks down the time, cost, and skills needed for traditional editing compared to an AI-powered workflow for creating social clips.
TaskManual EditingAI-Assisted Editing (Klap)Key Benefit of AI
Adding Captions
Transcribing audio by hand and timing each word on the timeline. Can take hours for longer videos.
AI automatically transcribes and syncs captions to the video in minutes.
Speed: Reduces a multi-hour task to a few clicks.
Highlighting Words
Manually creating text layers, adding animations, and timing them to appear with specific words.
The AI can often identify key phrases and automatically suggest animated callouts.
Efficiency: Automates a tedious creative process for more dynamic text.
Adding a Brand Logo
Importing your logo file and manually positioning it on every single clip.
Apply your logo as part of a template, ensuring it appears consistently across all clips.
Consistency: Guarantees brand uniformity without repetitive manual work.
As you can see, the right tools don't just speed things up; they automate the most tedious parts of the job.
Learning how to make video edits that perform on social media means mastering more than just cutting clips. By combining clean audio, polished color, and smart graphics, you give your video the professional sheen it needs to stand out and stop the scroll.
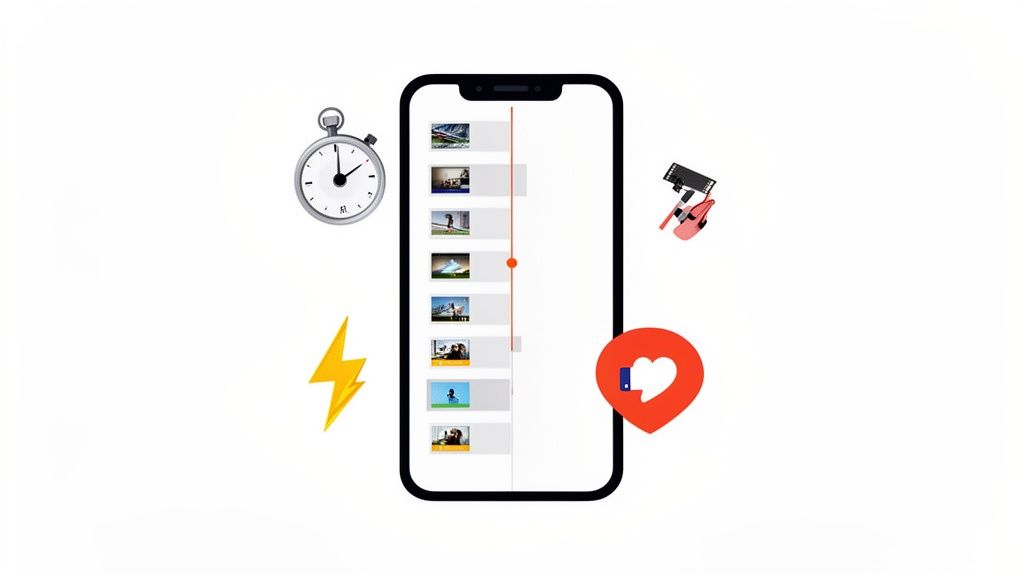
Multiply Your Content with AI-Powered Repurposing
So you’ve put in the hard work and created a great long-form video—a deep-dive podcast, a detailed webinar, or an awesome product demo. Now what? Don’t let that amazing asset just sit there collecting digital dust. The smartest creators work smarter, not harder, by multiplying their content.
This is where AI-powered repurposing really shines. Instead of spending hours scrubbing through footage trying to find a few shareable moments, you can let a platform like Klap do the heavy lifting. The idea is simple: upload one long video, and the AI handles the rest.
Let AI Find Your Best Moments
Think of AI as your most efficient assistant editor. Its job is to analyze your entire video—from the dialogue and visuals to the overall pacing—and pinpoint the most engaging, "viral-worthy" clips. It’s looking for the strongest hooks, the most powerful statements, and the most visually interesting scenes.
This completely takes the guesswork and manual labor out of the equation. In minutes, you can get a whole list of potential short-form clips to review, each one picked because it has the best shot at grabbing attention on a crowded social feed.
The biggest shift in modern content creation isn't just about editing faster; it's about amplifying your efforts. AI repurposing tools turn a single piece of content into a full-blown marketing campaign, dramatically increasing the ROI on your initial production time.
This automated approach is quickly becoming the new normal. In fact, AI adoption among creators has skyrocketed, with usage rates nearly doubling in just a couple of years. As of 2025, 51% of video marketers are actively using AI for creation or editing, and 41% of businesses have adopted AI to produce videos—a huge jump from only 18% in 2023.
From Horizontal to Vertical, Automatically
One of the most mind-numbing tasks in social media editing is reframing horizontal (16:9) video for vertical platforms (9:16) like TikTok, Reels, and Shorts. Manually tracking the speaker to keep them centered is a chore nobody enjoys.
AI-powered platforms automate this entire process.
- Auto-Reframing: The AI intelligently follows the main subject, making sure they’re always perfectly centered in the vertical frame. It can even cut between multiple speakers automatically.
- Dynamic Captions: Since most social video is watched on mute, captions are a must. These tools auto-transcribe your audio and generate eye-catching, animated captions that are easy to read.
- Brand Consistency: You can set up your brand kit once—with your logo, colors, and fonts—and have it applied to every single clip automatically.
This is all part of giving your videos a final, professional polish, a process that AI helps speed up dramatically.
As you can see, a polished video comes down to nailing the audio, color, and graphics—all areas where AI tools can give you a massive head start.
This strategy gives you a constant stream of high-quality, on-brand content for your social channels. You can dive deeper into this topic by checking out our guide on how to create YouTube Shorts from existing video. For specific industries like fashion e-commerce, tools like an AI Ghost Mannequin Generator can even generate new product visuals without a model, which can then be used in your video edits.
When you start thinking this way, you stop seeing video creation as a one-and-done task. Instead, every long video becomes a goldmine of content you can pull from for weeks. This is how you stay consistent, grow your audience, and squeeze every drop of value out of the content you create.
Exporting and Distributing Your Video for Maximum Reach
You’ve poured hours into crafting the perfect edit. The story flows, the colors pop, and the audio is crisp. But all that hard work can be undone in a few clicks if you mess up the final step: exporting.
Getting your export settings right is what separates a sharp, professional-looking video from a pixelated mess. This isn't just a technical chore; it's the final quality check that ensures your content looks amazing on every phone, tablet, and computer screen it reaches.
Decoding Your Export Settings
That export screen can look intimidating, with a bunch of jargon like codec and bitrate. Don't worry, you only need to understand a few key settings to get it right almost every time.
- Codec (H.264): Think of a codec as a way to compress your video. The H.264 codec is the universal standard for online video. It’s fantastic at shrinking your file size without noticeably degrading the visual quality, which is exactly why platforms like YouTube and Instagram recommend it.
- Container (MP4): This is the wrapper for your video, audio, and data. An .MP4 file is the universal standard. It just works, everywhere. Stick with it.
- Bitrate (Mbps): This controls how much data is packed into each second of your video. A higher bitrate means better quality but a bigger file size. A lower bitrate gives you a smaller file but can make your video look blocky, especially in scenes with lots of motion.
For most online video, a variable bitrate (VBR) is your best friend. It intelligently allocates more data to complex, high-motion scenes and less to static ones, giving you the best balance between quality and file size.
A Quick Export Cheat Sheet
Tired of guessing what settings to use? Save this cheat sheet. These are solid starting points for the most popular platforms, designed to give you great quality without making you wait hours for an upload.
PlatformResolution & Frame RateBitrate (VBR, 2-Pass)Audio
YouTube
1080p @ 30/60fps
10-15 Mbps (Target), 20 Mbps (Max)
AAC, 320 kbps
1080p @ 30fps
8-10 Mbps (Target), 15 Mbps (Max)
AAC, 128 kbps
TikTok
1080p @ 30fps
8-10 Mbps (Target), 15 Mbps (Max)
AAC, 128 kbps
Distribution Is More Than Just Uploading
Hitting "publish" isn't the end of the job. A smart distribution strategy is about packaging your video to stop the scroll. This means writing a title that sparks curiosity, a description packed with relevant keywords, and designing a thumbnail that people can't help but click.
Your video's packaging should work in harmony with the edit itself. If you spent time creating a high-energy hook in the first three seconds, your thumbnail needs to reflect that same energy. And don’t forget that captions are non-negotiable for social reach today. To master this, check out our complete guide on how to add captions to YouTube Shorts.
Thinking about distribution from the start is how you ensure your video doesn’t just get seen—it gets noticed.
Common Questions About How to Make Video Edits
As you get your hands dirty with video editing, you're bound to run into a few common hurdles. Getting clear on these early on will save you headaches, speed up your workflow, and help you edit with more confidence. Here are the questions I see pop up most often from creators.
What Is the Best Video Editing Software for Beginners?
The "best" software question is one I get all the time, and honestly, the right answer is different for everyone. It really comes down to what feels intuitive to you and what fits your budget.
A lot of people start with powerful free options like CapCut for mobile or DaVinci Resolve for desktop. But even free tools have their quirks. For instance, the free version of DaVinci Resolve can be a pain on Linux because it doesn't play nice with the standard h.264 video files your phone or camera probably records in—you'd have to buy the paid version to get that support.
Ultimately, the best tool is the one that doesn't get in your way. Many creators find that investing in user-friendly paid software like Adobe Premiere or Final Cut Pro is worth it for the smoother workflow and better support.
How Long Should a Social Media Video Be?
This depends on the platform, but the overall trend is undeniable: shorter is almost always better for grabbing and holding attention.
- TikTok & Instagram Reels: Keep these tight, somewhere between 15-45 seconds. The algorithms on these platforms reward videos that people watch all the way through, so pack your punch quickly.
- YouTube Shorts: You have up to 60 seconds, but the goal is the same. These are built for quick, looping content that's easy to consume.
- LinkedIn/Facebook Feed: There's a bit more breathing room here, usually around 1-3 minutes. If you're sharing educational or professional content, your audience is often willing to stick around longer.
The golden rule? Your video should only be as long as it needs to be. If you can deliver your message in 30 seconds, don't pad it out to a minute just because you can.
What Is the Fastest Way to Add Captions to My Videos?
Trying to transcribe and time your captions by hand is one of the biggest time-sinks in all of video editing. The fastest and most efficient way to get it done is with AI.
The AI video editing market is exploding, projected to reach USD 4.4 billion by 2033, and it’s because these tools are giving creators back their time—boosting productivity by an average of 47%.
Instead of spending hours on tedious manual work, AI platforms like Klap can automatically generate, style, and sync dynamic captions in just a few minutes. You can dive deeper into this trend by checking out these video editing statistics. Using AI for captions makes your content more accessible and frees you up to work on the creative side of things.
Ready to stop wasting hours on tedious editing and start multiplying your content? Klap uses AI to turn your long videos into dozens of viral-ready short clips in minutes. Get started with Klap for free and see how fast you can grow.
