How to Get Audio Off a Video: Easy Steps & Free Tools
Other

You have a long video on your drive, but the part that will travel is the audio. The sharp quote from an interview. The clean explanation from a webinar. The 20-second reaction that can become a podcast clip, a TikTok sound, an audiogram, or the voice layer for a captioned Short.
That is why knowing how to get audio off a video matters for creators. Extraction is not the end goal. Repurposing is. The right method depends on what you want to make next and how much quality you can afford to lose.
A clean export works well for a podcast feed or an AI workflow in a tool like Klap. A fast phone-based method is often enough when you need to turn a good line into a social post before the moment passes. If you plan to cut one interview into ten assets every week, format support, batch processing, and audio quality stop being minor details.
Basic tutorials usually stop at the export button. Useful workflows go one step further. They help you choose a method that fits the outcome, protect speech clarity, and avoid quality loss that shows up later when you edit, caption, transcribe, or remix the clip.
Why Separating Audio from Video is a Creator Superpower
A lot of creators still treat video as the finished product. In practice, video is often the source file and audio is the reusable asset hidden inside it.
A webinar can become a podcast episode. A founder interview can become a short spoken quote over captions. A customer testimonial can become a voice-led Reel. Even if you never publish a standalone audio file, extracting the audio gives you more editing freedom and cleaner repurposing options.
Audio is often the most reusable part
Short-form content rewards clarity fast. People decide quickly whether to keep watching, and the hook usually starts with what’s said, not with a cinematic transition.
That’s one reason repurposing has become such a core creator skill. The same verified overview notes that short-form demand has surged alongside platform growth, and that creators increasingly reuse long-form content for audio clips and social formats in response to those viewing patterns from the same source.
Good repurposing starts by isolating the part of the content that carries the idea. In many cases, that’s the audio first, visuals second.
If you’ve ever pulled a quote from a long interview and turned it into a vertical clip, you already know this intuitively. The spoken line does the heavy lifting. The visual layer supports it.
It saves effort without making the content feel recycled
The strongest creators don’t just make more. They get more mileage from what they already made.
Instead of recording a separate voice memo, re-reading a script, or rebuilding a clip from scratch, you can extract the original spoken segment and shape it for a new channel. That keeps the tone natural. It also preserves the energy of the original delivery, which is hard to fake on a second take.
A few strong use cases:
- Podcast republishing: Turn the spoken portion of a video interview into an audio-first episode.
- Audiograms: Use a clean quote plus waveform and captions for Instagram or LinkedIn.
- Trend-aligned clips: Pull a memorable line and pair it with a fresh visual edit for short-form platforms.
- Transcription workflows: Extract the track first when you need accurate text from a long recording.
Audio extraction is also a quality checkpoint
Separating audio forces you to inspect what you recorded. That’s useful because many creators don’t notice channel issues, low levels, or room noise until they isolate the track.
Once the audio is separate, you can fix it. You can remove hum, correct duplicated channels, normalize volume, and export the file in the format that fits the next step.
That’s the shift. Audio extraction isn’t just a technical utility anymore. It’s a repurposing move.
Choosing Your Audio Extraction Method
You recorded a solid video, pulled the audio with the first tool you found, and now the clip sounds thin in headphones or only plays on one side. That usually is not a recording problem. It is a method problem.
The right extraction setup depends on what happens after the export. A creator pulling a quote for TikTok, a marketer feeding speech into an AI clipping workflow, and a producer archiving long interviews need different things from the same source file. Choose for the outcome first, then for convenience.
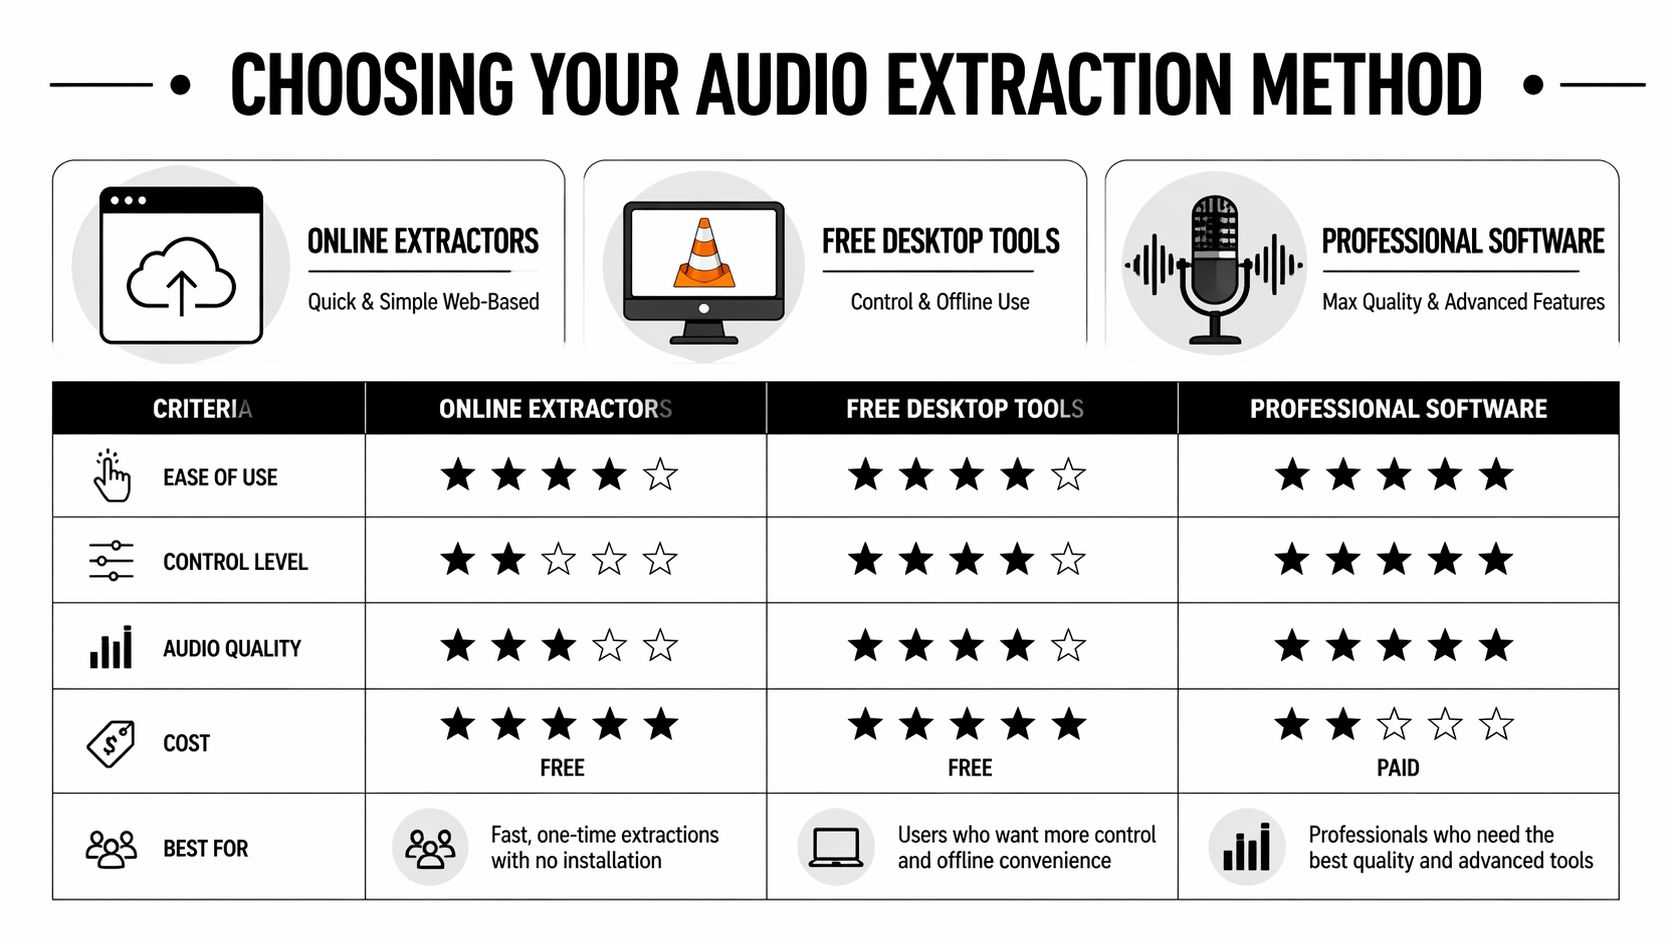
A simple way to choose
Use this table as a fast filter:
MethodBest when you needTrade-off
Online extractors
Fast results and no install
Less control over quality and file handling
Free desktop tools
More precision without paying
A slightly slower setup
Professional software
Batch workflows, multi-track handling, export control
More complexity or cost
Mobile apps
Quick edits from footage already on your phone
Fewer cleanup options
That choice matters because extraction is rarely the final step.
If you need a podcast clip, keep the audio as close to the original as possible and avoid unnecessary re-encoding. If you need a short-form voice-led post, speed can win, but only if the export still sounds clean on phone speakers and earbuds. If you are preparing footage for an AI workflow, trim the source first with a video trimmer for shorter, cleaner inputs, then extract only what the tool needs.
Match the tool to the outcome
Each method creates a different kind of friction later.
- For a podcast clip: Prioritize WAV or another high-quality export, especially if you plan to denoise, level, or master the file later.
- For a TikTok, Reel, or Shorts voice segment: Fast extraction is fine, but check loudness and channel balance before posting. Platform compression will expose problems quickly.
- For AI repurposing tools: Clean speech matters more than fancy settings. Remove long silences, cut dead air, and avoid repeated exports that stack compression artifacts.
- For repeatable content operations: Batch processing and preset-based exports save time once you are handling multiple interviews, webinars, or creator files each week.
A common mistake is using the fastest tool for every job. Quick browser exports are fine for rough pulls. They are a weak choice when the audio will be edited again, clipped into multiple posts, or turned into an asset you plan to reuse for weeks.
Don’t ignore channel problems
Channel handling is where basic guides usually stop too early.
Some cameras and screen recorders produce two-channel mono, where both sides carry the same signal. Others capture speech on one side and leave the other side weak or empty. Creators using quick-export tools often notice this only after the file hits headphones, a podcast app, or a social edit.
The fix starts with inspection. If the extracted track sounds hollow, oddly wide, or one-sided, check whether the file should stay stereo, be split into separate channels, or be mixed down to mono before anything else. That one check can prevent bad sounding reposts, failed AI transcripts, and shorts that feel cheap even when the video looks polished.
Practical rule: If speech is the point of the clip, verify channel behavior before you normalize, denoise, or convert formats.
A quick decision checklist
Use this before you pick a tool:
- Need it in minutes: Choose an online extractor or mobile app.
- Need cleanup after extraction: Use Audacity or another desktop editor.
- Need the original audio stream untouched: Use FFmpeg or a professional editor.
- Working with interviews or camera audio: Check mono versus stereo before publishing.
- Handling lots of files repeatedly: Pick a batch-friendly workflow early.
A good extraction method does more than pull sound out of a video. It gives you an audio file that is ready for the next job, whether that is a podcast cut, a viral soundbite, or an AI repurposing workflow.
Free Desktop Tools for Precise Control
A lot of creator workflows break at the handoff. The video looks fine, but the exported audio is too compressed for a podcast teaser, one channel is weak, or the file needs cleanup before an AI clipping tool can do anything useful with it.
Free desktop tools solve that middle layer well. They give you more control than a browser-based extractor, without pushing you into a full post-production setup.
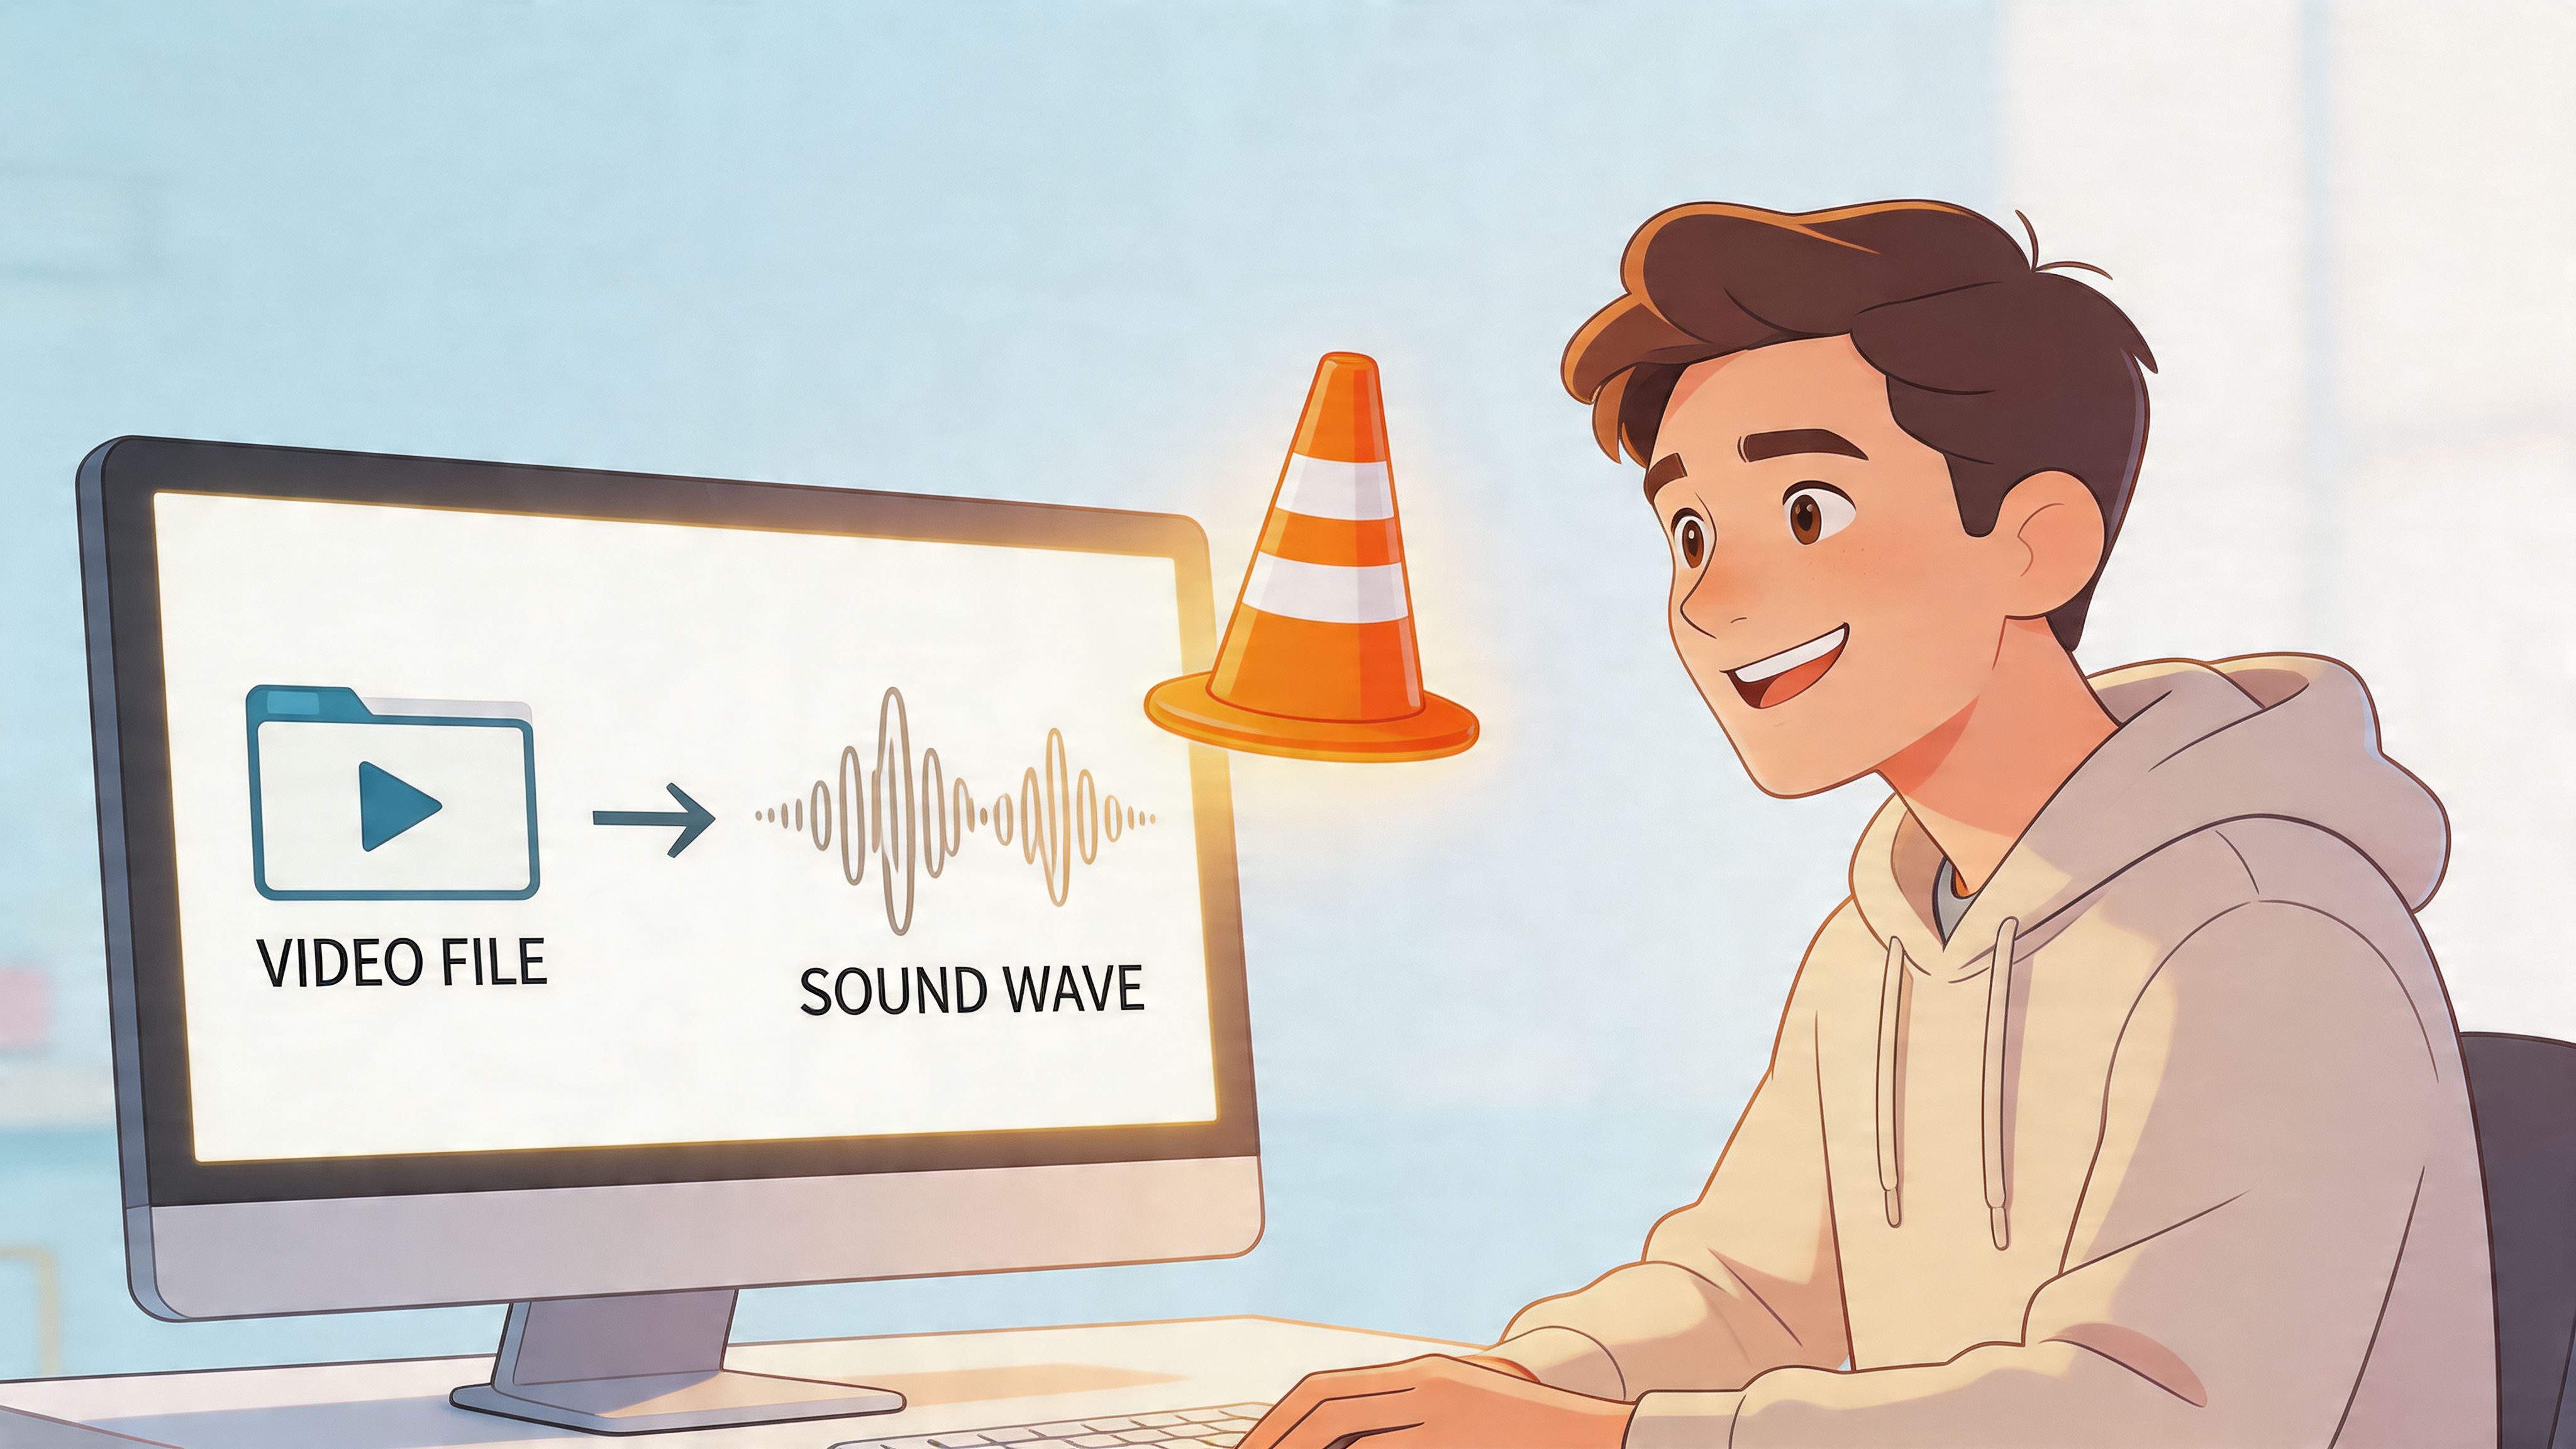
Using VLC for fast extraction
VLC is the practical pick when the job is simple. Get the audio out, choose a common format, move on.
It works well for creator tasks like exporting dialogue from a tutorial, pulling audio from a webinar for transcription, or making a rough sound file you plan to turn into a TikTok voice clip later. If you already know the recording is clean, VLC saves time.
VLC workflow
- Open VLC.
- Go to Media then Convert / Save.
- Add your video file.
- Click Convert / Save again.
- Under Profile, choose an audio format such as MP3 or another audio-only preset.
- Pick a destination filename.
- Start the conversion.
That gets you a usable file fast.
The trade-off is control. VLC is good at extraction, but not much else. It will not help much with channel repair, detailed listening, noise cleanup, or preparing spoken audio for high-retention clips where clarity needs to be tight.
If you only need one moment from a longer recording, trim first so you are not exporting ten minutes to use twenty seconds. This online video trimmer is a quick way to cut the source before extraction.
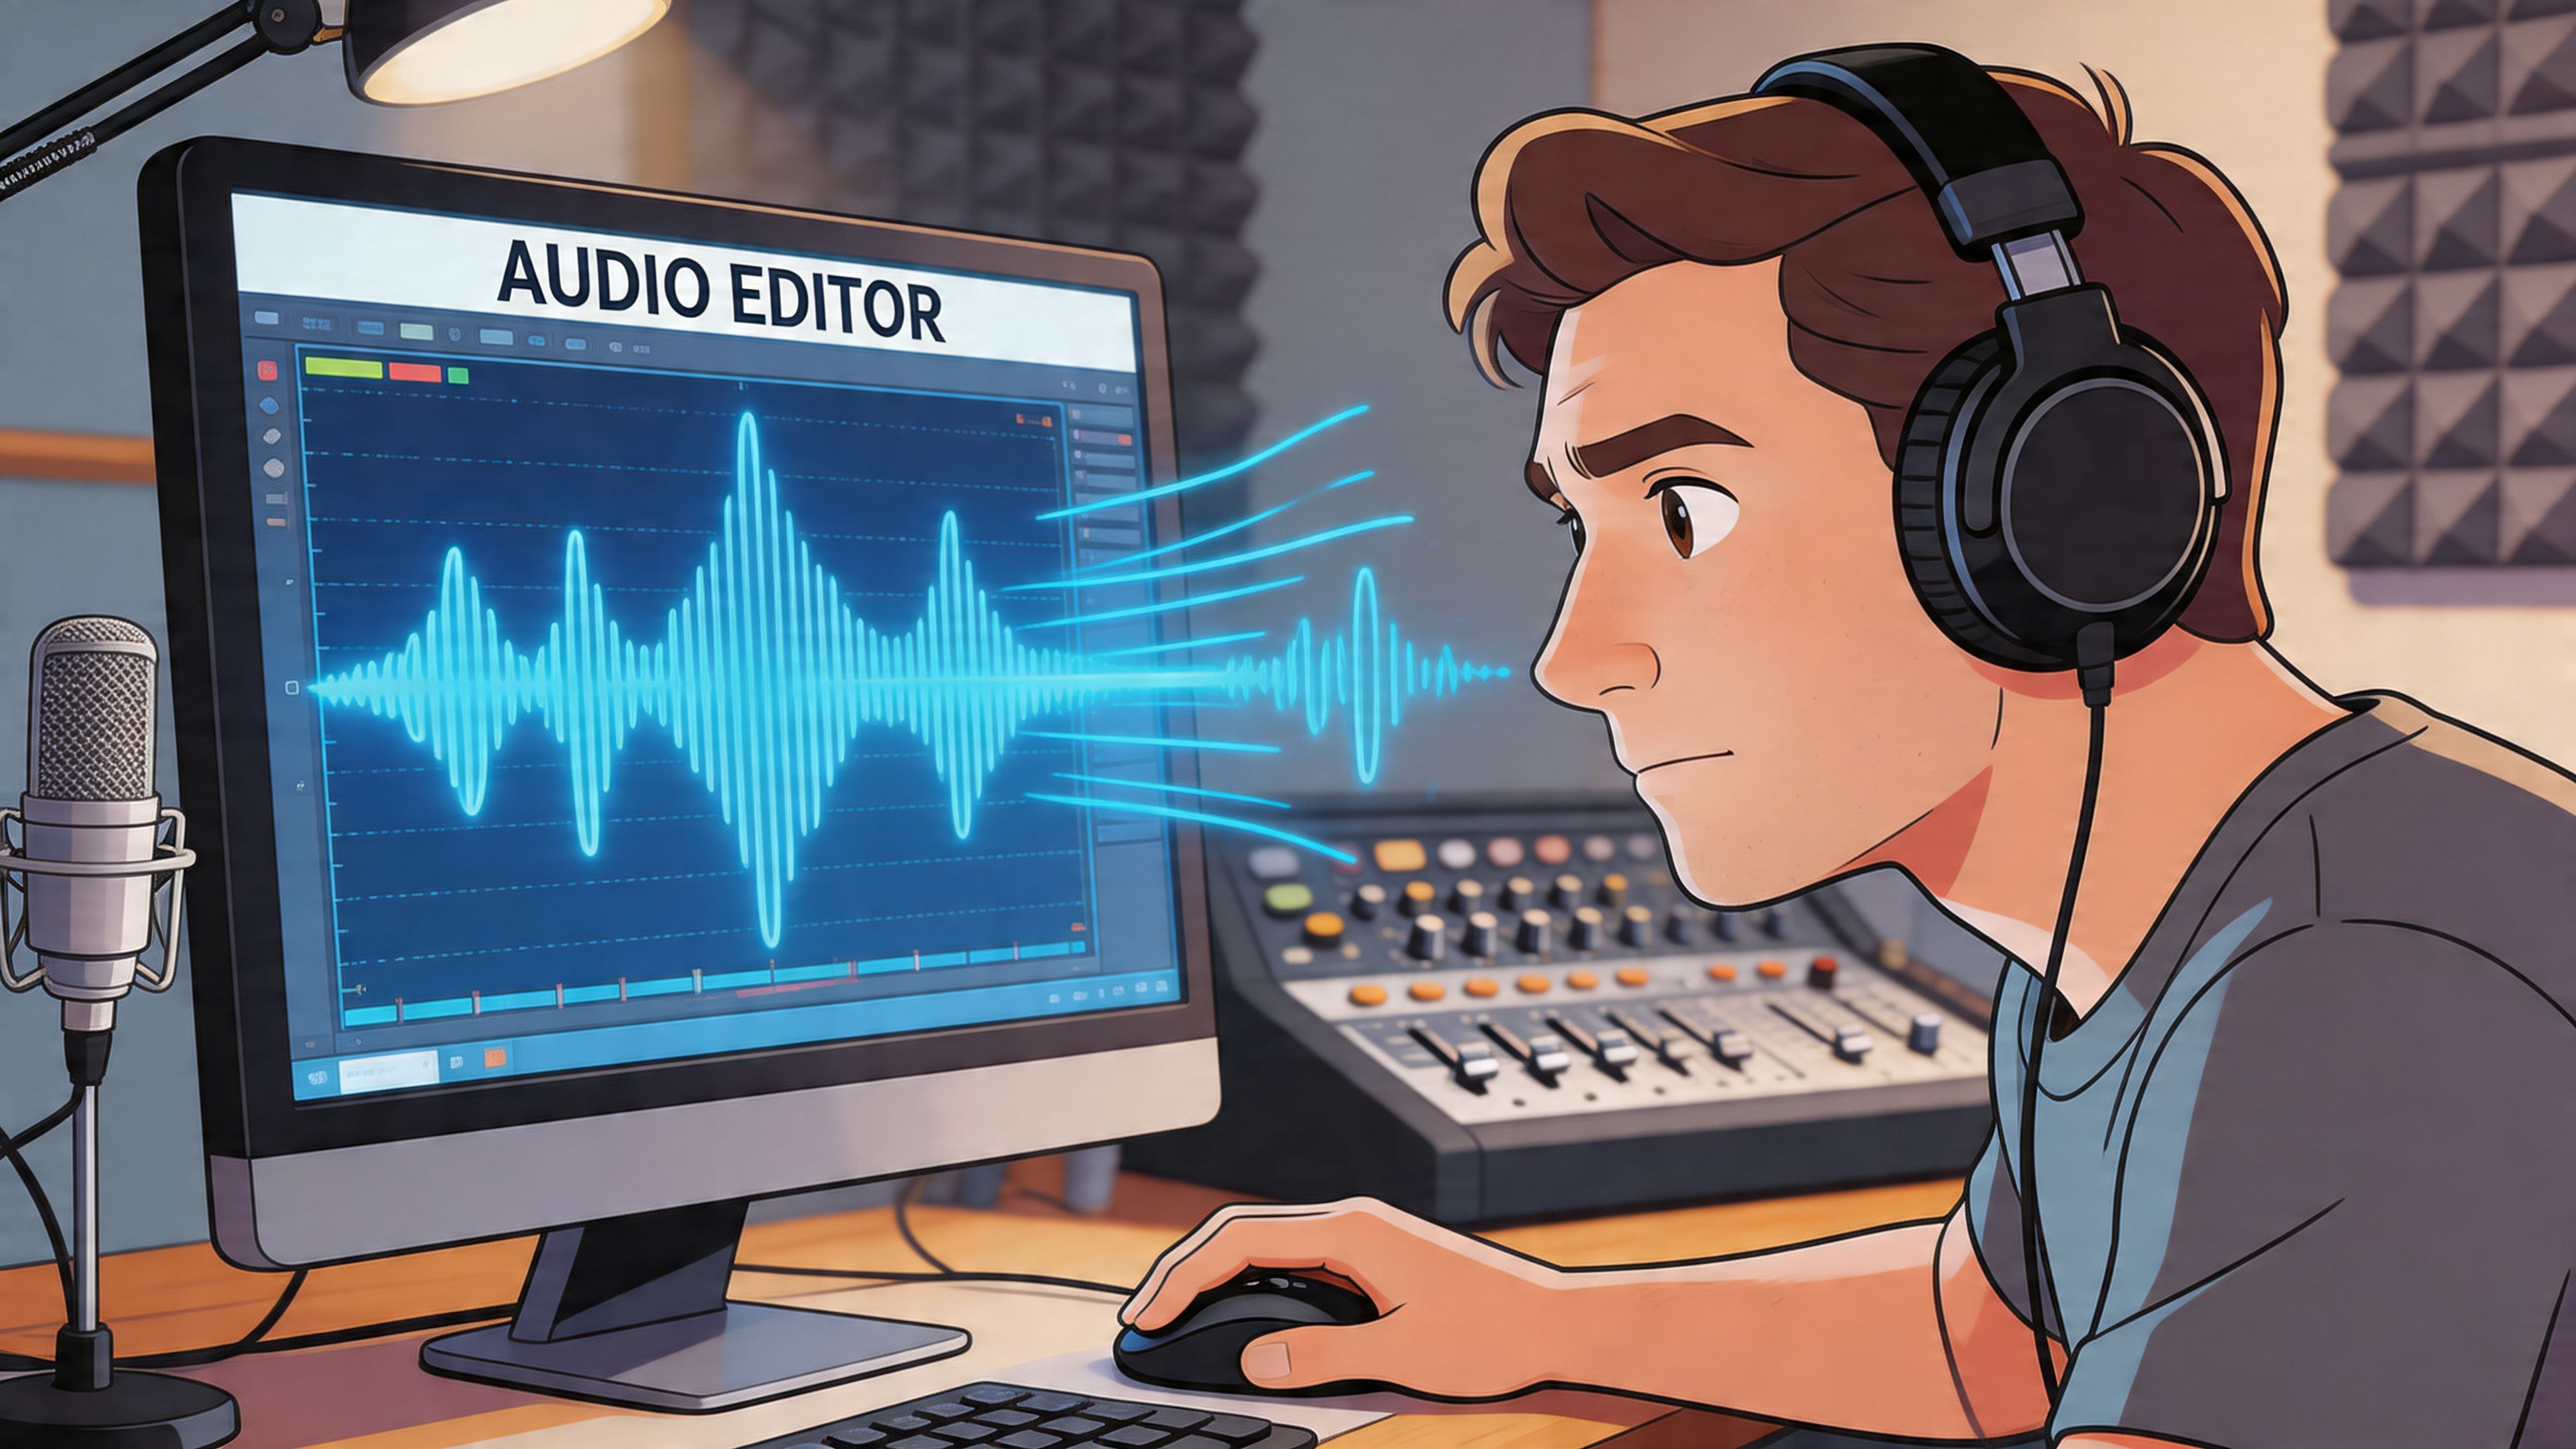
Audacity gives you extraction plus cleanup
Audacity is the better choice when the audio needs inspection before you reuse it. You can import the video, pull the sound into the project, listen closely, and fix common problems in the same session.
That matters if the end goal is repurposing. A podcast clip needs cleaner speech than a casual archive file. A TikTok sound should start strong and stay consistent. Audio headed into an AI workflow also benefits from fewer distractions, cleaner levels, and one clear voice track. If you want a stronger post-extraction editing process, this guide to a pro workflow for editing audio is a useful companion.
Audacity workflow
- Install and open Audacity.
- Import your video file.
- Let Audacity extract the audio track into the project.
- Listen through once before making edits.
- Check whether the track is true stereo, duplicated mono, or one usable channel plus one weak or empty channel.
- Export to WAV if you want editing flexibility, or MP3 if file size matters more.
That first listen is where the main work starts.
Creators often discover the file is technically stereo but functionally not. Camera audio may duplicate the same voice on both sides. Lavalier recordings sometimes land harder on one channel than the other. Screen recordings can carry low-level hum that is easy to miss on laptop speakers and obvious everywhere else.
Fixing two-channel mono in Audacity
This is one of the highest-value checks in the whole process.
If both channels are carrying the same speech, convert to mono and keep the cleaner result. If one side is weak or empty, split the stereo track, keep the good channel, and discard the bad one. That reduces confusion later and gives you a cleaner base for captions, transcripts, and social edits built around spoken content.
For repurposing, mono is often the right call for voice-led clips. It keeps the file simple, avoids weird headphone playback, and tends to behave better once you start trimming, captioning, and exporting for multiple platforms.
Here’s a walkthrough you can reference while following along:
Cleaning up noise and levels
Audacity becomes more useful after the audio is separated because you can make small corrections that improve reuse across formats.
Start with noise reduction only if the background problem is steady, such as fan noise, room tone, or low HVAC rumble. Capture a short noise profile, apply a light pass, and listen back. Heavy reduction can make speech sound brittle or watery, which hurts shorts, podcast clips, and AI transcription quality.
A simple cleanup routine works well:
- Find a clean silent segment: Use a part of the recording where only background noise is present.
- Capture the noise profile: Sample that section in Noise Reduction.
- Apply a restrained setting: Clean the file without stripping the natural tone from the voice.
- Normalize after cleanup: Bring levels into a more consistent range before export.
- Check with headphones: Problems in sibilance, channel balance, and artifacts show up faster there.
What each tool is best for
Use VLC when speed matters more than repair.
Use Audacity when the extracted file still needs judgment. That includes spoken-word clips, creator interviews, commentary tracks, and any audio you plan to reuse in more than one format.
That distinction matters because repurposing punishes sloppy exports. A file that sounds acceptable inside the original video can feel cheap once it becomes a standalone podcast excerpt, a TikTok sound, or the source audio for an AI clipping workflow. Free desktop tools give you enough control to avoid that problem without slowing down your whole publishing process.
Advanced Extraction with Pro Tools
A creator pulls a strong 20-second quote from a recorded interview, turns it into a podcast teaser, then sends the same audio into an AI clipping tool for shorts. That workflow falls apart fast if the extraction step already baked in quality loss, collapsed channels, or exported the wrong codec.
Professional tools earn their keep when the audio has more than one job. If you need the original stream intact for archiving, clipping, transcription, or later remixing, use a method that preserves options instead of forcing a quick export.
FFmpeg for lossless extraction and batch work
FFmpeg is the better choice when precision matters more than interface. It copies the audio stream directly out of the video container, which is exactly what you want if the source already contains clean AAC audio and you do not want another encode before that file becomes a podcast pull quote, a reusable TikTok sound, or source material for AI tools.
The key command is:
ffmpeg -i input.mp4 -vn -acodec copy output.aac
What the command does
-i input.mp4selects the source file-vnremoves the video stream from the output-acodec copycopies the existing audio without re-encodingoutput.aacsaves the file in a container that matches the copied stream
That last point matters. copy only works cleanly when the output extension matches the source audio codec. If your video contains AAC, .aac or .m4a usually makes sense. If it contains PCM audio, export to WAV instead. Check first, then extract. That habit prevents the failed exports and playback issues that waste time later.
A few practical upgrades make FFmpeg much more useful in creator workflows:
- inspect streams with
ffprobebefore exporting - map a specific track if the file has multiple audio streams
- trim a quote or hook at extraction time if you only need a short segment
- batch process webinar, interview, or course files with a simple script
FFmpeg is especially good for archive-heavy work. A podcaster saving original interview audio, a social team clipping multiple episodes, or a creator feeding long-form content into AI software will usually get a cleaner, more repeatable result here than with manual exports.
Premiere Pro for editorial extraction
Premiere Pro fits a different kind of job. Use it when extraction is part of active editing, not just file handling.
If you are already reviewing takes, placing markers, testing hooks, or cutting multiple versions from one master video, Premiere keeps the decision-making in one place. You can isolate the exact line you want, confirm timing against the visuals, then export only the usable audio range.
A practical Premiere workflow looks like this:
- Import the source video through Media Browser.
- Add it to a sequence.
- Unlink the audio and video if you need to treat them separately.
- Set In and Out points around the exact section you want.
- Open Export.
- Disable video export.
- Export audio in WAV, MP3, or AAC based on the destination.
- Keep the source sample rate when possible to avoid unnecessary conversion.
Premiere also gives you better context for repurposing decisions. You can hear the line in sequence, judge whether the pacing works for a short clip, and decide whether a raw WAV is better for a podcast editor while an AAC or MP3 is fine for social posting. That context is hard to replicate in standalone extraction tools.
Which one should you use?
GoalBetter fit
Preserve the original stream from lots of files
FFmpeg
Pull one precise section while editing a video
Premiere Pro
Automate repeat extraction jobs
FFmpeg
Prep audio alongside a multi-asset edit
Premiere Pro
The trade-off is simple. FFmpeg gives you control and scale. Premiere gives you editorial judgment and speed inside an existing edit.
One more point creators often miss. Extraction is not the end of the workflow. It sets up everything that happens next. If the audio is headed toward podcast publishing or spoken-word cleanup, this guide to a pro workflow for editing audio is a strong follow-up because it focuses on cleanup, leveling, and finishing after the file is out of the video.
Quick and Easy Online and Mobile Solutions
You spot a strong line in a webinar recording at 9:10 a.m. By lunch, you want that line as a TikTok sound test, a clean audio clip for a podcast teaser, or a spoken segment ready for an AI repurposing tool. That is where online extractors and mobile apps earn their place. They are built for speed, and speed matters when the goal is publishing while the moment is still relevant.
These tools are not the best choice for archive-quality work. They are the fastest route from video to usable audio when you need to move now.
How browser and phone-based extraction usually works
The workflow is usually simple:
- Upload the video or import it from your phone.
- Pick an audio format such as MP3, AAC, or WAV.
- Export and send the file into your next tool.
That simplicity is the point. If you are clipping a creator interview for social, testing a hook for Reels, or pulling dialogue for turning an existing video into YouTube Shorts, a quick export can be enough to keep production moving.
Use online tools when speed matters more than control
Browser-based extractors are a good fit for a few specific jobs:
- pulling one quote for a same-day social post
- getting audio off a file on a borrowed or locked-down computer
- creating a scratch track for captions, transcripts, or AI clipping
- testing whether a clip has enough audio value to repurpose further
I use them early in the workflow, not at the finish line. That distinction matters.
If the audio is headed into a polished podcast episode, a monetized YouTube upload, or paid creative, convenience tools can create cleanup work later. Many of them compress by default, hide export settings, or re-encode without making that obvious. For rough cuts, that is acceptable. For a clip you plan to reuse across several platforms, it is often smarter to treat the first export as a draft.
Mobile apps are strongest when your whole workflow lives on your phone
Creators who film, edit, and publish on mobile do not always need to touch a desktop app. A decent phone workflow can get you from recorded video to posted asset fast, especially for talking-head content, reaction clips, and voice-led tutorials.
The better mobile apps usually let you:
- import directly from the camera roll
- detach the audio track in one tap
- export to a common format
- pass the file into a captioning, editing, or scheduling app
That makes mobile extraction useful for fast repurposing. You can pull a strong spoken moment from a long video, clean the beginning and end, then test it as a voiceover, a sound bed, or a narration layer for short-form content.
The trade-offs creators should check before publishing
Fast extraction tools save time, but they also hide details that affect performance later.
- Format limits: Some apps only export compressed files, which is fine for social drafts but weaker for editing and cleanup.
- Re-encoding: The exported file may sound slightly softer or thinner than the original track.
- Metadata loss: File names, tags, and embedded details may not carry over.
- Channel issues: If the original audio has left-right problems, many quick tools will not warn you.
The practical rule is simple. If the clip is disposable, optimize for speed. If the clip might become a podcast snippet, a reusable viral sound, or source material for AI editing, keep the cleanest version you can and avoid repeated conversions.
Quick tools help you get to the next step faster. They just should not make the final quality decision for you.
Turning Your Audio into Viral Shorts with Klap
Extraction is only the first half of the job. The true value comes from turning that audio into something people will finish watching.
For short-form content, audio quality affects everything downstream. It affects how clean captions are, how strong the hook feels, and whether the clip sounds polished enough to hold attention in a crowded feed.
Quality matters before clipping starts
A lot of creators lose quality before they even start repurposing. They extract badly, re-encode too aggressively, or work from a low-grade export instead of the cleanest source available.
That matters because tutorials often skip the damage caused by repeated conversion. Verified data notes that re-encoding audio can cause a 15-25% fidelity loss, and that 70% of short-form video drop-offs are due to bad sound, according to this verified source.
That’s the practical reason to care about extraction quality. A weaker source file doesn’t just sound worse. It can make every later step less effective.
Prepare the audio before repurposing
Before you turn a long recording into multiple shorts, do a quick prep pass.
- Keep the cleanest source you have: If you can extract without re-encoding, do that first.
- Fix channels early: Don’t build clips on top of broken left-right mapping.
- Normalize levels: Spoken audio should feel even and easy to hear.
- Trim dead space: Remove long pauses at the beginning and end.
- Choose the right delivery format: Use a high-quality export for editing, then create lighter versions later if needed.
This prep work is small, but it changes the result. A polished spoken line feels more intentional, especially when paired with captions and tight framing.
The repurposing mindset that works
When creators struggle with shorts, it’s often not because they lack material. It’s because they treat the long video as one asset instead of many possible moments.
A better approach is to listen for:
- the clearest takeaway
- the strongest emotional reaction
- the most surprising line
- the quote that stands on its own without full context
Those moments usually live in the audio first. Once you isolate them, the visual edit becomes much easier.
If you want a deeper playbook for that process, this guide on how to create YouTube Shorts from existing video is useful because it focuses on turning finished long-form content into shorter social formats.
The best short clip often isn’t the most visually impressive part of the original video. It’s the part people would repeat out loud to someone else.
What works in practice
For podcast interviews, webinar recordings, and talking-head videos, a good workflow usually looks like this:
StageWhat to focus on
Extraction
Preserve quality and fix obvious channel issues
Cleanup
Reduce noise, normalize volume, trim excess silence
Selection
Pull lines with a clear hook or standalone value
Repurposing
Add captions, crop for vertical, tighten pacing
That sequence works because each step protects the next one. Clean audio helps the spoken idea land. And when the spoken idea lands, the short has a much better shot at holding attention.
Legal Guidelines and Troubleshooting Audio Issues
Getting audio off a video is technically easy. Using that audio responsibly is where creators need more discipline.
If it’s your own recording, the legal side is straightforward. If it’s someone else’s video, a licensed track, a movie scene, or a creator clip from another platform, the situation gets more complicated very quickly.
Use audio you have the right to use
The safe baseline is simple. Extract and reuse audio you created, recorded, commissioned, or clearly licensed.
Fair use can apply in some contexts, but creators often overestimate how much protection that gives them. Commentary, critique, parody, and education can matter, but none of those labels automatically make a reuse safe.
A practical habit is to assume platforms will inspect audio aggressively. If you want a better sense of how detection works, this overview of what audio fingerprinting is gives useful context on how systems identify matching audio across uploads.
Fixing common extraction problems
Once the rights are clear, the next challenge is usually cleanup.
If the audio is too quiet
Start with normalization. Don’t jump straight into heavy compression if the basic issue is just low level. Bring the track up cleanly, then decide whether it still needs dynamic control.
If there’s background hum or hiss
Use noise reduction carefully. Sample the unwanted noise from a silent section if your editor supports that workflow, then apply a conservative pass. Too much reduction can make speech sound brittle.
If the audio only plays in one ear
Check channel mapping first. This is common with camera files that record one good channel and one empty one, or duplicate mono in a stereo container. Convert to a usable mono file if needed.
If the export sounds worse than the original
You probably re-encoded unnecessarily or chose a poor output setting. Go back to the cleanest extraction point and export once for the intended use instead of creating multiple generations.
Don’t troubleshoot by stacking effects randomly. Identify whether the problem is level, noise, channel mapping, or codec choice first.
A creator-safe checklist
- Rights first: Confirm you can use the source audio.
- Listen on headphones: Small issues show up faster.
- Inspect channels: Especially with camera and recorder files.
- Keep a master file: Save one clean version before platform-specific exports.
- Export intentionally: Match the file type to the actual publishing goal.
That combination keeps the workflow both safer and cleaner.
Frequently Asked Questions
Can I extract audio directly from a YouTube video?
If it’s your own video or you have permission to use it, yes, there are tools and workflows that can help you pull the audio from that source. The important part isn’t just whether it’s possible. It’s whether you have the right to do it and whether the resulting quality is good enough for repurposing.
What’s the best audio format after extraction?
It depends on what happens next.
- WAV is a strong choice for editing and archiving because it preserves quality well.
- AAC is useful when the source already contains AAC and you want a direct extraction path.
- MP3 is practical for lightweight sharing and quick publishing.
If you expect to edit the file more than once, keep a higher-quality master first and create smaller delivery copies later.
Why does my extracted audio sound weird in headphones?
The most common culprit is channel handling. Some video files contain duplicated mono inside a stereo track, or one channel may be blank. That can make the file sound off-center, doubled, or thin. Inspect the channels and convert to mono if that matches the original recording.
Will extraction reduce quality?
It can, but it doesn’t have to. Quality loss usually happens when you re-encode instead of copying the original audio stream, or when a quick web tool compresses the file during export. If you also want text from the spoken content after extraction, a dedicated podcast transcription tool can help turn clean audio into a more usable editing asset.
Should I use an online tool or desktop software?
Use an online tool when speed matters more than control. Use desktop software when the clip matters enough to clean properly, fix channels, or preserve the best possible source.
If you’re sitting on long interviews, webinars, podcasts, or YouTube uploads, Klap can help you turn those recordings into social-ready short clips faster, with AI-assisted selection, reframing, and captions built for vertical platforms.
