How to Do a Voice Over Like a Professional
Other
Getting a professional voice over right comes down to four things: your script, your recording space, your performance, and your audio editing. The whole game is about capturing clean, clear audio that actually connects with your audience, and that work starts long before you ever hit record.
Laying the Groundwork for a Flawless Voice Over
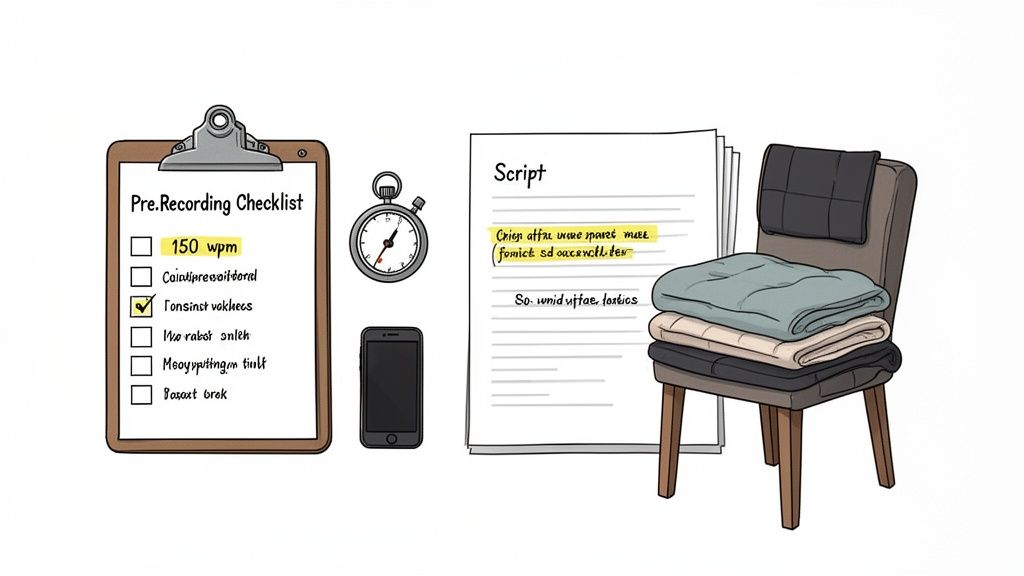
Before you even think about mics and software, you need to understand this: great audio is 90% preparation and only 10% performance. The effort you put in upfront has a massive impact on your final quality and can slash your editing time later. Think of this as your pre-flight checklist for getting pristine audio on the first take.
This whole stage is about controlling your variables. You want to stamp out as many potential problems as you can, from awkward script phrasing to the hum of your refrigerator in the background.
Adapt Your Script for Speaking
A script written for the page is not the same as a script written for the ear. Words that look perfect on screen can sound stiff and unnatural when spoken aloud. Your first job is to turn that written text into a natural, conversational flow.
Read your entire script out loud at least three to five times. You'll instantly catch sentences that are way too long, words that are clunky to pronounce, or phrases that just don't sound like a real person talking.
Pro Tip: Time yourself during one of your practice reads. The industry standard for a clear, easy-to-follow voice over is a speaking rate of about 150 words per minute (WPM). If you're blasting through it at 200 WPM, you risk losing over 30% of your audience's comprehension.
This isn't just about speed; it's about making sure your message actually lands. A slower, more deliberate pace works wonders, whether you're making a quick social clip or a detailed tutorial. For more tips on building great narratives, check out our other articles on content creation.
Create a Budget-Friendly Recording Space
You don't need a professional, sound-proofed studio to get clean audio. The real goal is just to minimize reverb (echo) and block out outside noise. Your biggest enemy is any hard, flat surface—walls, floors, desks—that bounces sound waves all over the place.
The solution is simple: surround yourself with soft, absorbent stuff.
- Pick a small room: A walk-in closet is the go-to for a reason. Less space means fewer surfaces for sound to bounce off.
- Use what you have: Hang thick blankets, towels, or duvets on the walls around where you'll be recording.
- Soften the floor: A plush rug or even a few pillows on the ground can make a huge difference in absorbing sound.
- Time it right: Record when your house and neighborhood are quietest. Avoid times with heavy traffic, noisy neighbors, or when the dishwasher is running.
It’s like building a little blanket fort. This "pillow fort studio" setup can absorb a surprising amount of echo and background noise, giving you a much cleaner track to work with from the start.
Identify Your Essential Starting Gear
Gear anxiety is a real thing, but you can get pro-level results without spending a fortune. While your phone's built-in mic isn't great (it picks up way too much room noise), a solid beginner setup is more accessible than ever.
For starters, you really only need a few key items:
- A decent USB Microphone: This is the most important piece of gear to invest in. A quality USB mic plugs right into your computer and is a massive step up in quality from any built-in option.
- A Pop Filter: This is the little screen that sits between you and the mic. It’s non-negotiable for blocking "plosives"—those harsh pops of air from "p" and "b" sounds that can completely ruin a good take.
- Headphones: Use closed-back headphones to listen to your audio as you record. This lets you hear exactly what the mic is picking up, so you can catch issues like mouth clicks or background hums in real-time instead of discovering them in post.
With a good script, a quiet space, and this basic gear, you have everything you need to start your voice over journey. Getting this prep work right makes the actual recording and editing process so much smoother.
Building Your Home Studio for Pro-Quality Audio
Alright, your script is ready and you've found a quiet room. Now comes the part that trips up a lot of creators: turning that space into a functional home studio. Many assume you need to spend a fortune to get professional-sounding audio, but that’s just not true.
The secret is focusing on the right things. With a few smart gear choices, you can get 80% of the quality for 20% of the cost. Our goal isn't to build a million-dollar recording palace—it's to control your environment and capture a clean, rich vocal that doesn’t sound like it was recorded in a bathroom.
This all comes down to choosing the right mic for your voice, placing it correctly, and killing the echo that screams "amateur."
Choosing Your Microphone: Condenser vs. Dynamic
Your microphone is the single most important piece of gear you'll buy. The two main types you’ll run into are condenser and dynamic mics, and they couldn’t be more different.
A condenser microphone is the studio standard for a reason. It's incredibly sensitive, capturing all the subtle details and high-frequency sparkle in your voice. But that sensitivity is a double-edged sword. It will also pick up the neighbor's dog barking, your computer fan humming, and every bit of reverb from an untreated room.
On the flip side, a dynamic microphone is far less sensitive, which makes it a beast at rejecting background noise. They're the go-to for live shows, radio, and podcasting for a reason. If you’re recording in a less-than-perfect room, a dynamic mic is your best friend, as it isolates your voice from the surrounding chaos.
- Go with a condenser if: You have a genuinely quiet, treated room and want to capture every last nuance of your performance.
- Go with a dynamic if: Your recording space has some background noise or echo, and you need your voice to cut through cleanly.
Mastering Your Mic Placement
Just having a great mic isn't enough. Where you put it is just as crucial for getting a professional voice over. Bad placement is a fast track to harsh, thin vocals or distracting mouth noises.
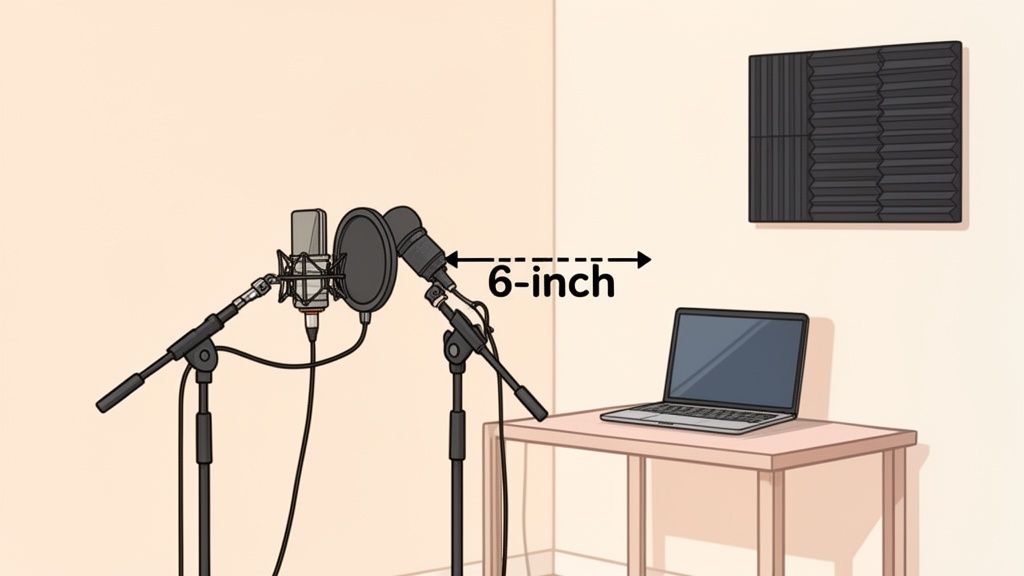
I live by the "6-inch rule" for mic placement. Position the mic about 6 inches away from your mouth. This distance hits the sweet spot, capturing vocal warmth without being blasted by plosives or sibilance.
To take it a step further, avoid speaking directly into the mic’s center. Instead, aim it slightly off to the side, toward the corner of your mouth. This off-axis technique is a pro move that prevents harsh "p" and "b" sounds (plosives) and sharp "s" sounds (sibilance) from hitting the mic’s diaphragm head-on.
And speaking of plosives, a pop filter is the best $10 you will ever spend on your setup. This simple mesh screen sits between you and the mic, breaking up the burst of air from your mouth. It’s a non-negotiable tool for clean takes.
Acoustic Treatment on a Budget
Echo, or reverb, is the number one enemy of clean voice over audio. It's the sound of your voice bouncing off hard surfaces—walls, desks, floors—creating that hollow, unprofessional vibe. You can start by surrounding yourself with pillows and blankets, but a small investment in actual acoustic treatment makes a world of difference.
The main goal is absorption. You want to cover the surfaces directly in front of and behind you.
- Acoustic Foam Panels: These are literally designed to eat sound frequencies. Placing a few panels on the wall behind your mic and another set behind you can slash reflections.
- A Portable Vocal Booth: This is a foam-lined shield that wraps around your microphone. It creates a mini-treated space right where you need it most, and you can pack it away when you're done.
Setting up a proper home studio does have an upfront cost, but you'll hear the return on investment immediately. While some independent professionals spend an average of $5,000 on their studios, you can get broadcast-ready quality for a fraction of that by focusing on these core elements. With top voice actors earning significant fees, this initial investment pays for itself by letting you produce audio that can compete. You can learn more about voice over industry statistics and earnings over at WIFTalents.com.
Mastering Your Vocal Delivery and Performance
With your studio ready, it’s time to focus on the most important instrument you have: your voice. The best microphone and acoustic treatment in the world can't save a flat, uninspired performance. This is where you learn to do a voice over that truly connects, transforming your delivery from simply reading words to performing a script.
Professional performance isn’t about faking a "radio voice." It’s about authenticity, control, and matching your energy to the content. We’ll get into the techniques that separate a good read from a truly captivating one, helping you deliver with confident clarity.
The Foundation of Vocal Control: Breathing
Everything in voice over starts with the breath. If your breath control is shaky, your voice will be too. You'll find yourself running out of air mid-sentence or lacking vocal power. The goal isn't to take huge, gulping breaths, but to breathe deeply and efficiently right from your diaphragm.
Here’s an actionable exercise to connect with your diaphragm:
- Lie flat on your back and place a book on your stomach.
- Breathe in deeply through your nose, focusing only on making the book rise. Your chest and shoulders should stay pretty still.
- Breathe out slowly through your mouth, feeling the book lower.
Practicing this for just a few minutes before you record builds crucial muscle memory. This kind of diaphragmatic breathing gives you a steady stream of air, which allows for longer, more controlled sentences and a much richer vocal tone.
Eliminating Distracting Mouth Noises
Nothing screams "amateur" faster than a recording full of mouth clicks, smacks, and other distracting noises. These little sounds can completely pull a listener out of the experience. The good news? They are largely preventable with a bit of prep.
- Hydrate Properly: Drink plenty of room-temperature water before and during your recording session. Steer clear of sugary drinks, caffeine, and dairy—they can all create phlegm and make mouth noise worse.
- Try the Green Apple Trick: Taking a few bites of a tart green apple can help clear your mouth of the excess saliva that causes clicks. It sounds strange, but it’s a classic voice actor trick for a reason.
- Warm-Up Your Mouth: Just like any other muscle, your mouth, tongue, and lips need a warm-up. Do a few simple tongue twisters or lip trills (those "motorboat" sounds) to get everything loose and ready to articulate clearly.
A clean recording is a respectful recording. By minimizing these distracting sounds, you show the listener that you value their attention and want to provide the clearest, most professional experience possible.
Finding Your Authentic Voice
The days of stiff, overly formal narration are long gone. Today’s audiences crave authenticity. They want to hear a real person talking to them, not an announcer reading at them. This means finding a conversational, natural delivery that still sounds polished and professional.
This shift is so significant that we're seeing a clear industry trend toward human authenticity. As brands aim for a more natural "neutral tone," many are actively choosing human narration over robotic-sounding AI voices. In fact, some projections show that brands will reject AI 40% of the time for re-voicing content with human talent by 2026. This creates a huge opportunity for creators who master a genuine delivery. You can explore more voice over trends at WIFTalents.com.
To find this authentic tone, stop thinking about "performing" and start thinking about "communicating." Just imagine you're explaining the topic to a single friend sitting across from you. This simple mental shift helps you relax, inject your natural personality, and deliver the lines with genuine intent.
If you're serious about taking your vocal skills to the next level, investing in professional guidance can make a world of difference. For those ready to take that step, this practical guide to finding adult voice lessons is an excellent place to start. A good coach provides personalized feedback you simply can't get from practicing alone.
Editing and Mastering Your Audio Like a Pro
Getting a clean recording is half the battle, but post-production is where the real magic happens. This is where you take that raw audio and polish it until it shines, turning a good take into a professional, broadcast-ready voice over.
This isn't about slapping on a bunch of weird effects. It’s about subtle enhancements—cleaning up the noise, balancing the volume, and shaping the tone. The end result is a crisp, clear, and rich voice over that’s ready to be paired with your video clips.
The Cleanup Phase: Your First Editing Pass
Before you start boosting frequencies or adding effects, you need to clean up the timeline. Think of it as prepping a canvas before you start painting. This first pass is all about removing anything that doesn't belong, giving you a solid foundation to build on.
Your main targets are background noise, mistakes, and awkward silences.
- Background Noise: Every recording has some ambient "room tone." Your goal is to reduce it without making the audio sound sterile or artificial.
- Mistakes & Flubs: This is your chance to cut out any coughs, stumbles over words, or long, unnecessary pauses. A clean cut can make it sound like you nailed it in one go.
- Awkward Gaps: Long silences between sentences can kill the momentum. Tighten them up to create a more natural, conversational flow.
This cleanup stage is non-negotiable. A key benchmark for pro audio is getting your noise floor below -60dB, which is achievable with the noise reduction tools in software like Audacity. When your audio is this clean, you can be sure that you aren't amplifying distracting hiss and hum later on. If you're curious about more industry benchmarks, WIFTalents.com offers some great statistical reports on the voice over world.
Adding Presence and Clarity with EQ and Compression
Once your audio track is clean, it's time to give it that professional punch and richness. This is where two essential tools come into play: Equalization (EQ) and Compression. When used correctly, they're the secret sauce behind that classic voice over sound.
Equalization (EQ) is all about shaping the tonal balance of your voice. Think of it like a very precise set of tone controls. You can boost certain frequencies to add presence or cut others to remove muddy or harsh sounds. A little boost around 2-4 kHz, for instance, can bring out clarity, while a small cut below 80 Hz can get rid of low-end rumble from your desk or mic stand.
Compression evens out the volume of your voice. It automatically lowers the loudest parts and raises the quietest ones, smoothing out the dynamics. This makes your voice over much more pleasant and easier to listen to, as your audience won't be constantly reaching for the volume knob.
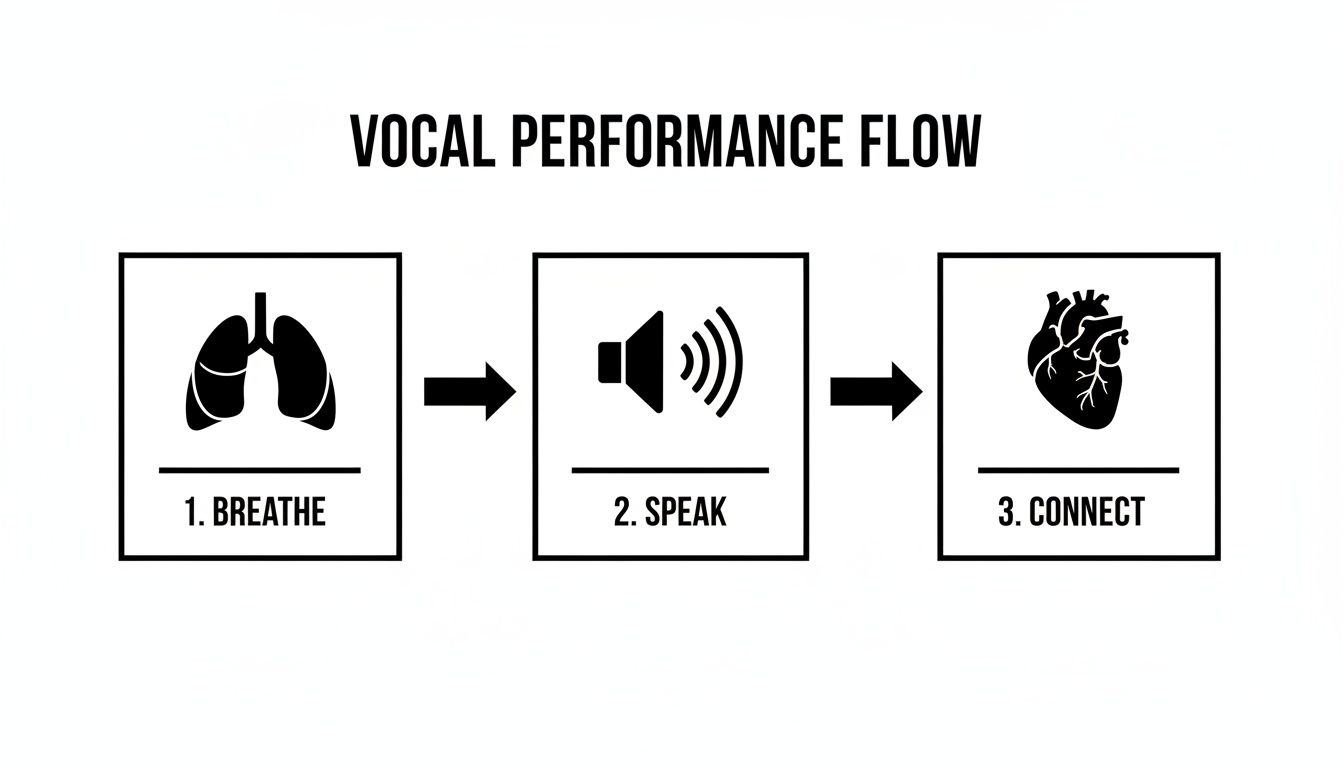
This whole process really starts with your performance. The diagram above nails it—great audio begins with proper breath support, clear speech, and a genuine connection to what you're saying. Editing just enhances what's already there.
To help you keep track of these processing steps, here's a quick reference table with common target settings.
Key Audio Editing Steps and Target Levels
This table outlines the essential audio processing steps for a professional voice over, with recommended settings to guide you.
Processing StepPurposeTarget Setting / Goal
Noise Reduction
Remove background hiss and hum.
Achieve a noise floor below -60dB.
EQ (High-Pass Filter)
Cut out low-frequency rumble.
Apply a gentle cut below 80-100 Hz.
Compression
Even out volume for consistency.
Aim for 3-6dB of gain reduction on peaks.
EQ (Presence Boost)
Add clarity and articulation.
Add a subtle boost of 1-3dB around 2-5 kHz.
Normalization
Bring the final audio to a standard level.
Normalize the final track to -1dB or -3dB.
Remember, these are just starting points. The best settings will always depend on your specific voice and recording environment, so use your ears and adjust accordingly.
The key to good mastering is subtlety. Your listeners shouldn't hear the EQ or compression; they should just hear a great-sounding voice. If your audio starts to sound processed or unnatural, you’ve probably pushed the effects too far.
Normalization: The Final Polish
The very last step in your audio chain is Normalization. This is a simple but crucial process. It scans your entire audio file, finds the loudest part, and adjusts the overall volume so that this peak hits a specific target level, usually just below 0dB (like -1dB or -3dB).
Normalization guarantees your final audio is at a healthy, standard volume without any digital distortion or clipping. It makes your voice over ready for any platform, from YouTube to a podcast player, ensuring it comes through loud and clear.
For creators repurposing podcasts or long videos, getting this clean audio is just the start. Having a clean transcript can make the entire clip creation process even faster. You can learn more about our podcast transcription tools and see how they fit perfectly into this workflow.
Integrating Your Voice Over with Video Content
You’ve polished your audio until it’s crystal clear. Now comes the fun part: pairing that professional voice over with your video. This is where your hard work behind the mic translates into higher engagement and, ultimately, more conversions.
Syncing audio to video is more than just a technical step—it’s where the magic happens. A well-timed voice over can clarify a confusing visual, inject emotion into a scene, or steer a viewer’s focus right where you want it. This is especially true when you're turning long-form content into punchy clips for social media.
From Long-Form Audio to High-Impact Shorts
One of the smartest content strategies is taking a single, long recording—from a podcast, webinar, or tutorial—and using it to create a whole library of short-form videos. This approach squeezes every drop of value out of the time you spend recording. The trick is to stop seeing your long recording as one asset and start seeing it as a goldmine of soundbites.
Here’s an actionable workflow to get you started:
- Pinpoint the Key Moments. Listen back to your full recording and hunt for the gems. You're looking for strong opinions, actionable advice, surprising stats, or a great story. These are your future clips.
- Generate the Visuals. You don't need to shoot new footage for every clip. Use AI-powered tools to quickly generate relevant B-roll or animated visuals that complement your audio snippets.
- Layer and Sync. Bring your polished audio and the new video clip into an editor. Line up your voice over with the most powerful visual moments to really drive your points home.
With this method, one hour of recording can easily become dozens of unique, shareable videos for TikTok, Instagram Reels, and YouTube Shorts. It’s an efficient way to scale up your content without burning out.
Enhancing AI-Generated Clips with Your Voice
AI video tools are great for churning out visually interesting clips in minutes. But they become truly powerful when you combine them with a professional human voice over. A real voice adds a layer of authority, personality, and trust that AI voices just can't replicate yet.
If you’re using a tool like Klap to find viral moments in your long videos, you might notice the original audio isn't always perfect for a standalone clip. The fix is simple: export the AI-generated video without its original audio, then layer your newly recorded, polished voice over on top.
This technique is a game-changer for explainer videos. In fact, adding a professional voice over to AI-generated clips can seriously boost engagement. For explainer videos, a high-quality voice over can lead to 25% higher conversions because it builds clarity and trust with the viewer.
A great voice over acts as the connective tissue between your visual and your message. It transforms a series of images into a coherent and persuasive story, making the final product far more effective.
Common Syncing Challenges and Solutions
When you’re combining your voice over with video, getting everything to line up perfectly is non-negotiable. A common headache is a tiny delay between the audio and video, known as audio latency, which can make your final cut feel amateurish.
To get that perfect sync, zoom way in on your video editor’s timeline. Carefully align the start of your audio waveform with the exact visual cue it’s meant to match. It’s a small tweak, but it makes a huge difference in the final product's quality.
For an even more streamlined way to create these kinds of videos, you can explore Klap's dedicated video maker tool.
A Few Common Voice Over Questions, Answered
Once you get the hang of the basics, you'll inevitably run into a new set of questions. It happens to every creator. Let's wrap up by tackling some of the most common hurdles that pop up when you're just starting out.
Think of this as a quick-fire round of advice to help you troubleshoot and keep moving forward.
How Should I Practice Before I Hit Record?
A great performance almost never happens on the first take. Before you even think about hitting record, plan on reading your script out loud at least 3-5 times. This isn't about memorizing the words—it's about finding their natural rhythm.
With each read-through, you'll start to feel the flow. You'll catch awkward phrases, get your pacing right, and figure out which words need a little extra punch. If your script is packed with technical terms or needs a specific emotional delivery, you might even need a few more practice runs to really nail it.
What's the Best Free Editing Software?
For creators who aren't ready to spend on software, Audacity is the clear winner. It's a surprisingly powerful open-source tool that gives you everything you need to produce a professional-sounding voice over, and it's completely free.
It works on any major operating system and comes packed with the essentials:
- Noise Reduction: Perfect for getting rid of that annoying background hiss or fan hum.
- Equalization (EQ): Lets you shape the tone of your voice, making it clearer and richer.
- Compression: Evens out the volume so your listeners don't have to keep adjusting their speakers.
Sure, paid software might have sleeker designs, but Audacity has all the core tools you need to get the job done right.
The most important skill in voice over isn't just speaking; it's listening. Record your practice sessions and listen back with a critical ear. You'll be surprised what you hear—subtle pacing issues, mouth noises, or awkward inflections—that you can then fix on the next take.
Can I Get Away with Using My Phone Mic?
Look, modern smartphone mics have come a long way, but they just aren't the right tool for this job. They’re designed to capture sound from every direction, which means they'll pick up way too much room echo, background noise, and other distracting sounds.
An external USB or XLR microphone, on the other hand, is built to do one thing: isolate your voice. It captures all the warmth and detail while actively rejecting the sounds you don't want. While your phone is fine for a quick scratch track, investing in a dedicated mic is the single biggest leap you can take toward professional quality. The difference in clarity is night and day.
How Do I Stop All the Annoying Mouth Clicks and Pops?
Those little clicks, pops, and smacks can instantly make a recording feel amateur. The good news? They're almost completely preventable with a few simple habits.
- Stay Hydrated: Drink plenty of room-temperature water before you start. Steer clear of dairy, caffeine, and sugary drinks—they can thicken your saliva and make mouth noises worse.
- Get a Pop Filter: This is non-negotiable. A pop filter placed between you and the mic will diffuse the harsh bursts of air from "p" and "b" sounds (known as plosives).
- Work the Mic Off-Axis: Don't speak directly into the microphone. Instead, angle yourself slightly so you're speaking just past it, at about a 15-degree angle. This simple trick keeps plosives from hitting the mic’s diaphragm head-on.
Building these habits will save you from hours of painful editing. It’s especially critical for educational content creators, as e-learning drives a massive 33% of all voice-over work globally. You can discover more insights about voice over industry statistics on Wifitalents.com.
Ready to turn your perfectly recorded voice overs into engaging social media content? Klap makes it easy. Just upload your long-form video, and our AI will find the best moments, reframe them for mobile, and add engaging captions automatically. Layer on your new voice over and create a month's worth of viral-ready clips in minutes. Try it for yourself at https://klap.app.
