How Do You Write A Transcript: Your 2026 Guide
Other

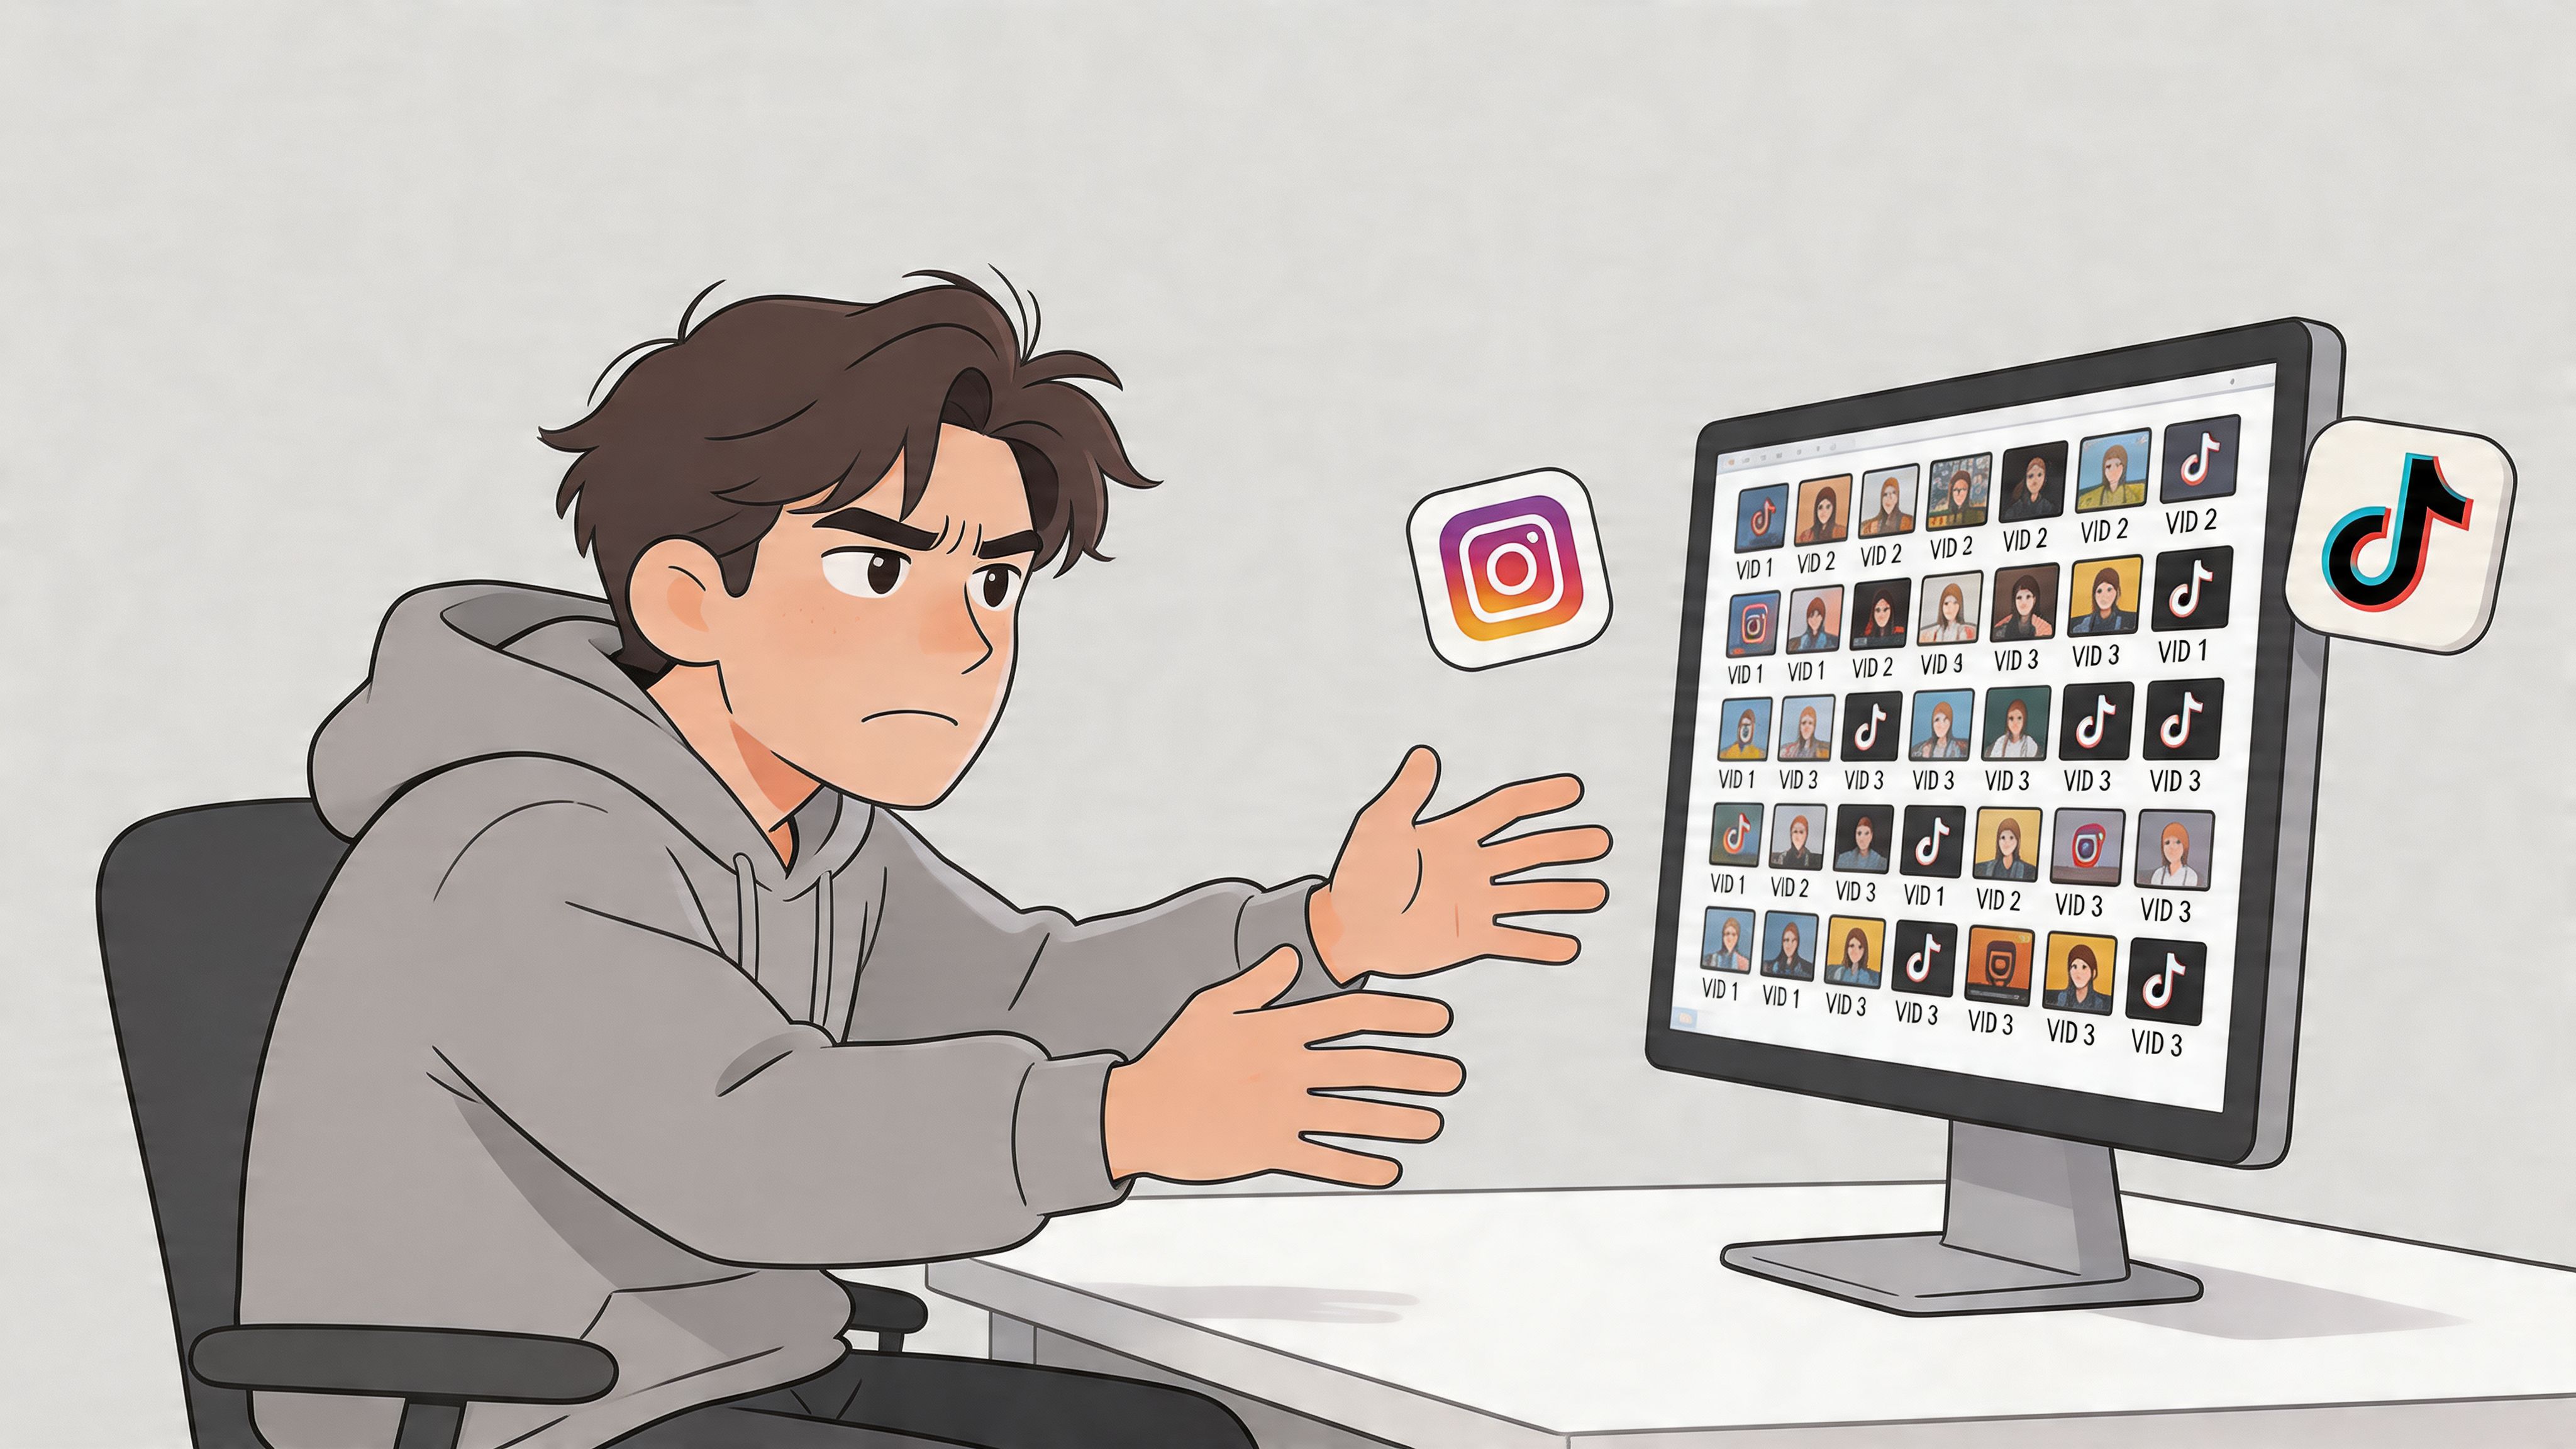
You’ve probably got a folder full of long videos that should be producing far more content than they are.
A podcast episode, webinar, interview, or talking-head video can hold dozens of sharp moments. A clean opinion. A story. A strong opener. A line that would work perfectly as a Reel or Short. But when you sit down to extract those moments, the process gets messy fast. You scrub through the timeline, miss good clips, second-guess the wording, and lose time fixing captions after the fact.
That’s usually when people ask, how do you write a transcript. The better question is why you’re writing it in the first place.
If you treat a transcript like a compliance document, you’ll get a block of text. If you treat it like a content asset, you’ll get raw material for captions, short-form scripts, blog drafts, quote posts, and searchable ideas. That shift changes the whole workflow.
Why Your Transcription Method Is Costing You Views
Most creators don’t have a content problem. They have an extraction problem.
You recorded the episode. You already did the hard part. But your transcript is either nonexistent, unreadable, or so literal that it’s useless for repurposing. That’s where views get lost. Not because the content was weak, but because the transcript wasn’t built for reuse.
Traditional transcript guides were written for archives, oral histories, and research. They care about preserving speech exactly, documenting deletions, and marking page breaks. That work matters, but it’s not what a creator needs when trying to turn one interview into five good clips. According to a historical transcription guide discussion that highlights this gap, 60% of creators struggle to script shorts from long-form content, while structured, hook-annotated transcripts help users generate clips 3x faster.
What the old approach gets wrong
A lot of transcript advice still assumes your end goal is storage, not distribution.
That creates three common problems:
- The transcript is too raw. It includes every “um,” restart, and tangent, which makes captions look clunky.
- The transcript has no structure. No speaker labels, no useful timestamps, no markers for standout moments.
- The transcript stops at accuracy. It records what was said, but it doesn’t help you decide what’s worth posting.
Practical rule: A transcript for repurposing should help you find clips, clean captions, and preserve context. If it only does one of those, it’s unfinished.
The real job of a transcript
A useful transcript does more than convert speech to text. It becomes a working document.
For creators and marketers, that means it should let you:
- Scan for hooks instead of replaying the whole file
- Edit captions quickly without hunting through the timeline
- Pull quotes and summaries for posts, emails, or descriptions
- Keep nuance intact so a short clip doesn’t distort the original point
That’s the a-ha moment. Transcription isn’t a boring admin step. It’s the layer that makes the rest of your repurposing workflow faster and safer.
Manual vs Automated Transcription Which Path to Choose
The first decision is simple on paper and annoying in practice. Do you transcribe manually, use AI, or combine both?
The answer depends on what matters most in this project. Speed, fidelity, budget, scale, or publish-ready captions. For most creators, this isn’t an ideological choice. It’s a workflow choice.
When manual transcription makes sense
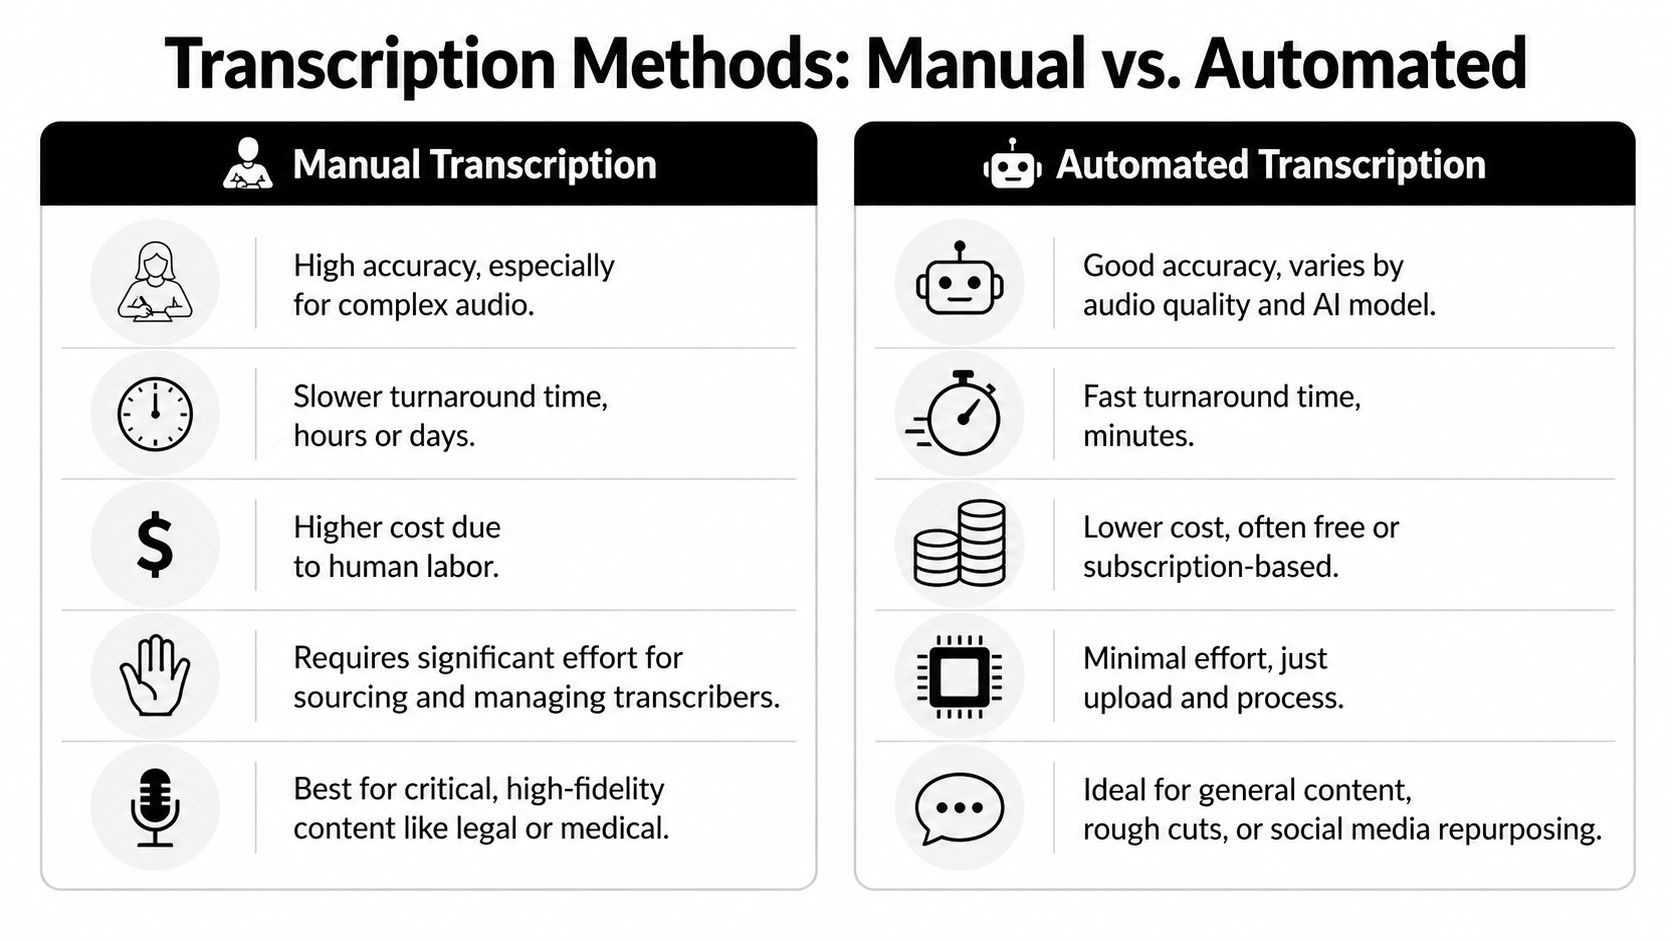
Manual transcription is still the cleanest option when precision matters more than speed.
If the audio is messy, the accents are heavy, multiple people interrupt each other, or the terminology is technical, a human transcriber will usually catch context that software misses. That’s why manual transcription still matters in legal, medical, and high-stakes research settings.
The downside is labor. The hybrid workflow reference from HypeScribe on transcription in qualitative research notes that manual transcription takes 3 to 4 hours of labor per audio hour, while AI can produce a first draft in minutes.
Where automated transcription wins
AI transcription is the obvious choice when you need volume and speed.
Upload the file, get a draft, and start editing. For a podcaster, coach, or marketing team publishing regularly, that speed changes what’s realistic. Suddenly transcripts are no longer a “nice if we get to it” task. They become part of the default pipeline.
Automated transcription works especially well when:
- Audio is clean and speakers are clear
- You need rough cuts fast for clipping and review
- You publish often and can’t justify manual effort every time
- The transcript is a working draft, not the final artifact
If you want a quick starting point for this kind of workflow, a podcast transcription tool can handle the first pass so you’re editing text instead of transcribing from scratch.
The method most creators actually need
The strongest setup is usually hybrid. AI first, human second.
AI handles the repetitive work. A person fixes the parts that affect meaning and presentation. That includes brand names, specialist jargon, overlapping dialogue, emotional beats, and the little context cues that matter once the transcript becomes captions or social clips.
Here’s the trade-off in plain terms:
MethodBest forMain weakness
Manual
Complex, sensitive, or messy audio
Slow and labor-heavy
Automated
Fast drafting at scale
Misses nuance and context
Hybrid
Repurposing workflows and publish-ready edits
Still needs review discipline
The best transcript workflow doesn’t ask humans to do machine work. It asks humans to fix the specific things machines still get wrong.
What fails in real creator workflows
Two extremes tend to break.
One is fully manual from start to finish. That’s accurate, but it doesn’t scale if you publish often. The other is “accept AI output as final.” That’s faster, but small errors can wreck a clip. A wrong product name, a missing “not,” or a bad speaker label can turn a usable segment into something you can’t post.
If your transcript is going to feed captions, blog drafts, quote graphics, and short-form editing, the hybrid path is usually the one that keeps quality high without turning every episode into a transcription project.
Prepare Your Audio for Maximum Transcription Accuracy
Most transcription problems start before the file ever reaches a transcriber or an AI tool.
Bad audio forces every later step to work harder. You’ll spend more time correcting names, separating speakers, and cleaning captions. Good preparation isn’t glamorous, but it saves far more time than people expect.
Listen once before you transcribe
One of the most overlooked habits is listening through the recording before the actual transcript pass.
The qualitative transcript guidance from ATLAS.ti’s research transcript guide recommends hearing the full audio first so you can identify speaker patterns, flag crosstalk, note terminology issues, and estimate the trouble spots. That single preview changes how smoothly the rest goes.
Small recording choices that pay off later
You don’t need a studio buildout. You need fewer problems.
- Record in a quiet room. Hum, keyboard noise, traffic, and room echo all create avoidable errors.
- Use a decent mic close to the speaker. Distance is where clarity dies.
- Separate speakers when possible. Interviews are easier to transcribe if each voice is more distinct.
- Avoid people talking over each other. Crosstalk is one of the fastest ways to ruin a transcript draft.
- Name files clearly. Episode names, dates, and guest names help keep transcript versions organized.
Prep your language, not just your gear
Creators often think about sound quality and forget vocabulary.
If your episode includes unusual names, product terms, acronyms, or niche language, make a short glossary before transcription starts. That can be as basic as a note in your doc with guest names, company names, recurring phrases, and terms that AI is likely to butcher.
Clean audio helps. A clean terminology list helps almost as much.
The point isn’t perfection. The point is removing avoidable friction before it turns into editing time.
How to Format Your Transcript for Readability and Repurposing
Formatting is where a transcript becomes usable.
A raw transcript dump might technically be correct, but it’s painful to scan and even worse to repurpose. If you want to turn spoken content into clips, subtitles, and scripts, structure matters as much as accuracy.
Pick the right level of detail
Qualitative research has long separated transcription into levels, from gist to full discourse notation. The practical summary from Transcription Centre’s guide to transcript format identifies four levels, and for repurposing the sweet spot is verbatim, which captures exact words while leaving out fillers. In that same reference, this cleaner text is noted as helping AI models identify engaging hooks with up to 92% accuracy.
For creators, that means this:
- Gist is too loose for captions or clip selection.
- Full discourse is too detailed for most marketing and creator workflows.
- Clean verbatim is the useful middle. You keep what was said, remove verbal clutter, and preserve the meaning.
Clean verbatim beats full verbatim for content reuse
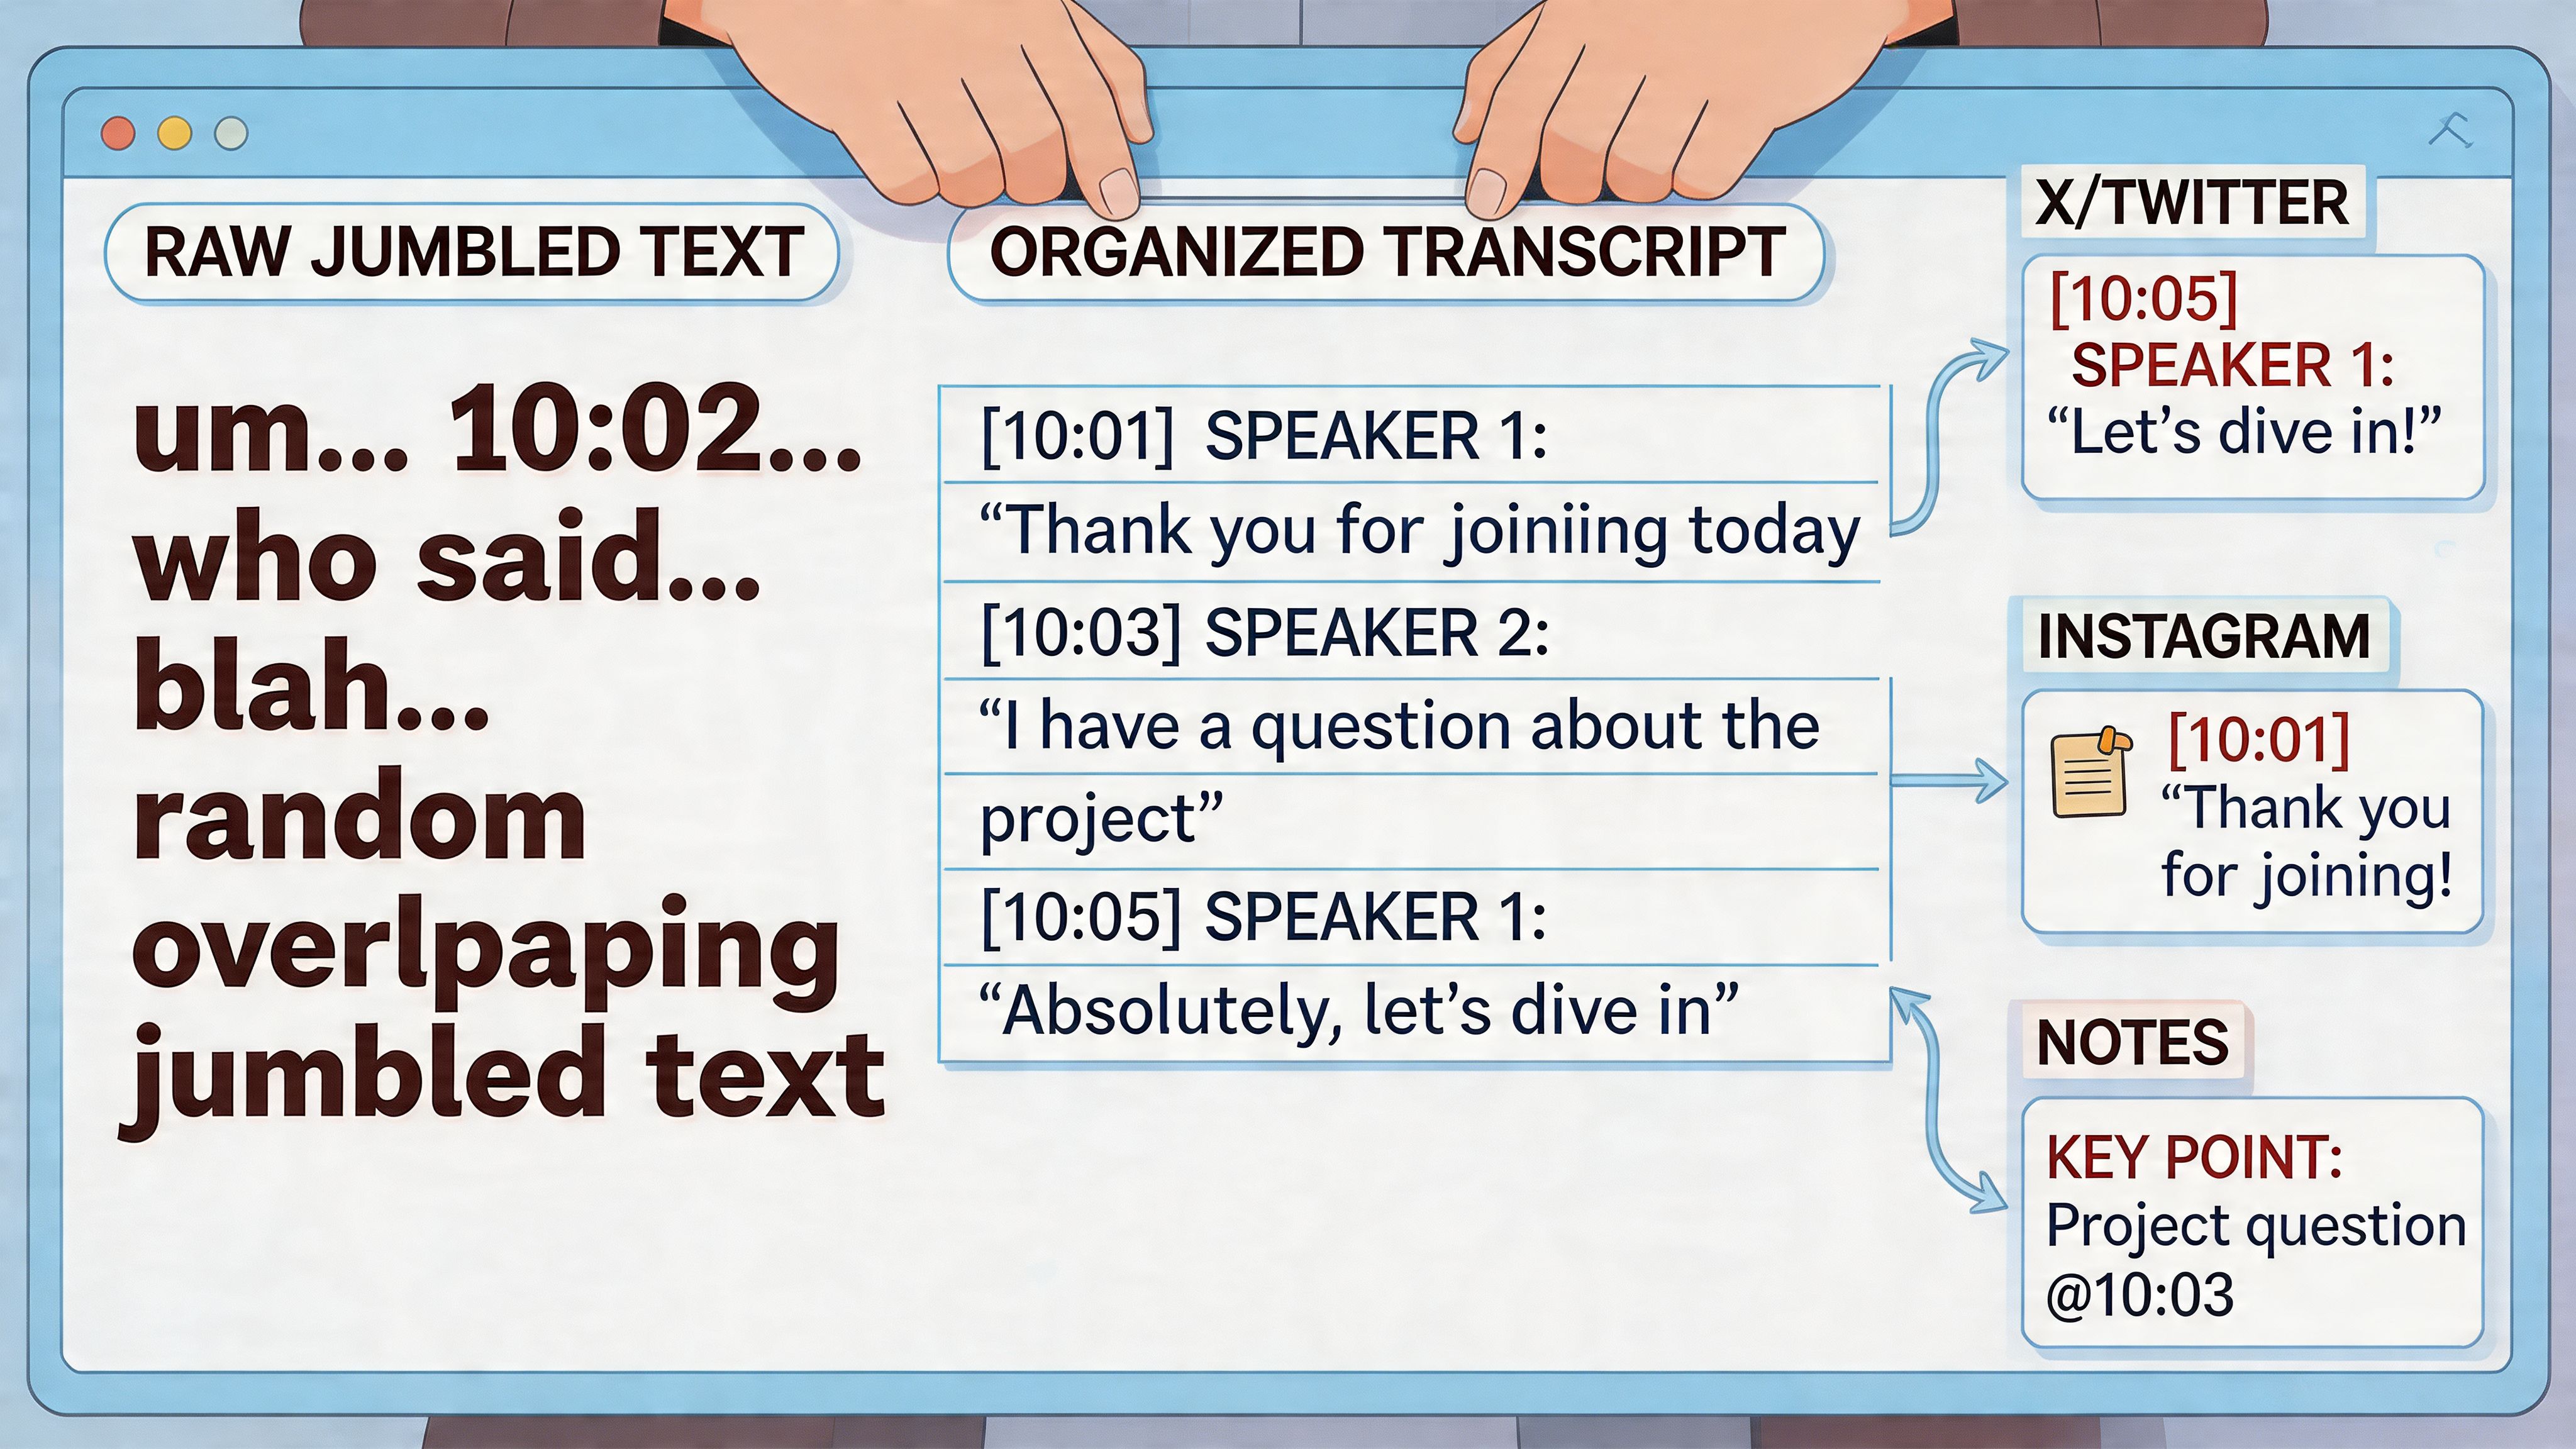
Here’s the practical difference.
Full verbatim Speaker 1: So, um, I think, you know, the main issue is, like, people wait too long to post.
Clean verbatim Speaker 1: I think the main issue is people wait too long to post.
The second version is better for subtitles, social posts, blogs, and clip review. It still sounds like the speaker. It just stops punishing the reader.
The format I recommend
Use a structure that both humans and software can scan quickly.
- Speaker labels in a consistent format such as “Host:” and “Guest:”
- Timestamps at speaker changes or at meaningful topic transitions
- Short paragraphs for each turn or idea shift
- Brackets for non-verbal cues when they change meaning, such as [laughs] or [long pause]
- Wide margins or note space if you’re reviewing and annotating
A simple template looks like this:
ElementExample
Speaker label
Host:
Timestamp
[00:03:14]
Non-verbal note
[laughs]
Repurposing note
[strong hook]
If you also need the transcript to support subtitle work, it helps to think ahead about line length and readability. This short guide on adding captions to video is useful because it focuses on presentation choices that affect how text lands on screen, not just whether the words are correct.
Format for editing, not just for storage
At this stage, many transcripts stall out. They’re readable, but they’re not operational.
A working transcript should include your annotations directly in the document. Mark the moments you may want to reuse. Add notes like [clip this], [great opening], [customer pain point], or [needs context before posting]. Those notes are what turn a transcript into an editing map.
The formatting also makes later subtitle work easier if you’re using a subtitle generator, because a cleaner source transcript reduces the amount of manual fixing after export.
The basics of transcript levels are explained clearly in this walkthrough:
A transcript should be easy to read with your eyes and easy to cut with your editor. If it only does one of those, reformat it.
A Creator's Workflow for Proofreading AI Transcripts
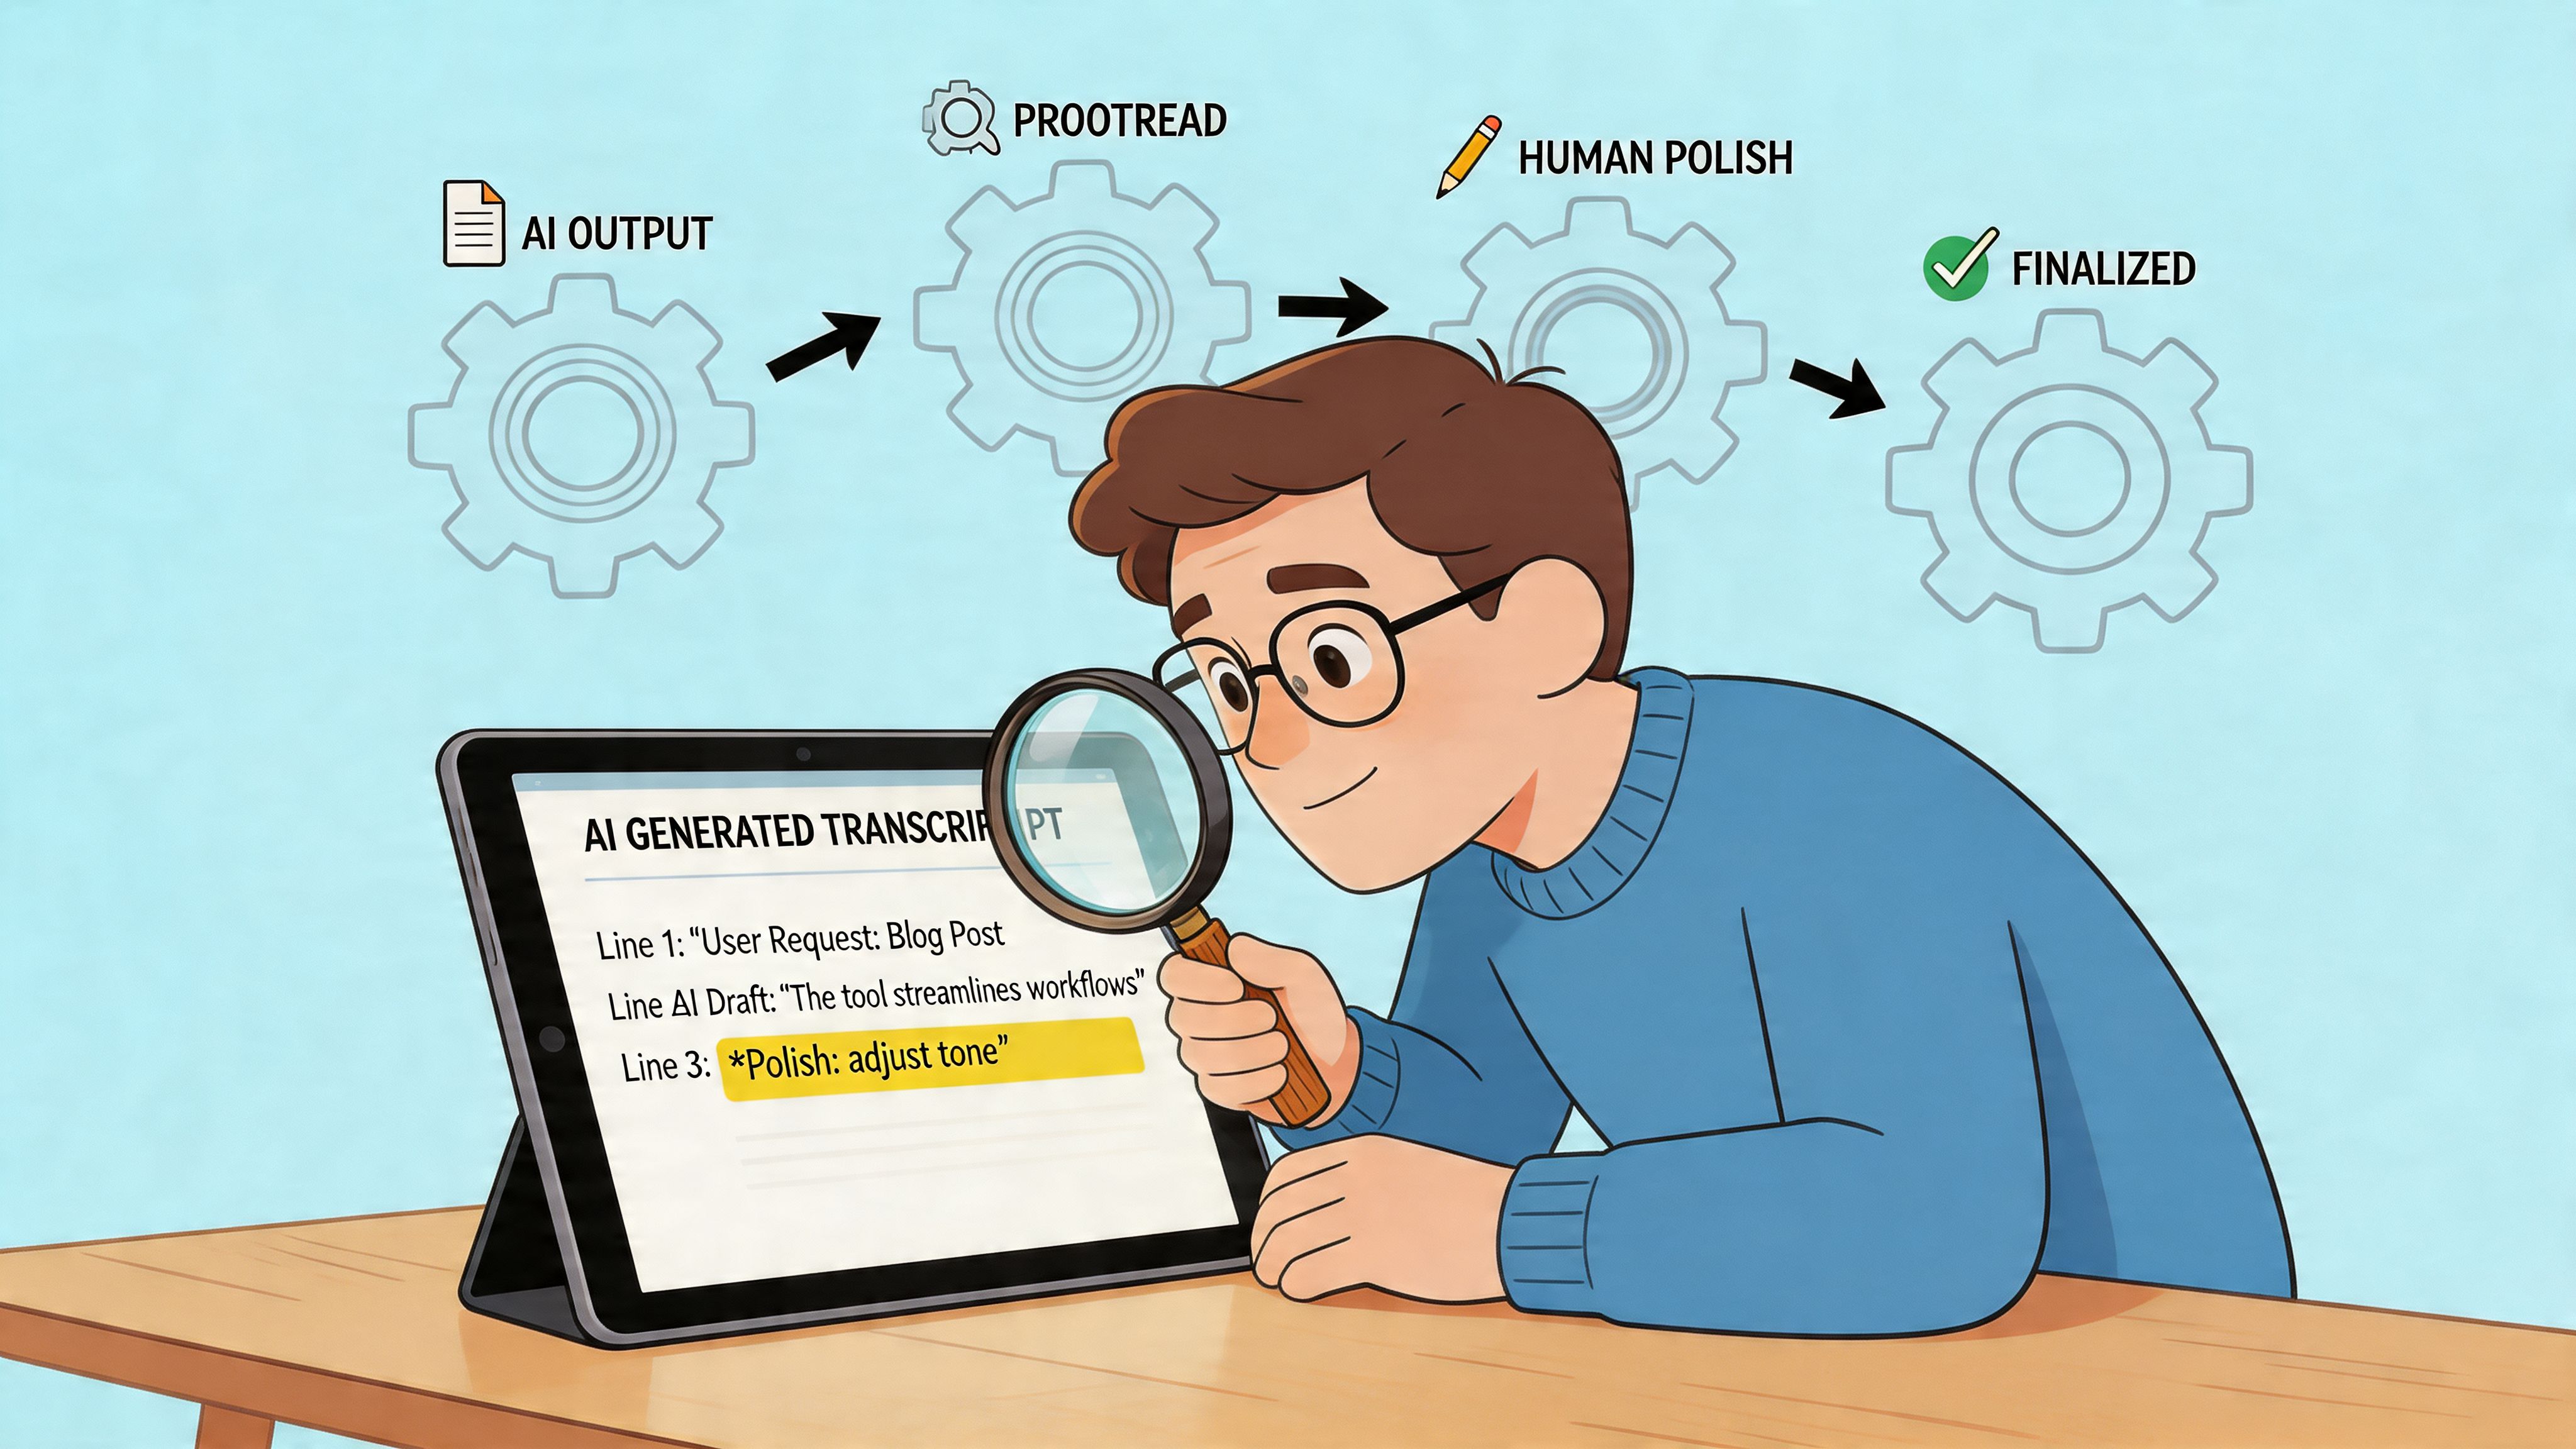
The first draft from AI is not the finish line. It’s the part that saves your hands from typing every word.
What matters next is the review pass. Not generic proofreading. A focused pass that fixes meaning, improves readability, and tags the moments that deserve reuse.
Start with the errors that can ruin a clip
Not every mistake matters equally.
The practical issue raised in VerbalScripts’ transcript formatting guide is that AI reached 95% accuracy for clear English in 2026, but can drop to 75% with accents or jargon. That same source notes a hybrid workflow can save creators 50% of their time compared with manual transcription.
So don’t waste your energy polishing every comma first. Fix the errors that alter trust or meaning:
- Names and brands
- Numbers and technical terms
- Negations like “can” versus “can’t”
- Speaker attribution
- Cut points where a sentence starts or ends awkwardly
Review like an editor, not a clerk
A strong pass usually looks like this:
- Play the audio faster while reading. Listening at increased speed helps you verify the flow without dragging the task out.
- Fix recurring mistakes globally. If the AI got a guest’s name wrong throughout, use find and replace.
- Remove filler only where it improves readability. Keep personality. Cut distraction.
- Mark unclear sections instead of guessing. If a word is inaudible, flag it and come back.
- Add context notes for anything that could be misleading when clipped.
Turn proofreading into annotation
This is the part most creators miss.
When you proofread, don’t just correct. Tag. A reviewed transcript becomes much more valuable when it includes notes for future content work.
You might mark lines like:
- [strong hook] for an opening line with tension
- [good Reel segment] for a self-contained answer
- [needs setup] for a quote that sounds sharp but requires the prior sentence
- [caption this exactly] for a line where wording matters
Editing note: The best human pass doesn’t compete with AI on speed. It adds judgment AI still doesn’t have.
Keep the final pass tight
Once the major fixes are done, skim the whole document once more for flow. Read it like a stranger would. If a caption pulled from this transcript appeared on-screen, would it make sense immediately? Would a clip pulled from the marked segment sound fair to the speaker? Would the wording look intentional rather than auto-generated?
That standard matters more than transcript perfection. You’re not preparing a museum record. You’re preparing content that people will read, hear, and judge in seconds.
Turn Your Transcript into Viral Content with Klap
A finished transcript is not the outcome. It’s the input.
Once you’ve cleaned the text, labeled speakers, fixed the bad AI guesses, and marked the strong moments, you’ve got something much more useful than a written record. You’ve got a source file for repurposing.
What to export and why
Different outputs need different transcript formats.
- Plain text or doc files work well for blog drafting, show notes, and quote extraction.
- Subtitle formats are useful when you’re moving toward on-screen captions.
- Annotated transcript docs help you or your editor choose clips quickly without rewatching the full episode.
That’s also where workflow matters. If your transcript is structured properly, you can move from long-form content into short-form editing much faster because the best moments are already visible on the page.
Use the transcript to spot clips with context
Here, many creators either save hours or waste them.
A transcript lets you find punchy statements fast, but context still matters. A sentence can read like a perfect hook and still fail as a clip if it depends on the previous thirty seconds. That’s why notes like [needs setup] or [clean standalone answer] matter so much.
If you’re publishing Shorts regularly, it also helps to understand how captions and formatting affect the final output. This guide on how to add captions to YouTube Shorts is useful when you’re turning transcript lines into actual on-screen text.
Klap is one option in that workflow. It analyzes long-form video, identifies engaging segments, reframes them for vertical formats, and prepares clips with captions so the transcript isn’t just archived text. It becomes part of the selection and editing process.
The transcript helps you find what was said. The repurposing workflow decides what deserves to be seen again.
That’s the ultimate payoff. One recording stops being one asset. It becomes a library.
Frequently Asked Questions About Writing Transcripts
What’s the difference between a transcript and captions
A transcript is the full text version of the spoken content. Captions are timed text that appears on video playback.
A transcript is usually where you review, clean, annotate, and repurpose. Captions are the formatted output viewers see on screen. If you’re learning the basics of the process, this walkthrough on how to transcribe video to text is a useful companion because it explains the conversion step in a clear, practical way.
Should I use full verbatim or clean verbatim
For most creators, use clean verbatim.
It keeps the speaker’s wording but removes filler, false starts, and repeated fragments that don’t help the audience. Full verbatim is useful when every utterance matters. Most marketing, podcast, and educational content doesn’t need that level of detail.
How should I label multiple speakers
Use names or roles consistently. “Host:” and “Guest:” are usually better than “Speaker 1” and “Speaker 2” unless the identities are unknown.
Also keep each speaker turn in a separate paragraph. If the conversation gets fast, add timestamps at transitions so you can find the right moment in the media file without hunting.
Do I need timestamps everywhere
No. Too many timestamps make a transcript harder to read.
Add them where they’re useful: speaker changes, topic changes, uncertain sections, and moments you may want to clip. Think of timestamps as navigation points, not decoration.
Is proofreading AI transcripts still necessary
Yes.
Even when the draft looks good at a glance, mistakes often hide in names, jargon, overlapping speech, and subtle wording that changes meaning. The human pass is where the transcript becomes publishable and reusable.
What should I do with the transcript after it’s finished
Use it actively. Pull hooks, build captions, draft summaries, collect quotes, and identify clip candidates. The transcript should keep producing value after the audio is done.
If you’re sitting on long videos and want a faster way to turn them into short-form content, Klap helps you move from transcript-ready source material to social clips built for TikTok, Reels, and Shorts.
