How to Schedule Instagram Reels (Step-by-Step Guide)
Content Creation

Quick Summary
This guide shows you exactly how to schedule Reels using two simple methods: Instagram’s native mobile app and Klap’s AI-powered platform. Whether you’re a creator or a brand, you’ll learn how to streamline your workflow, stay consistent, and maximize your reach without being glued to your phone. Visit the Klap blog to learn more about preparing and scheduling Reels and Shorts.
Want More Views? Start Scheduling Your Reels
Experts agree that when you post on Instagram matters. It directly affects how many people that can see and engage with your content. The algorithm also favors posts that get early engagement, so timing is everything.
But how do you stay ahead and post when your audience is most active? This is where scheduling comes in. Scheduling your Instagram Reels lets you batch content, reduce stress, and consistently hit peak engagement windows without being tied to your phone.
In this Klap guide, we’ll walk you through exactly how to schedule your Instagram Reels step by step so you can stay consistent, save time, and grow without compromise.
Why Listen to Us?
At Klap, our AI-powered tools have helped over 1.1 million creators turn long videos into 2.5 million viral clips. Beyond giving you everything you need to turn raw footage into ready-to-publish short-form content, we also understand that consistency drives reach, and we’re here to help you post smarter, not harder.
What Does It Mean to Schedule Instagram Reels?
Scheduling Instagram Reels means selecting a specific date and time for your Reel to be automatically published. Instead of posting in real time, you set it up in advance using tools that handle the publishing for you.
This process typically involves uploading your video, writing a caption, choosing a thumbnail, and selecting the scheduled time. Depending on the tool, you may also be able to preview how your Reel will appear once posted.
Scheduling is supported natively through the Instagram app or via third-party tools like Klap that connect to your Instagram account.
Scheduling your Instagram Reels can significantly strengthen your content strategy. Here’s how:
- Stay Consistent: Regular posting keeps you visible. Scheduling ensures your Reels go live at the right times, even when you're busy, so you never miss a beat.
- Post at the Best Times: Schedule when your audience is most active to reach more people and boost engagement and visibility.
- Save Time: Batch-creating and scheduling Reels frees up your day-to-day. It’s a smarter way to manage content without the daily scramble.
- Plan Campaigns with Ease: Whether it’s a product launch or a seasonal push, scheduling helps you stay aligned with your marketing goals and roll out content seamlessly.
- Create Better Content: With more time to plan ahead, your Reels can be more thoughtful, polished, and aligned with what your audience cares about.
In short, scheduling Reels helps you stay consistent, connect with your audience, and work more efficiently.
Step-By-Step Guide on How to Schedule Instagram Reels
Method 1: How to Schedule Instagram Reels Using Klap
Klap makes editing Instagram Reels incredibly fast by using AI to generate your first draft and providing an intuitive editor to fine-tune the results. But that’s not all. You can also schedule your edited Reels to go live at a future date.
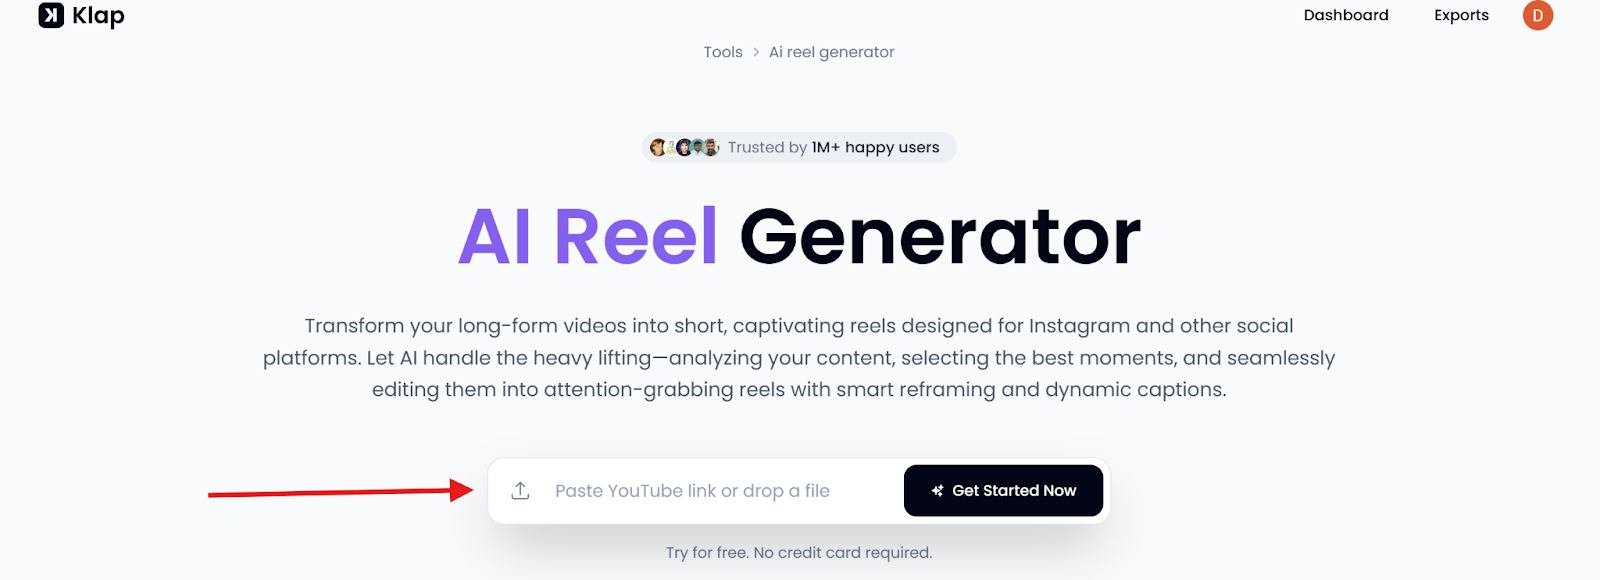
Step 1: Visit the Klap AI Reel Generator Tool Page
- Start by heading to the Klap AI Reel Generator page.
- This is where you’ll begin creating the clip you want to schedule.
Step 2: Input or Upload Your Original Video
You can paste a YouTube link or upload a video file directly from your device (supported formats include MP4, MOV, and AVI).
- For YouTube: Copy the video’s URL from your browser and paste it into Klap’s input field. Here’s what the URL looks like:

- For Upload: Click the upload button and select your file from your device’s storage.
Once uploaded, you’ll be redirected to log in or sign up for a Klap account.
Step 3: Log In or Create an Account
- If you’re new to Klap, create a free account. Otherwise, just log in to continue.
Step 4: Set Your Instagram Reel Preferences
A pop-up will appear, prompting you to configure your clip:
- Select "Shorts" as the format.
- Set the Duration to “Auto,” which is the option for TikTok videos and Instagram Reels.
- Select your preferred language under the Language tab.
- Enable “Reframe” only if your video is not already in the 9:16 aspect ratio, which is Instagram’s default vertical frame for Reels.
- Then, select "Portrait" (9:16) as the dimension to enable Klap's intelligent auto-resizing feature to resize your video.
- Enable “Captions” to auto-generate subtitles.
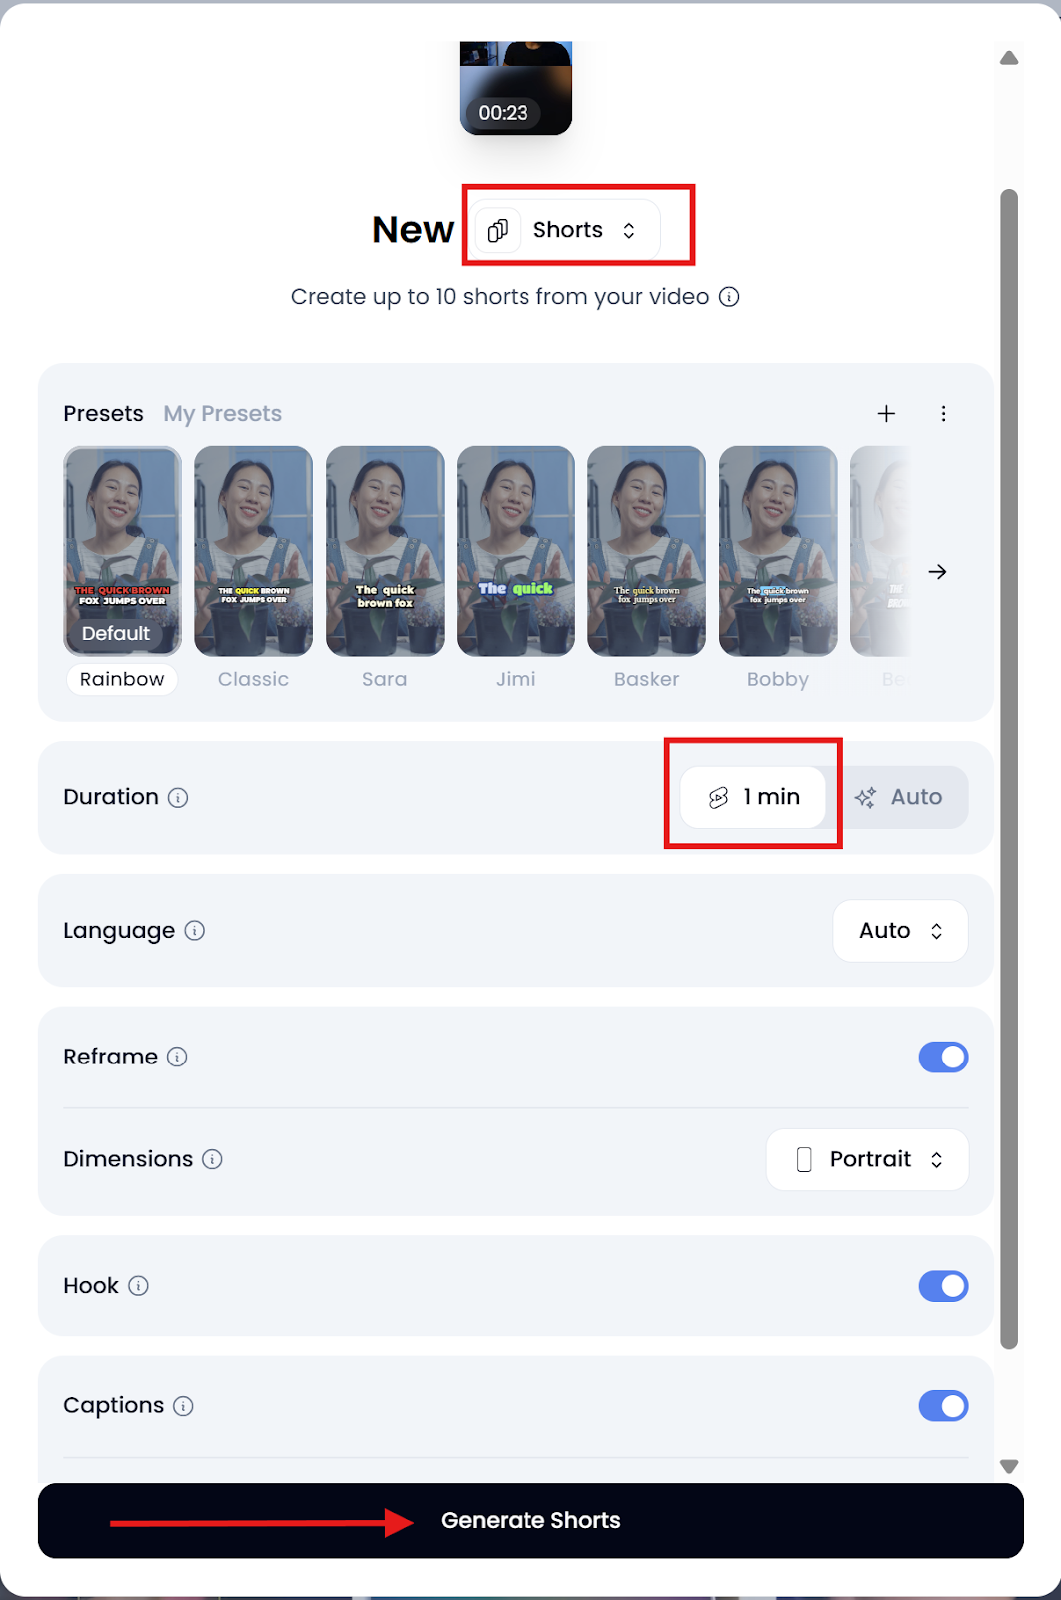
Step 5: Generate Your Instagram Reel
- Once you’ve set your preferences, click “Generate Shorts” and let Klap’s AI process your content.
- Depending on the video length, this may take a few seconds to a couple of minutes.
Step 6: Edit Your Instagram Reel in Klap
You now have an auto-generated Instagram Reel video available for download.
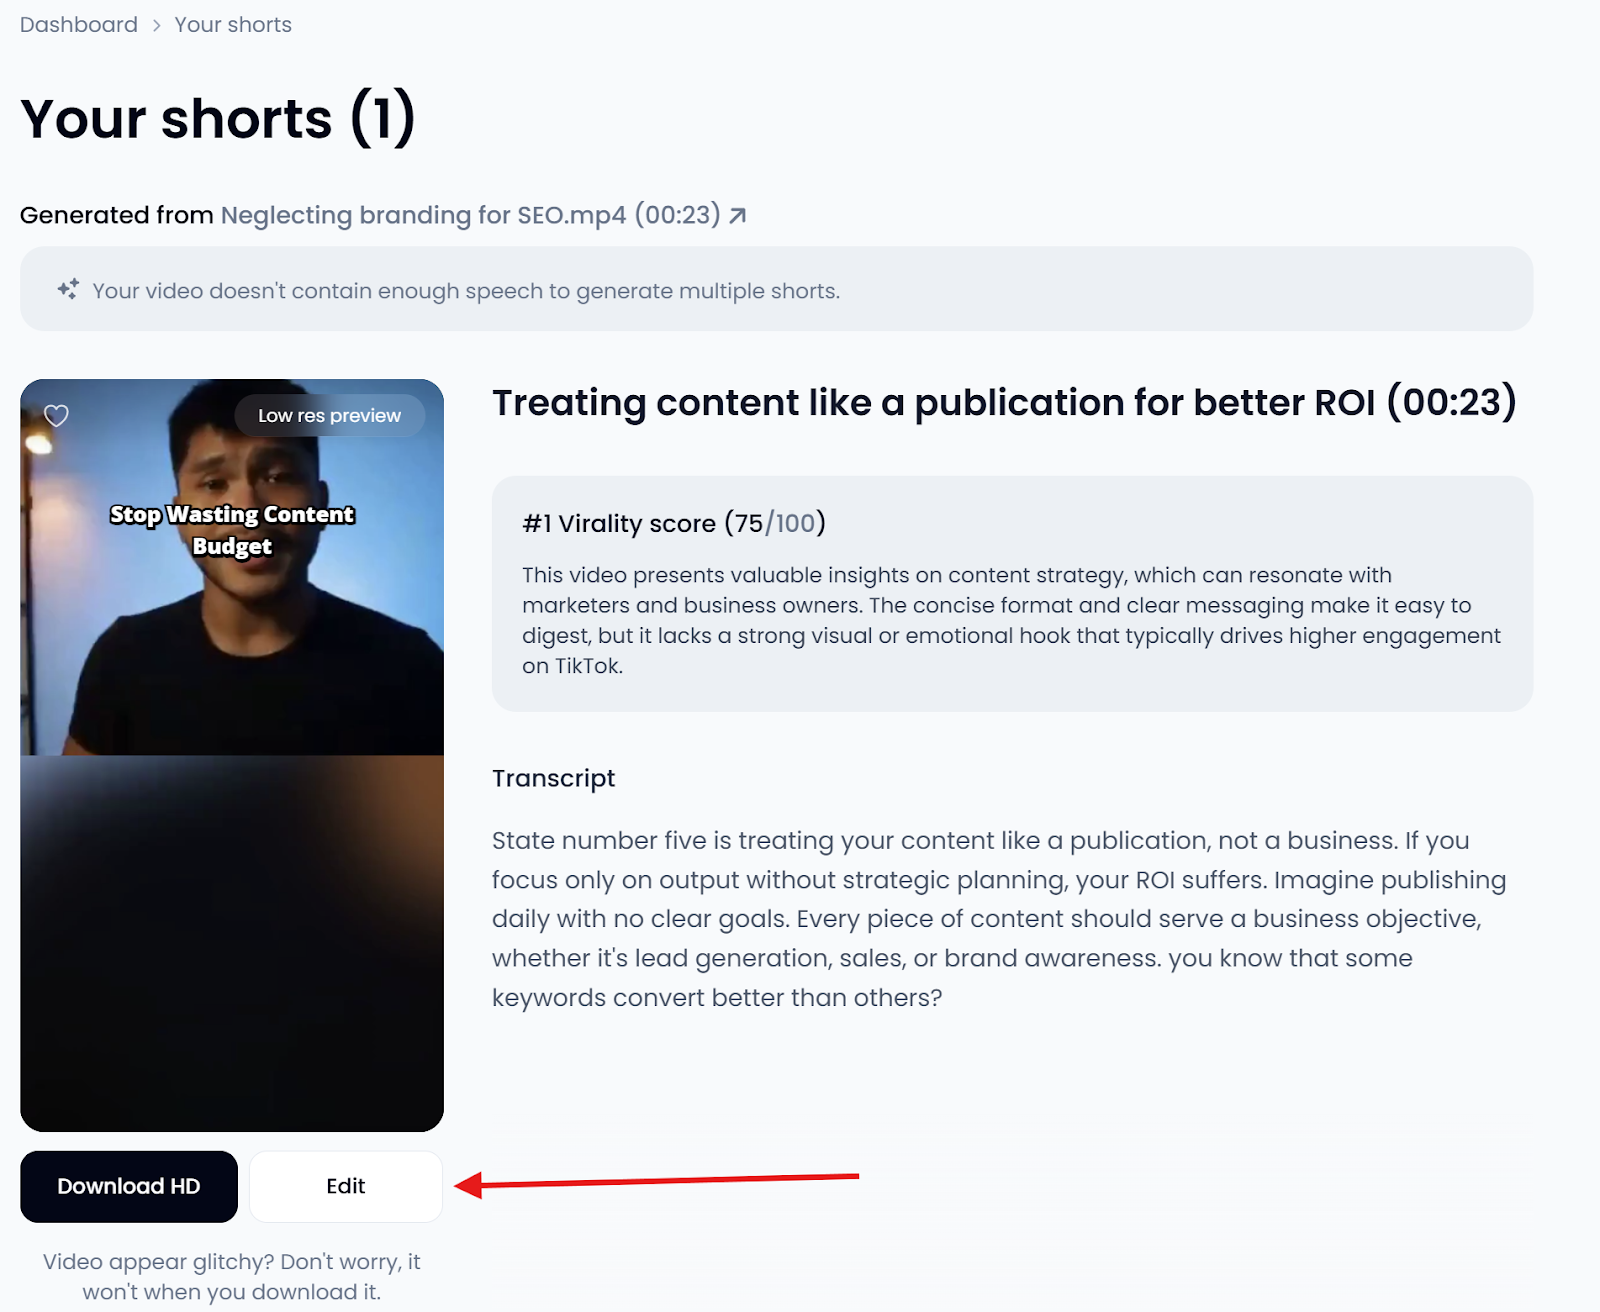
Next, click “Edit” to refine your clip further inside Klap’s editor before scheduling. Here, you can:
- Trim: Cut out filler, remove dead air, or adjust where your TikTok video starts and ends.
- Crop: Fine-tune how your video fits into the vertical 9:16 frame. It’s a great way to highlight the speaker’s face or keep the focus centered.
- Captions: Assess the auto-generated captions from the transcribed audio and make quick edits. You can also turn individual caption lines on or off and add custom captions for clarity.
- Style: Polish your Instagram Reel even further by adjusting typography, positioning, highlights, presets, animations, emojis, overlays, etc.
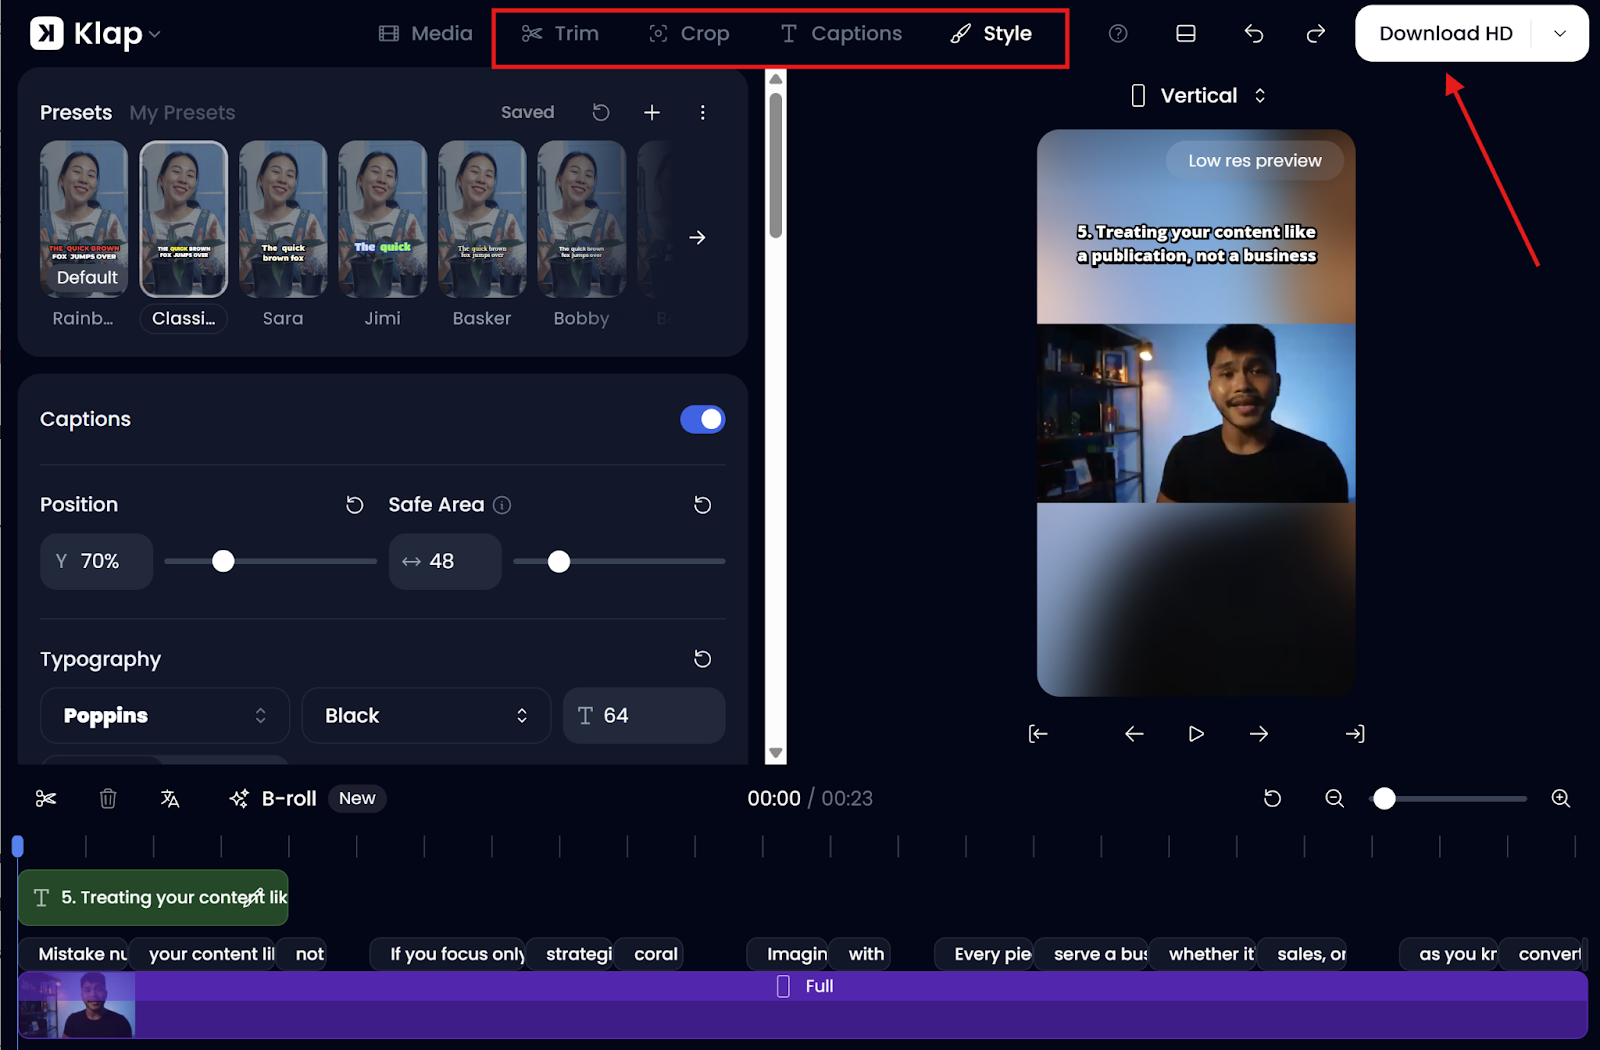
Step 7: Render and Export Your Instagram Reel
- All done? Hit “Download HD.”
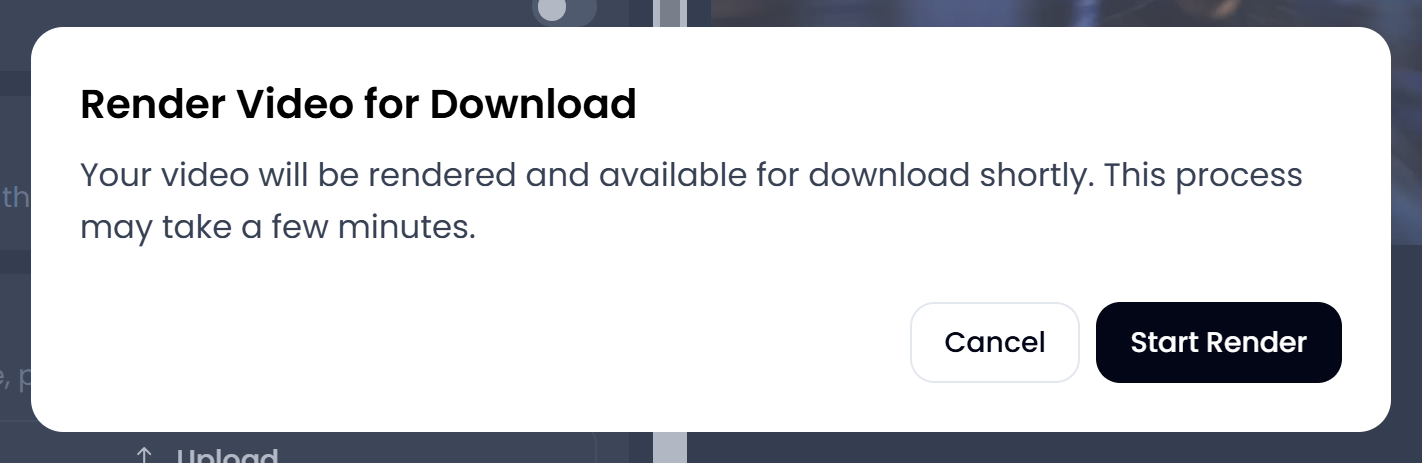
- On the resulting popup, click “Start Render" to begin rendering your edited Instagram Reel.
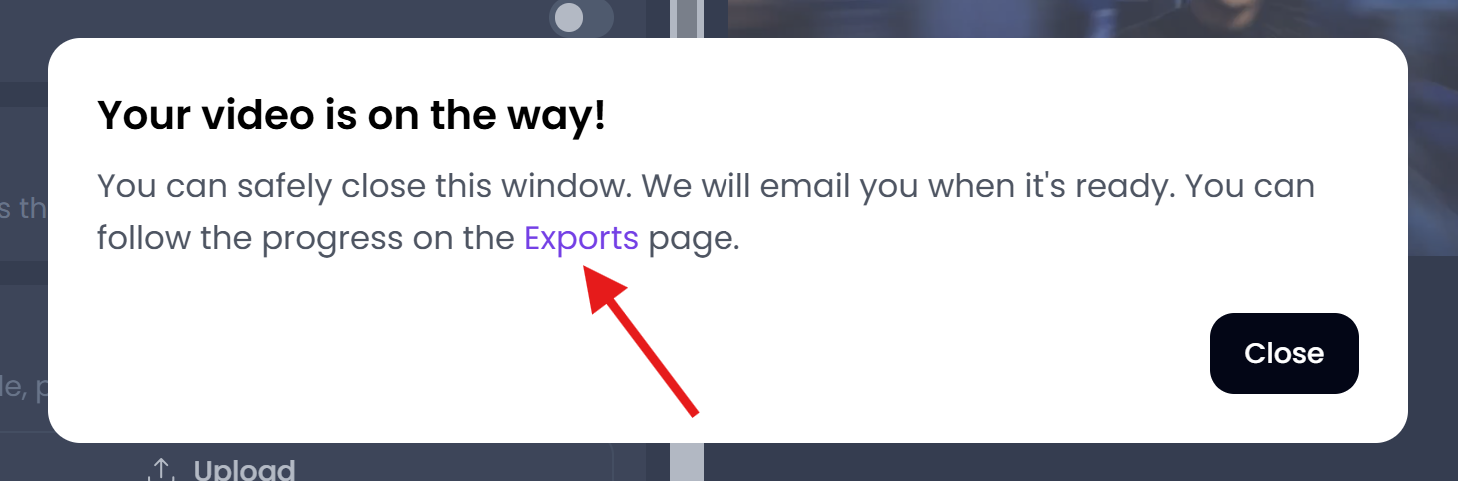
- While rendering goes on in the background, Klap prompts you to track the progress on the Exports page.
- Click the “Exports” in-text link in the popup to head to the Exports page.
- On the Exports page, locate your newly rendered Instagram Reel and click Post right under it.
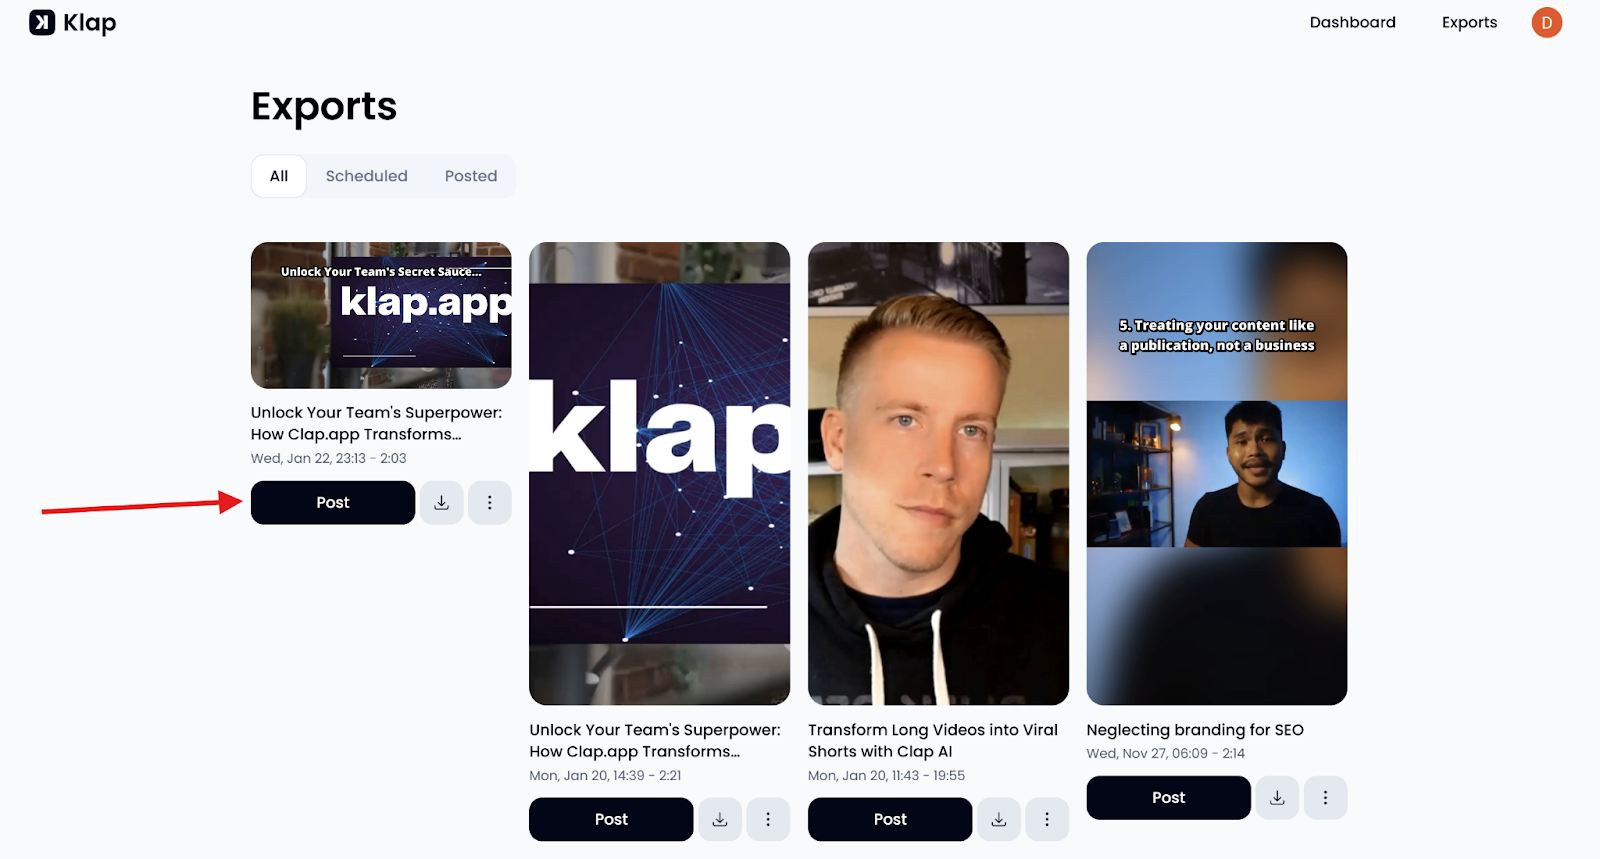
- This takes you to the Publish page, where you can schedule your Reel.
Step 8: Schedule Your Instagram Reel
On the Publish page:
- Click the Instagram icon at the top of the page to connect your Instagram account.
- Add your preferred caption in the designated area.
- Next, click Schedule at the bottom of the page to access the calendar interface.

- Choose your preferred date and time, then click “Confirm.”
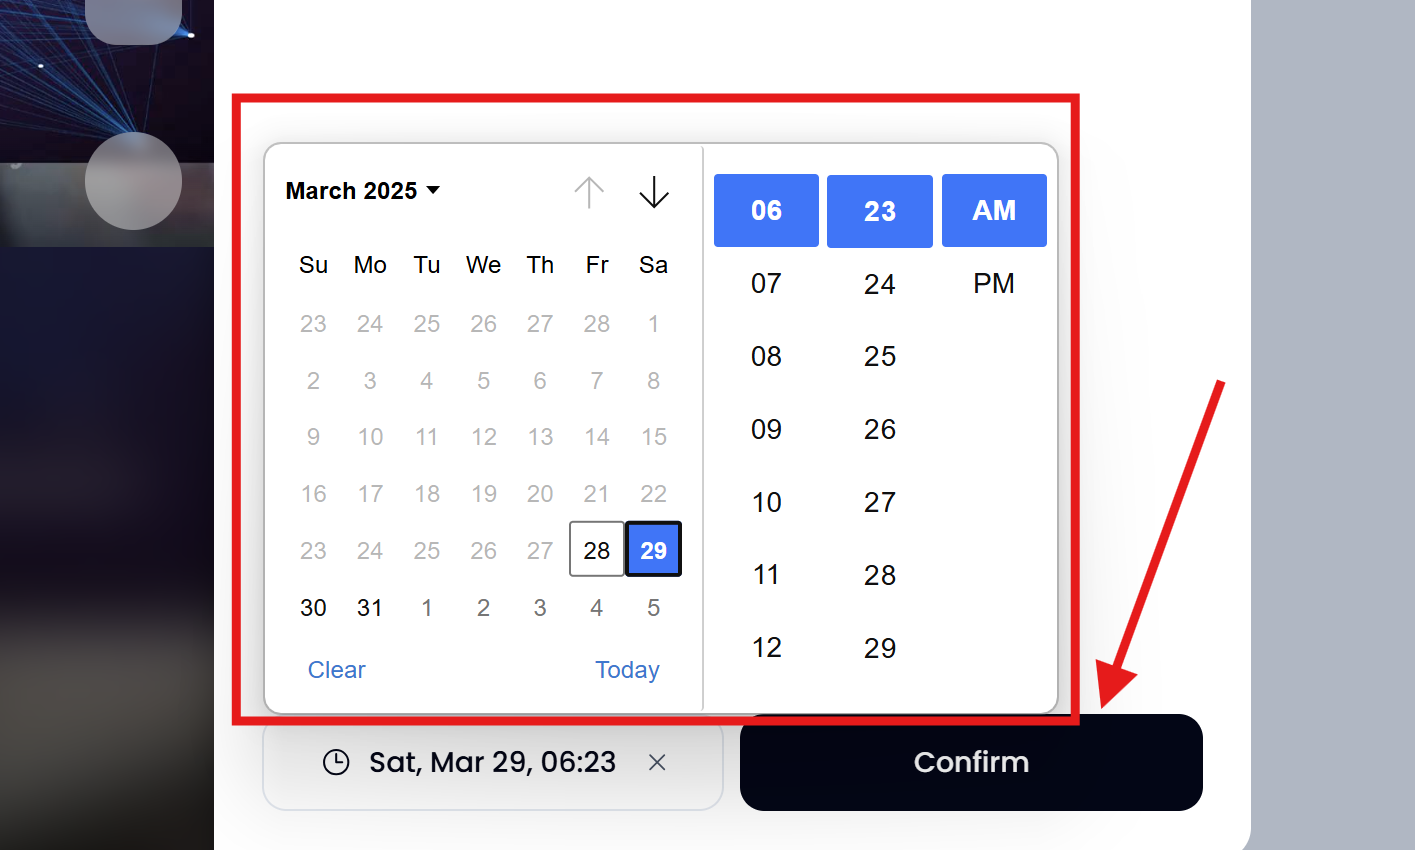
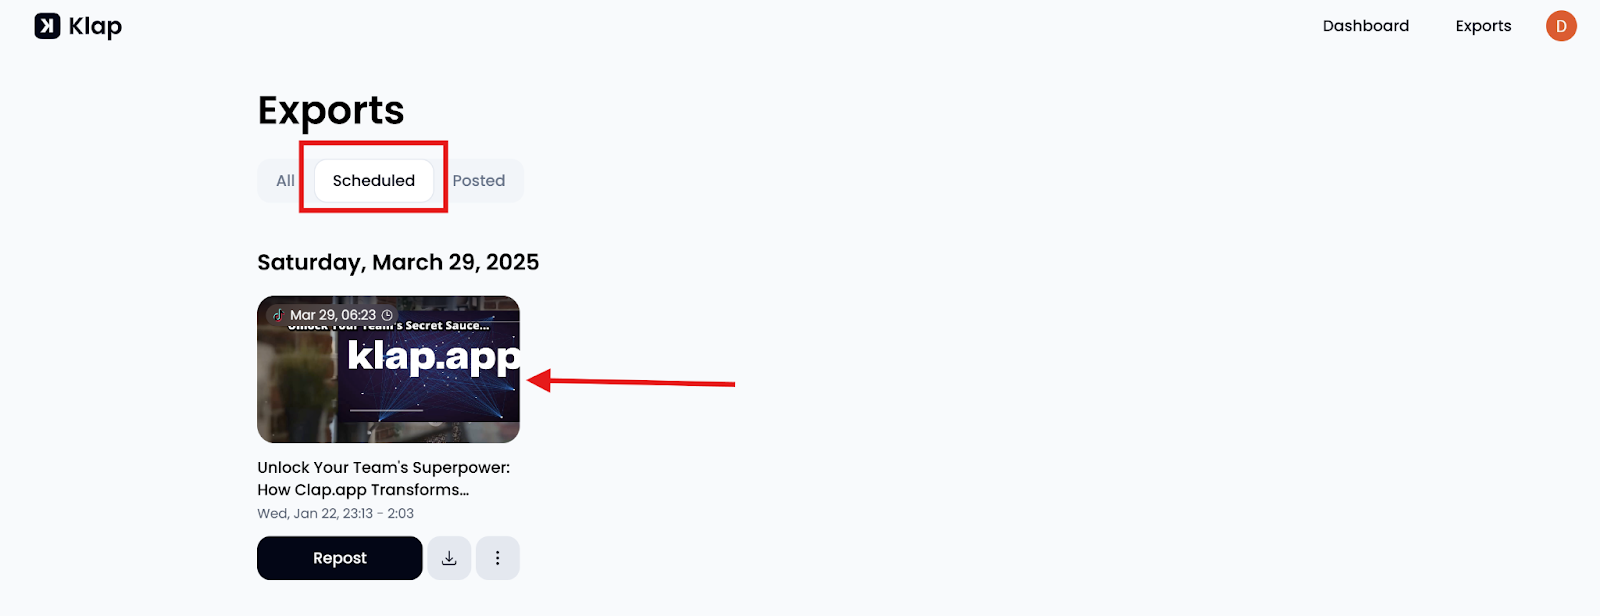
- Your Klap-edited Reel is now queued to go live as scheduled. You can keep track under the “Scheduled” tab on the Exports page.
Method 2: Scheduling Instagram Reels Using the Instagram Mobile App
Instagram allows users to schedule Reels up to 75 days in advance directly through its mobile app. This feature is available for both Business and Creator accounts. Here's how to schedule your Reels natively:
Step 1: Open the Instagram App
- Open the Instagram app on your mobile device.
- Make sure you're signed in to the correct account before starting.
Step 2: Create a New Reel
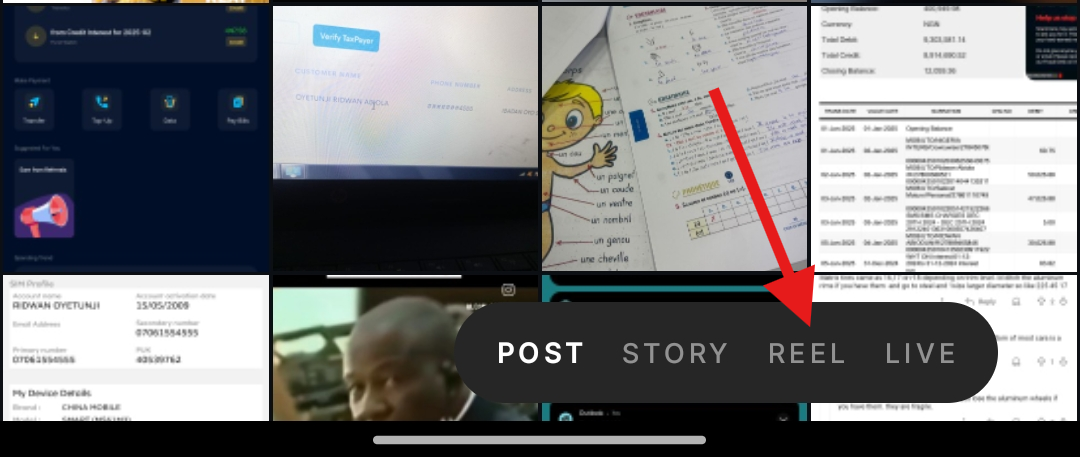
- Tap the "+" icon at the bottom (or top right-hand corner) of the home screen.
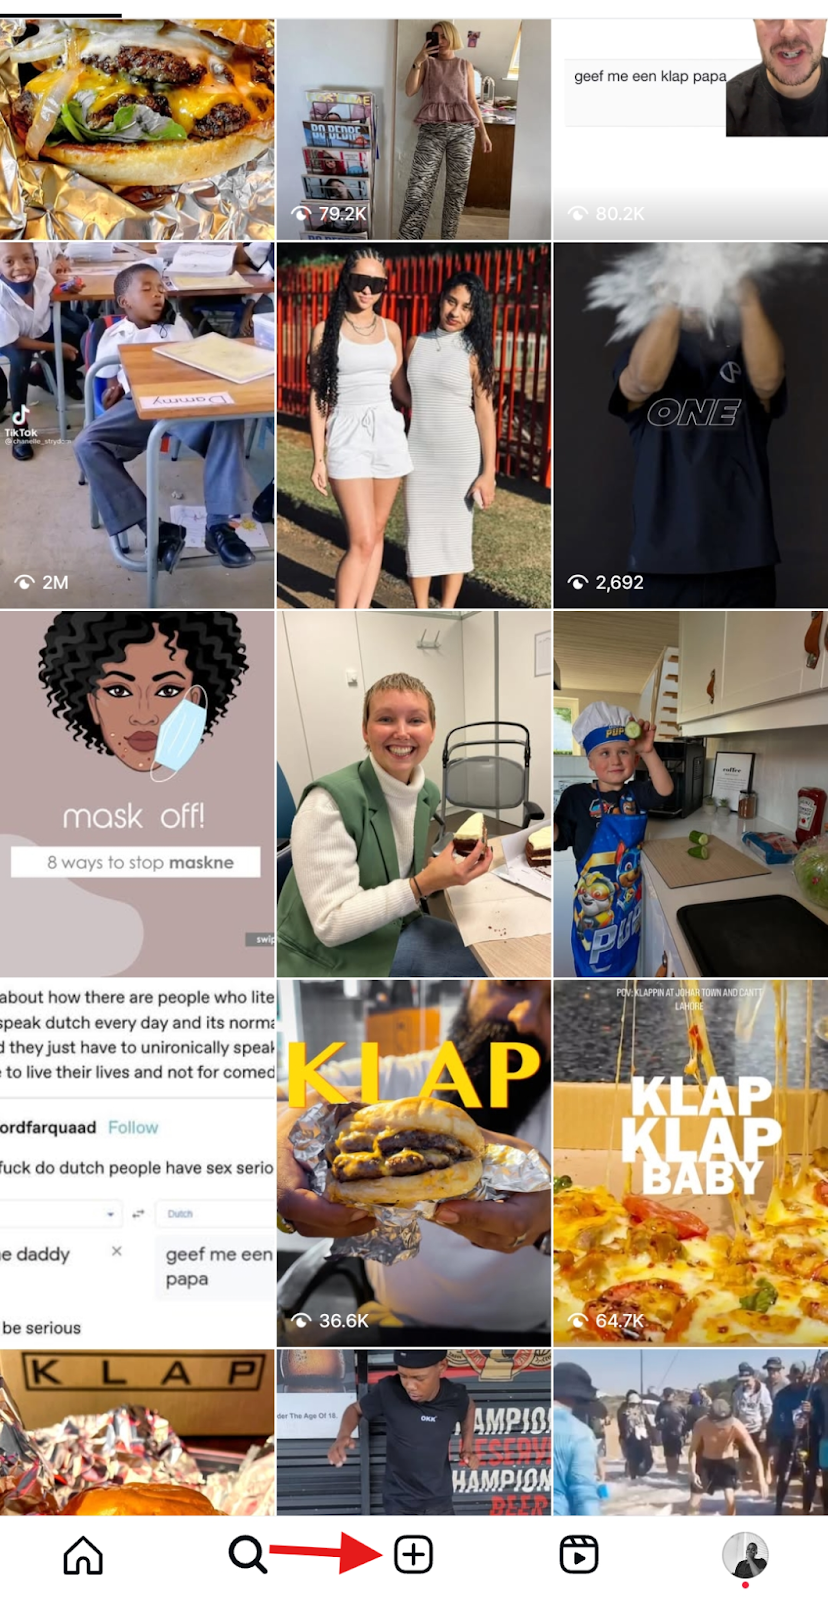
- Tap on “Reel” to begin creating your video.
Step 3: Add Your Content
- Tap the “Camera” option to record a new video. Alternatively, you can choose a pre-recorded video from your phone’s gallery.
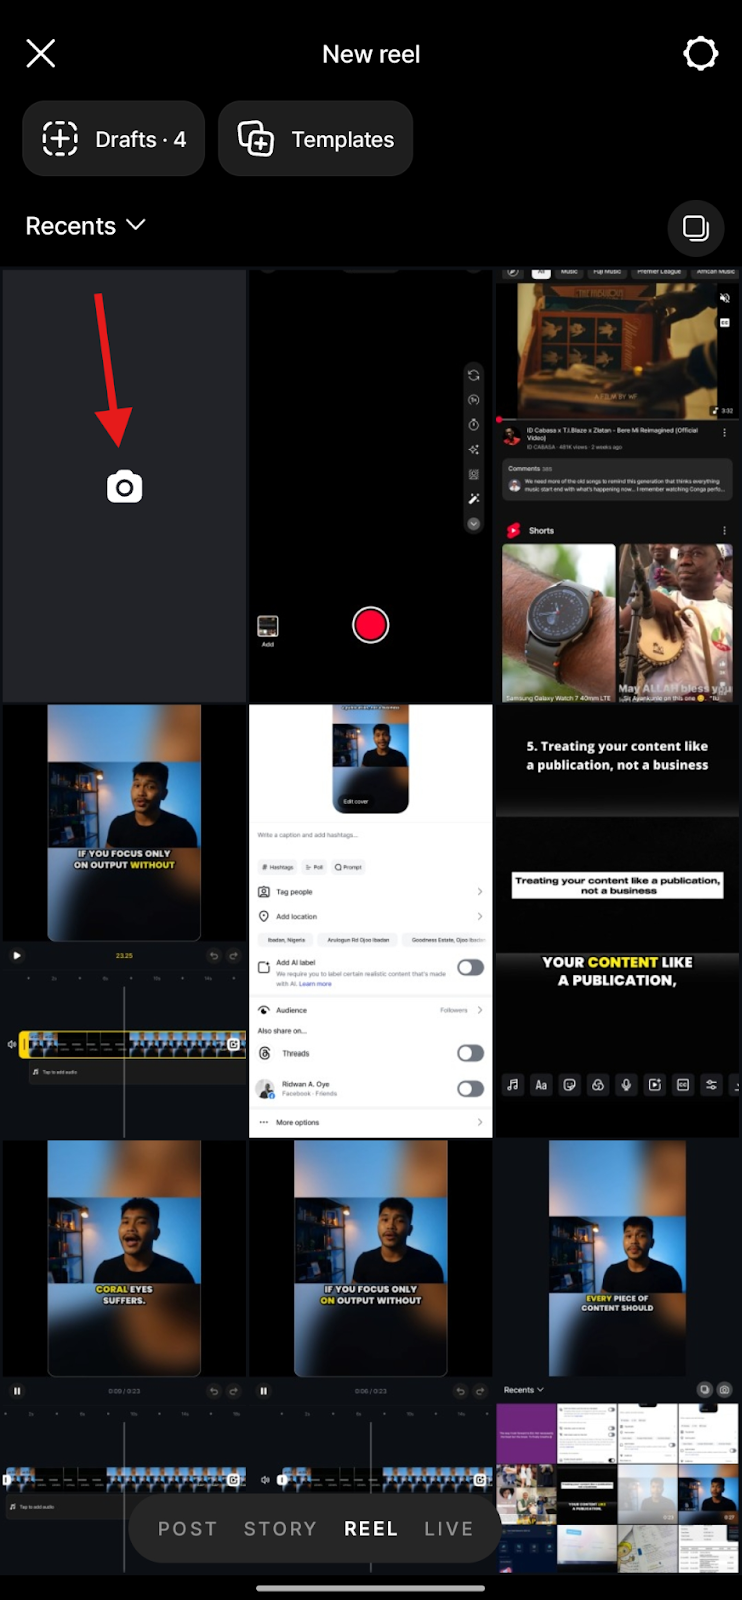
- Ensure the video adheres to Instagram's Reel specifications (e.g., vertical format, appropriate length).
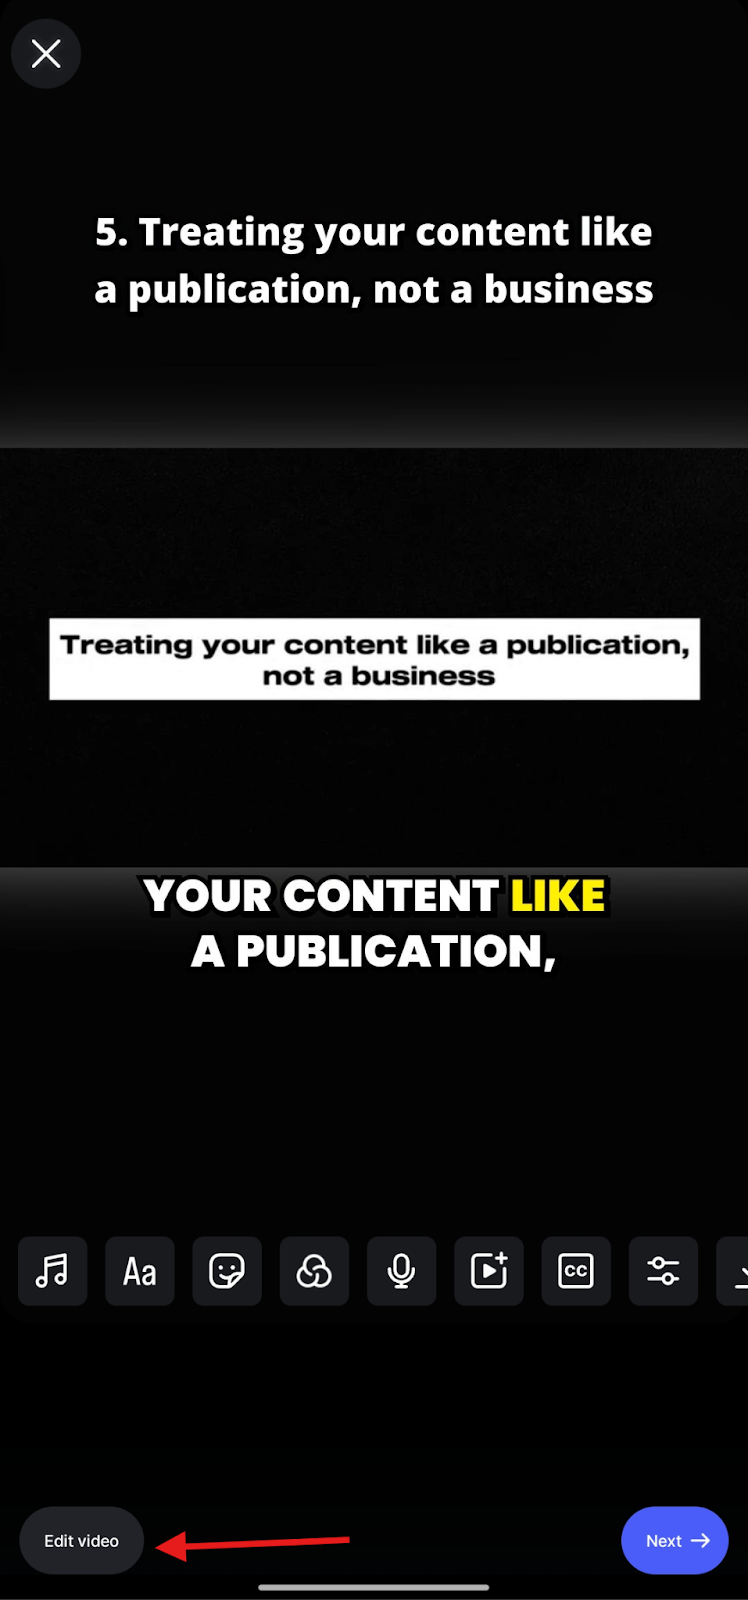
Step 4: Edit Your Reel
- Use Instagram's built-in editing tools to add music, text, stickers, or effects to enhance your Reel.
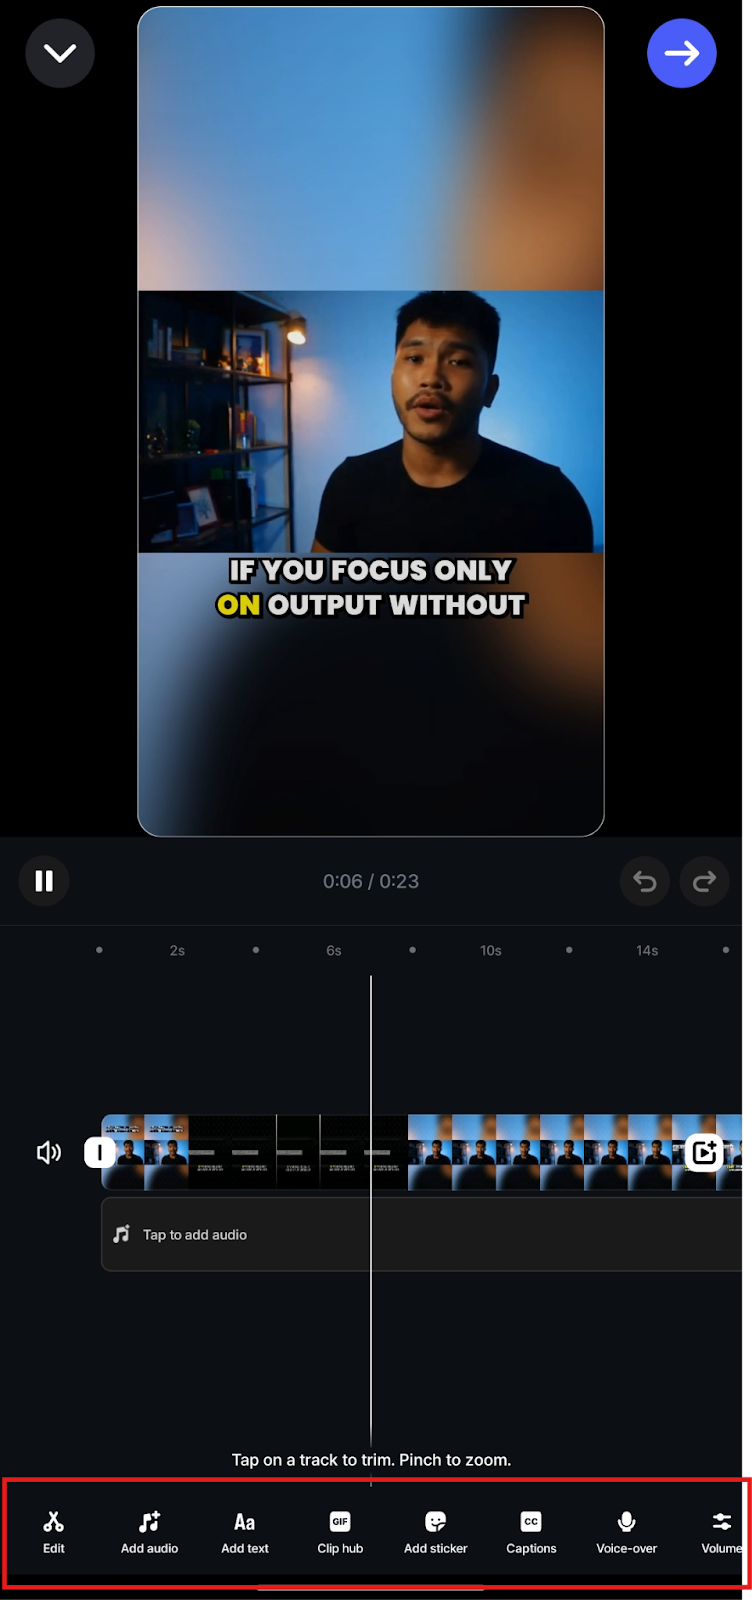
- You can preview and adjust edits by dragging and rearranging clips on the timeline.
- Once you are satisfied with your edits, tap "Next" to access the publishing screen, where you can schedule your Reel.
Step 5: Schedule Your Reel
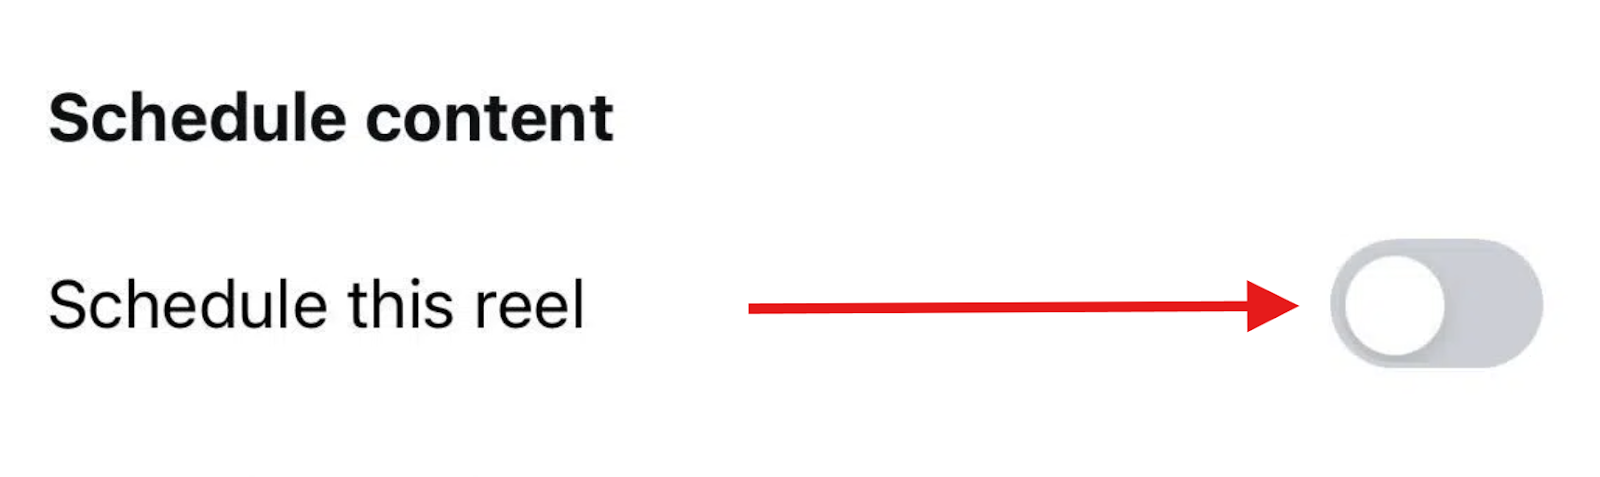
- On the publishing screen where you add captions and tags, tap on "More options" at the bottom of the screen.
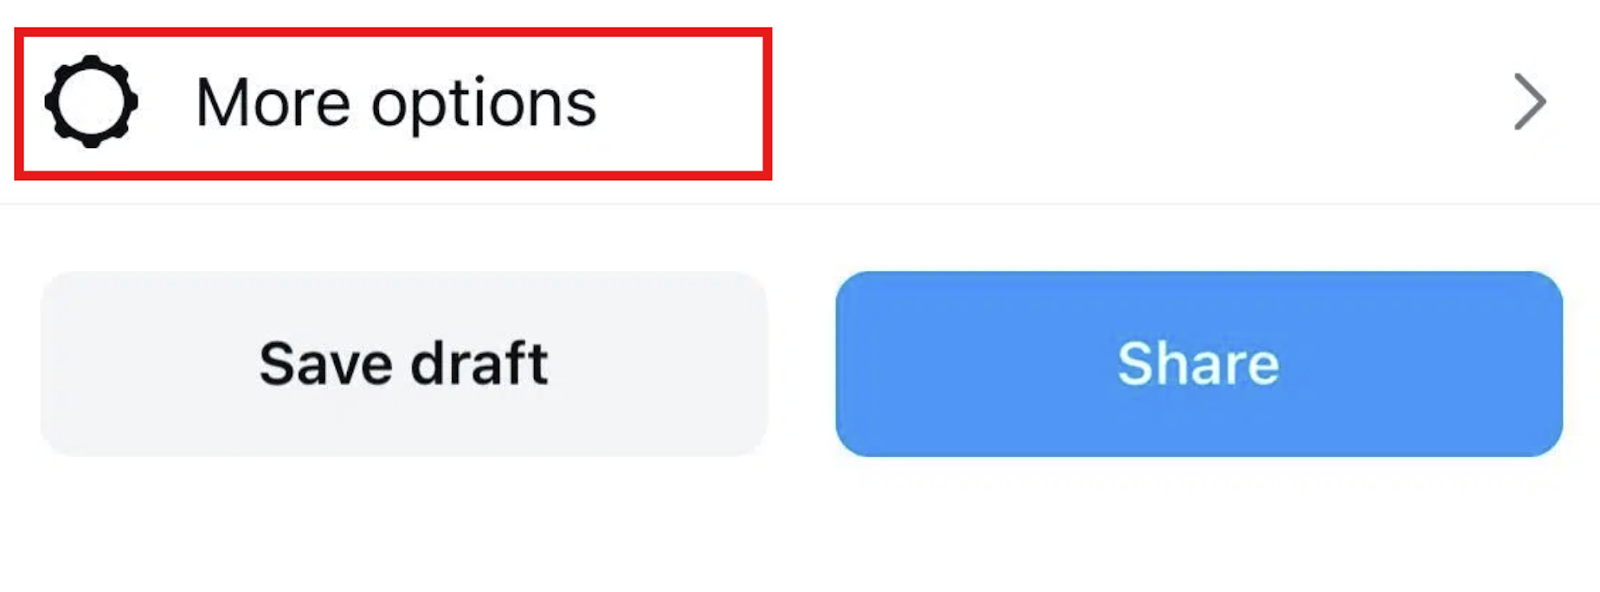
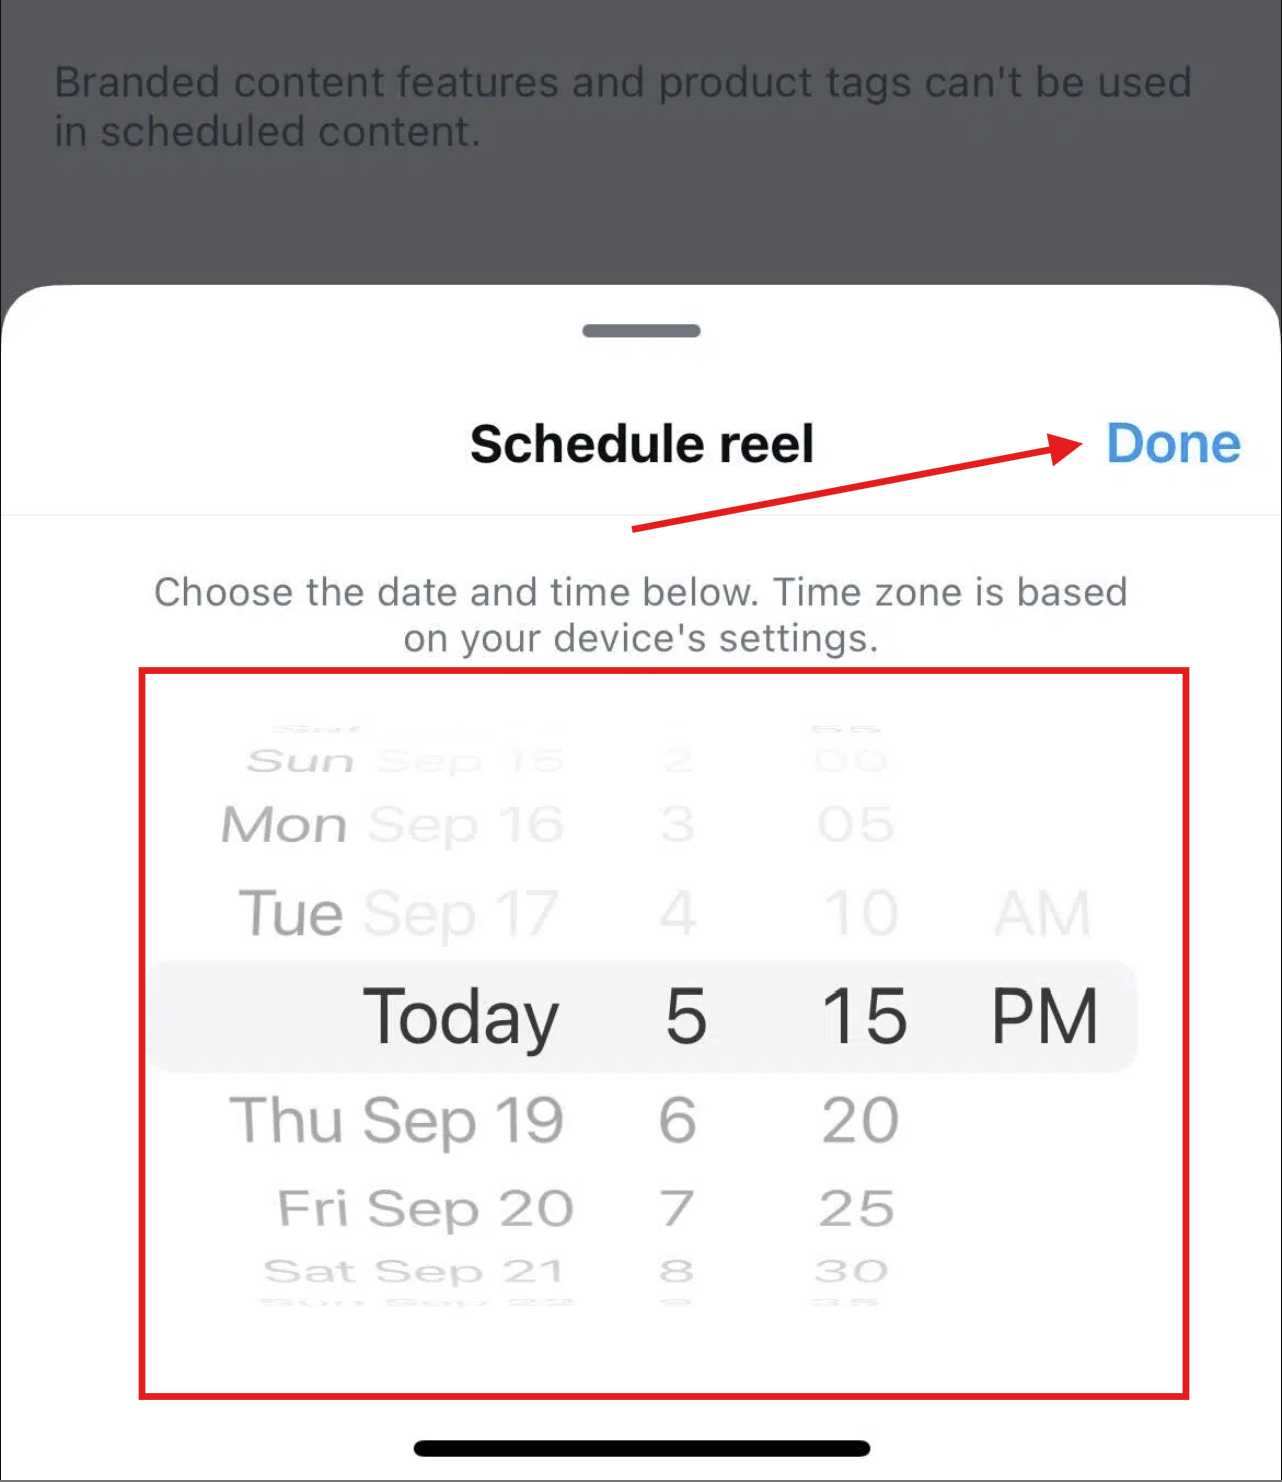
- Toggle on "Schedule this reel," and a date and time picker will appear.
- Select your desired publication date and time, up to 75 days in advance, and tap “Done.”
Step 6: Finalize and Schedule
- After setting the schedule, return to the previous screen and tap "Schedule" to confirm.
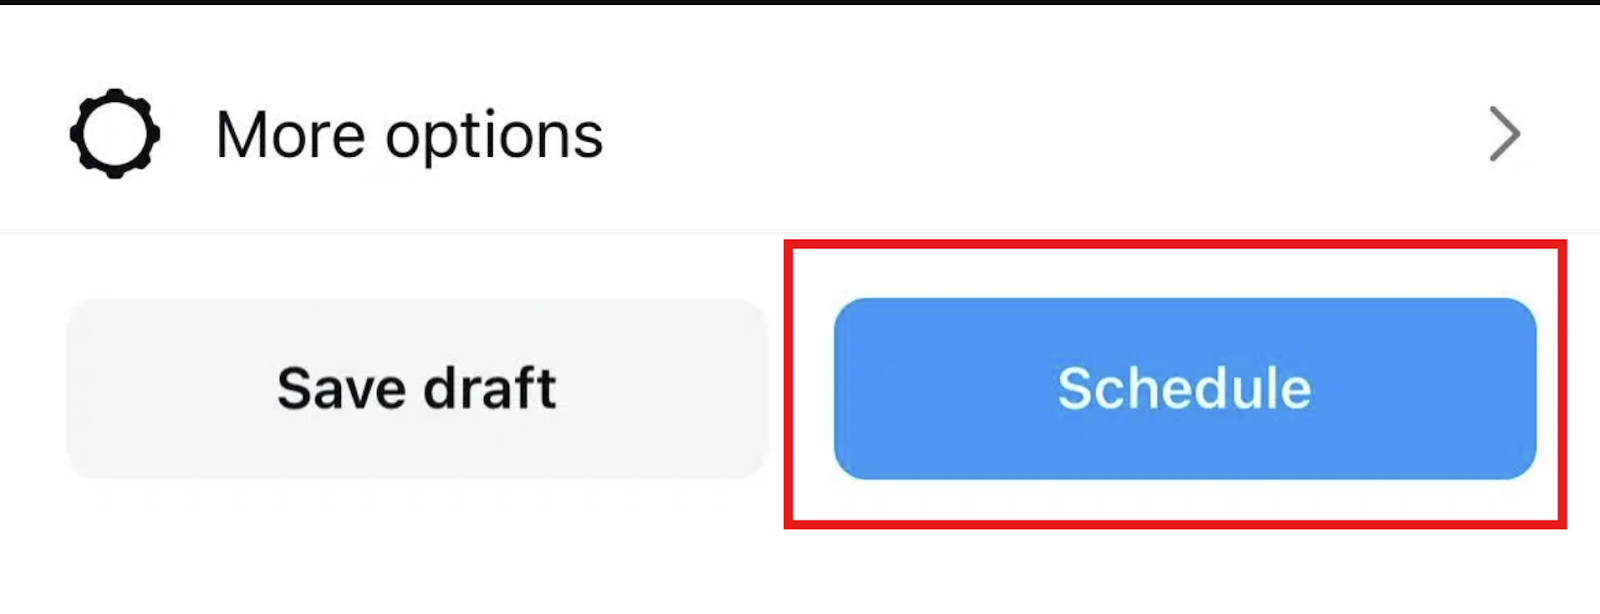
That’s all. Your Reel is now successfully scheduled.
Step 7: Manage Scheduled Reels
To view or manage your scheduled Reels:
- Go to your profile and tap the three horizontal lines (hamburger menu) in the top-right corner.
- Select "Scheduled Content."
- Here, you can view all your scheduled posts and Reels.
- To make changes, tap the three dots next to the scheduled Reel to edit, reschedule, or delete it.
NOTE: Ensure your Instagram app is updated to the latest version to access the scheduling feature. If you don't see the scheduling option, it may not yet be available for your account, as Instagram rolls out features gradually.
While Instagram’s built-in scheduling tool is helpful for quick planning, it does have several limitations to keep in mind:
- Only available on the Instagram mobile app; no desktop/web option, which can be inconvenient for teams or computer users.
- Limited editing flexibility; changes require deleting and recreating the post.
- Only Business and Creator accounts can schedule Reels; personal accounts must switch profiles.
- Instagram limits scheduling to 25 posts per day, which can be restrictive for high-volume content creators.
- Scheduling up to 75 days in advance is inconsistent; many users can only schedule 30 days ahead.
These limitations make Instagram’s native scheduler best suited for lighter, on-the-go planning rather than elaborate content strategies. Creators who want more will have to consider advanced alternatives like Klap.
Best Practices for Scheduling Instagram Reels
- Know Your Audience's Peak Times: Timing is key to maximizing engagement. Use insights from Instagram Analytics or your third-party scheduling tool to determine when your audience is most active. Schedule your Reels to go live during these peak hours for maximum visibility.
- Edit and Optimize: Take advantage of tools like Klap’s AI-powered editing to create polished, high-quality Reels. Refine your videos, add captions, adjust styles, and ensure that the content aligns with your brand’s messaging.
- Stay on Brand: Consistency is key in building your brand’s presence. Use a consistent style across all your Reels by sticking to similar colors, fonts, and themes.
- Use Hashtags and Captions Wisely: When scheduling your Reels, include relevant hashtags and captions to increase discoverability. Choose keywords that resonate with your target audience and align with trends in your niche.
- Batch Create Content: Save time and reduce stress by creating multiple Reels in one go. Schedule them in advance to maintain a consistent posting schedule without scrambling to create content each day.
- Monitor and Adjust: Even though your Reels are scheduled, it’s important to track their performance. Regularly check engagement metrics and adjust future posts based on what’s resonating with your audience.
- Stay Flexible: Life happens, and sometimes you need to adjust your schedule. While Klap allows for easy scheduling with no limits, Instagram’s native scheduling tool is less flexible. Always be ready to make quick changes if needed.
By following these best practices, you can optimize your scheduling process, ensuring your Reels perform well and your social media presence remains consistent and engaging.
Schedule Your Reels Seamlessly with Klap
Staying consistent on Instagram is key to growth, and scheduling your Reels is one of the easiest ways to do so. While the Instagram mobile app lets you schedule reels, it comes with a few limitations that may hinder your workflow.
Klap removes this limitation. In just minutes, you can turn long-form videos into scroll-stopping Instagram Reels with AI-powered editing and built-in styling tools. You can then schedule these reels directly to Instagram, all from one platform.
Sign up for Klap today for FREE to schedule your next Reel in just a few clicks.
