How to Resize Videos for Every Platform in 2026
Other

You've got a polished 16:9 interview, webinar, or product demo, and the moment you upload it to TikTok, Instagram Reels, or YouTube Shorts, the framing falls apart. The speaker's face drifts out of view, captions sit beneath the interface, and the platform either crops important details or adds empty bars around the footage.
Learning how to resize videos properly means solving a composition problem before solving a pixel problem. A reliable workflow keeps the subject visible, protects captions, matches each platform's canvas, and produces every version from one source instead of forcing you to rebuild the edit repeatedly.
Why Resizing Videos Matters More Than Ever in 2026
A horizontal master can look excellent on a desktop and still fail in a vertical feed. TikTok, Reels, and Shorts are designed around the upright phone screen, so a direct 16:9 upload may be aggressively cropped, letterboxed, or displayed with key content outside the viewer's practical field of attention.
The shift toward portrait viewing isn't cosmetic. The Interactive Advertising Bureau's vertical video guidance states that vertical video accounts for 90% of smartphone view time, with 9:16 established as the standard portrait specification. In practical production terms, that usually means a 1080×1920 canvas for short-form delivery.

The old workflow creates unnecessary rework
Many teams still duplicate an entire project for every destination. They make a TikTok timeline, then a Reels timeline, then a Shorts timeline, adjusting crops and captions independently. That approach works for one clip, but it becomes fragile as soon as the source includes multiple speakers, moving subjects, graphics, or several camera angles.
A better setup treats the long-form edit as the source of truth. From that master, you create a controlled vertical version, then generate other platform variants through consistent reframing and export settings. You're not re-editing the story each time. You're adapting its composition.
Practical rule: Resize once per target format, not repeatedly through intermediate exports.
The performance case supports that priority. Industry summaries report vertical completion rates around 76% compared with roughly 54% for horizontal video, while other guidance says viewers are 90% more likely to finish vertical videos than horizontal ones. Those figures come from 8Frame's vertical-first video strategy guide, and they point to a practical conclusion: the portrait cut deserves deliberate editing, not a quick automatic crop.
The rest of the workflow comes down to four decisions. Pick the right canvas, check whether the source can survive reframing, move the focal point instead of blindly centering it, and use one repeatable pipeline for review and export.
Choosing the Right Aspect Ratio and Resolution
Start with the destination, not the editor. A ratio determines how much of the original frame survives, while resolution determines how sharply that composition appears after export. The commonly recommended short-form target is 9:16 at 1080×1920, as outlined in this social media video aspect ratio guide.
PlatformAspect RatioResolutionFrame RateBitrate
TikTok
9:16
1080×1920
Match source
Pair with 1080p H.264 target
Instagram Reels
9:16
1080×1920
Match source
Pair with 1080p H.264 target
YouTube Shorts
9:16
1080×1920
Match source
Pair with 1080p H.264 target
Instagram feed
4:5
1080×1350
Match source
Scale with output resolution
Feed posts
1:1
1080×1080
Match source
Scale with output resolution
YouTube and LinkedIn landscape
16:9
1920×1080
Match source
Pair with 1080p target
For Instagram and Facebook feed posts, 4:5 portrait and 1:1 square generally occupy more mobile screen space than 16:9, while Stories and Reels use 9:16. SocialBee's video size guidance lays out that distinction clearly. YouTube's long-form player is built around 16:9, and it also accepts 4:3 uploads, adding pillarboxing when necessary, as described in Sprout Social's platform specifications.
Use 9:16 as the short-form starting point
For a podcast clip, interview, webinar excerpt, or talking-head video intended for mobile discovery, make the vertical cut first. A 9:16 composition gives you the largest usable canvas for Shorts, Reels, and TikTok, while a 4:5 or square version can be derived later for feed placements.
Keep frame-rate decisions consistent with the source. If the footage was captured at 30fps, exporting at 30fps avoids unnecessary frame duplication. If the source is 60fps and the motion benefits from it, retain 60fps where the destination supports it. Don't upscale a small source to reach a larger number. Scaling can preserve proportions, but it can't restore detail that the camera never captured.
Bitrate must follow the output rather than the original file. Mux's encoding guidance gives starting H.264 ranges of roughly 4–6 Mbps for 1080p, 2–4 Mbps for 720p, and 1–2 Mbps for 480p. For high-quality 1080p compression, another video compression guide cites roughly 5–8 Mbps, with lower streaming targets around 2–4 Mbps. Treat those as starting points, then check the actual upload requirements of the platform and codec you're using.
Preparing Your Source Footage for a Clean Resize
Before changing the canvas, inspect the material you're about to crop. A clean resize starts with enough detail, useful headroom, and a clear understanding of where the important action sits.
Check the source before opening the resize controls
Confirm the source resolution first. Footage at or above 1920×1080 gives a 9:16 reframer more usable detail than a smaller source, especially when the subject starts near one side of a wide frame. Proportional scaling matters here. Set one output dimension and let the other calculate automatically so faces, circles, logos, and text don't stretch. The resolution scaling guide offers a useful reference for preserving those proportions.
Next, identify the focal points. In an interview, that may be the speaker's eyes and hands. In a product demonstration, it might be the product itself, followed by the presenter's face. Don't assume the center of the frame is the correct vertical composition. A centered crop can leave empty space above the subject while cutting off the element that explains the shot.
Protect the areas platforms cover
Vertical platforms place interface elements near the edges. Captions, usernames, buttons, and descriptions can cover important content even when the exported file itself looks correct. Keep the speaker, product, and essential graphics in a central safe area, and place subtitles high enough that lower interface controls won't hide them.
Horizontal headroom also gives the reframer room to track a moving subject. A tightly framed shot may technically convert to 9:16, but it won't provide enough space for a natural pan. Recording at 60fps can help when you need slow motion or smoother movement, but it doesn't solve a poor composition by itself.

Run this quick checklist before resizing:
- Resolution: Confirm the source has enough detail for the chosen output.
- Heads and tails: Remove dead air, accidental starts, and rough endings before reframing.
- Focal points: Mark the primary subject and any secondary visual that must remain visible.
- Safe zones: Keep faces, captions, logos, and product details away from platform-covered edges.
- Motion room: Check whether the subject moves far enough to require keyframed tracking.
Resizing and Reframing Step by Step
A reliable resize protects the master first, then rebuilds the composition for the target screen. Pixel dimensions come after framing decisions.
- Duplicate the timeline. Lock the original master and work from a copy. This keeps the edit, audio mix, transitions, and graphics available if the vertical version needs different timing or placement.
- Set the target canvas. Choose 9:16, 4:5, 1:1, or 16:9 before adjusting the clip. Use a crop or fill operation that preserves the source proportions. Stretching footage distorts faces, products, and graphics.
- Map the focal point. Place the subject where the new frame gives the shot room to work. A speaker may sit slightly above center to leave space for captions. A product demonstration may need an off-center position so the hand or object remains visible.
- Track movement with keyframes. Animate position and scale when the subject crosses the source frame. A static center crop can suit a stationary talking head, but it breaks when someone turns, gestures, or shares the shot with another speaker.

Match the export to the new frame
Export at the final target resolution rather than creating a large intermediate file and resizing it again. H.264 is a practical compatibility choice. H.265 can reduce file size when the destination supports it consistently.
The requested production preset of 10–15 Mbps for 1080p vertical and 20–35 Mbps for 4K can serve as a high-quality editing target, not a universal platform requirement. Bitrate cannot repair a weak crop, and a larger file may slow uploads without improving a phone-sized image.
Keep the source frame rate when it suits the destination, and retain audio at 48 kHz when the project and platform support it. Check the finished file on an actual phone. Desktop previews can hide tiny captions, awkward eye lines, clipped hands, and interface collisions.
A single automated pipeline can handle the resize, reframe, and export without sending the project through four separate apps. For teams building repeatable vertical video editing workflows, that setup reduces handoffs and keeps composition checks close to the final export.
Use these videographer marketing tips to connect repurposed clips with the publishing process, then test the rendered file on the platform where viewers will encounter it.
An AI Shortcut With Klap
Manual reframing gives you control, but it becomes expensive when one long recording needs several useful clips. A single interview can contain multiple speakers, scene changes, pauses, and moments that work as independent short-form edits. Searching for those moments, cutting them, tracking faces, adding captions, and exporting each ratio can consume more time than the original recording.

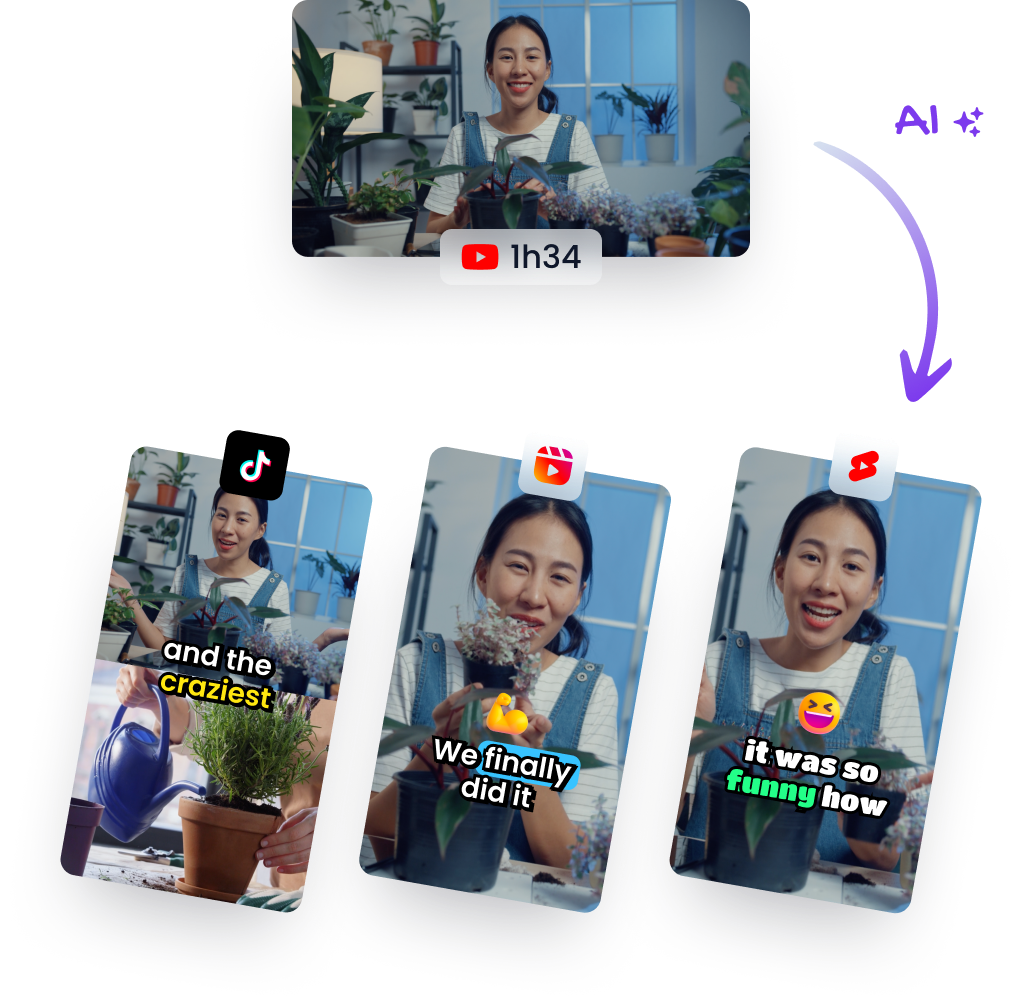
Klap compresses that sequence into an upload and review workflow. You upload one long-form video, and its AI analyzes speakers, scene changes, and likely engaging moments before generating short clips. It can automatically reframe around faces and important motion instead of applying one fixed center crop, then prepare vertical versions with animated captions and jump cuts.
That matters most when the source isn't visually simple. A static crop can handle a single speaker who stays in place, but it struggles with two-person conversations, demonstrations, and footage where the action moves across a wide frame. Automated tracking provides a first pass, while human review remains necessary for brand positioning, caption corrections, pacing, and moments where the model misunderstands the visual priority.
For example, a 20-minute interview can be turned into ten publish-ready clips in approximately the time required to render one manually reframed version, according to the workflow scenario described in the brief. The practical benefit isn't that the editor disappears. It's that the editor reviews a queue instead of repeating the same mechanical operations across separate timelines.
You can also compare that workflow with a dedicated video resizing tool when the source clip is already selected and the main need is adapting its dimensions.
The generated output still deserves a phone preview. Check whether captions are readable, whether the first frame makes sense without context, and whether the crop keeps the intended person or object visible during every cut.
Common Mistakes That Break Your Resized Video
A resized clip can be technically correct and still fail in the feed. The common cause is a workflow that treats export settings as the finish line, while overlooking the decisions that shape how the clip is understood.
Starting from the wrong edit creates unnecessary repair work. A version built for a long horizontal sequence may contain pauses, wide establishing shots, or transitions that do not survive a short vertical cut. Select the strongest excerpt and tighten its story before automating variants. Reframing cannot fix a weak opening or a scene that needs context the crop removes.
Letting automation make the final call is another frequent failure. Face tracking can follow the wrong person, switch focus during a gesture, or favor a background face in a group shot. Review every cut where the subject changes, the camera moves quickly, or a product enters the frame. Correcting a few decisions is faster than discovering them after publishing.
Ignoring text and brand consistency makes a set of resized clips feel improvised. Captions may change position, line breaks, capitalization, or styling between exports. Set one caption treatment, then inspect it against busy footage, bright backgrounds, and fast dialogue. Logos and lower thirds also need consistent timing, not just consistent placement.
Exporting without checking the platform's processing result hides problems until the clip is live. Upload a test when the account or platform is unfamiliar, then inspect playback, audio sync, captions, and thumbnail selection after processing. A clean local file does not guarantee an equally clear feed preview.
Klap can keep selection, reframing, captions, and review in one workflow, reducing handoffs between separate apps. Use it for the first pass, then make the editorial corrections that automation cannot judge reliably.
Your Repeatable Resize Workflow Going Forward
Use this six-stage routine for the next clip:
- Audit the source. Check resolution, clean heads and tails, silent gaps, focal points, and available motion room.
- Choose the destination. Pick the platform and target ratio before opening the editor.
- Mark the composition. Place focal points, subtitles, logos, and safe zones on the timeline.
- Create the primary cut. Build the vertical or square version from the clean source.
- Generate variants. Use automated reframing where possible instead of rebuilding every timeline manually.
- Run phone QA. Watch at least five seconds of the opening, a busy middle moment, and the ending on a phone before publishing.
That routine works for a podcast clip headed to LinkedIn, a webinar excerpt intended for YouTube Shorts, or a product demonstration prepared for TikTok. The format changes, but the production logic stays the same: protect the story, then fit the pixels around it.
Start with one existing long-form video today. Choose its strongest short segment, create the 9:16 version, review the crop on your phone, and save the export settings as a reusable preset.
Klap turns long-form footage into social-ready short clips with automated resizing, face-aware reframing, captions, and review tools for platforms such as TikTok, Reels, and Shorts. Upload your next interview, webinar, or podcast and test the workflow at Klap.