The Best Video File Format for Instagram to Maximize Quality
Other

You’ve been there. You spend hours, maybe even days, shooting and editing the perfect video. It's crisp, it's clean, it's ready to wow your audience. Then you upload it to Instagram, and... it looks like a pixelated mess.
What gives?
It's a frustratingly common problem for creators. The secret to fixing it isn't some complex trick—it's about understanding what Instagram wants from your video file. The best video file format for Instagram is an MP4 with an H.264 codec and AAC audio. This specific combination gives you the best shot at preserving quality because it's exactly what the platform is designed to handle.
Why Your Instagram Video Quality Suffers After Uploading
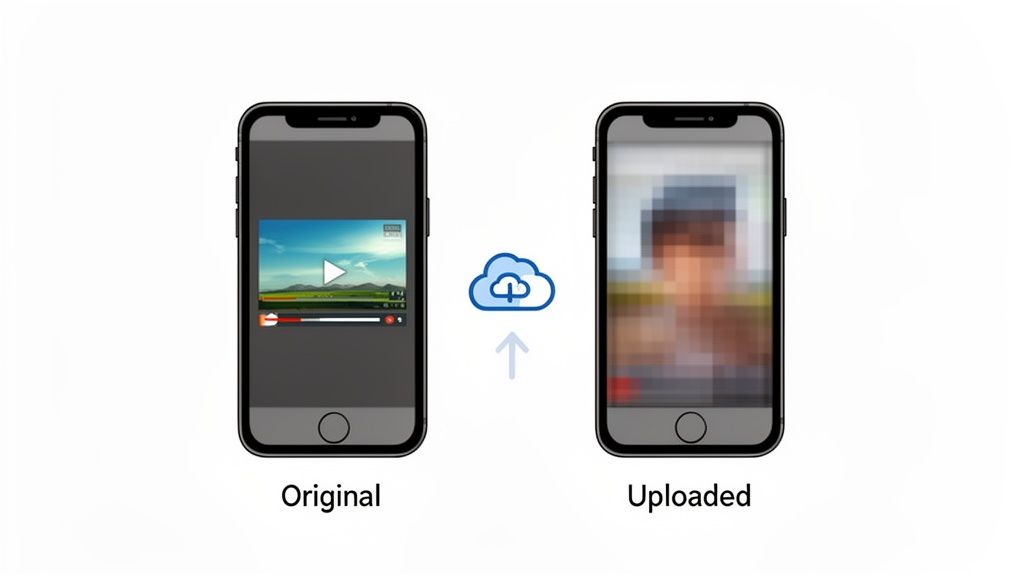
That sinking feeling you get when your high-definition video turns into a blurry, soft version of itself on your Feed or Reel isn't your fault. It’s the direct result of Instagram's aggressive compression algorithm.
Think about it: with over 2.4 billion monthly active users uploading and streaming video, Instagram has to shrink every single file to save server space and make sure content plays smoothly, even for users on a shaky connection. Their system automatically "squishes" your video to a smaller size.
Imagine trying to vacuum-seal a big, fluffy blanket to fit it into a tiny box. If you don't fold it neatly first, it comes out a wrinkled, compressed mess. That's what happens to your video when its settings aren't right.
The Real Culprit Behind Blurry Videos
The core of the problem is that Instagram's algorithm doesn't know how to gracefully handle files that fall outside its preferred specs. When you upload a video with a massive bitrate or an unsupported format, you're handing over a file that it’s forced to compress heavily.
This often leads to ugly visual problems:
- Pixelation: Those chunky, blocky artifacts that are especially noticeable in scenes with a lot of movement.
- Color Banding: Smooth gradients, like a beautiful sunset, get turned into distinct, striped bands of color.
- Loss of Detail: All those sharp edges and fine textures you worked on just disappear, leaving everything looking soft.
The secret to fighting back is simple: give Instagram a video that is already as close to its final, preferred state as possible. When you control the export settings yourself, you minimize how much the platform has to crush it, preserving the clarity you worked so hard to create.
This guide will put you back in the driver's seat. We'll walk you through exactly how choosing the right video file format for Instagram and mastering your export settings can make all the difference. For those looking to streamline the process, especially when repurposing longer content, a good video cropping tool can automatically apply these optimal settings for you.
Understanding Containers and Codecs
To really nail your Instagram videos, you have to get a handle on two terms that trip up a lot of creators: containers and codecs. It sounds technical, but getting this right is the difference between a video that looks sharp and one that’s a pixelated mess.
Think of your video file like a package you’re about to ship to Instagram.
The container is the shipping box. It holds everything together—the video track, the audio track, and even other data like captions. The two you’ll see most often are .MP4 and .MOV.
What Is a Video Container?
A container is just a wrapper. It doesn't actually determine the quality of the video inside; it just organizes all the different parts. While Instagram technically accepts both MP4 and MOV, one is a much safer bet.
Actionable Insight: Always choose MP4 (MPEG-4 Part 14). It's the universal standard, meaning your video will play nice not just with Instagram, but with virtually any device or platform. This simple choice prevents countless upload errors and playback glitches.
That massive compatibility is a huge deal. An MOV file might work, but an MP4 is the reliable, go-to choice for Instagram.
What Is a Video Codec?
Okay, so if the container is the shipping box, the codec is how you pack everything inside it. The word "codec" is just a mashup of "compressor-decompressor." Its job is to shrink your huge, raw video files into a size that’s easy to upload and stream, all without totally wrecking the quality.
There are a ton of different codecs out there, but for Instagram, one is king: H.264 (also known as AVC).
The H.264 codec is a workhorse. It’s an industry-standard technology that hits the perfect sweet spot between high-quality video and a small file size. This is exactly why Instagram and most other streaming platforms absolutely love it. A smaller file means a faster upload for you and a smooth, buffer-free experience for your followers. It’s a win-win.
So, when you go to export your video, what you’re really telling your editing software is this: "Put my video in an MP4 box, and pack it using the H.264 method." This simple combo is the gold standard for Instagram, ensuring your content shows up looking exactly how you intended.
Your Instagram Video Export Settings Cheat Sheet
Alright, we've covered the "what" and "why" behind video formats. Now it's time to get into the good stuff—the "how." This is your definitive guide to the exact export settings Instagram’s algorithm actually wants.
Stop guessing and start creating presets in your editing software. Trust me, it’s a game-changer for making sure every video you post is optimized for maximum clarity.
Think of it like this: when you hand Instagram a video file with settings it loves, the platform does less work "digesting" (compressing) it. The result? Your video looks crisp and clean on your audience's screen, not like a pixelated mess.
This simple diagram breaks down the basic structure of a video file, showing how the container and codec work together to create the final product.
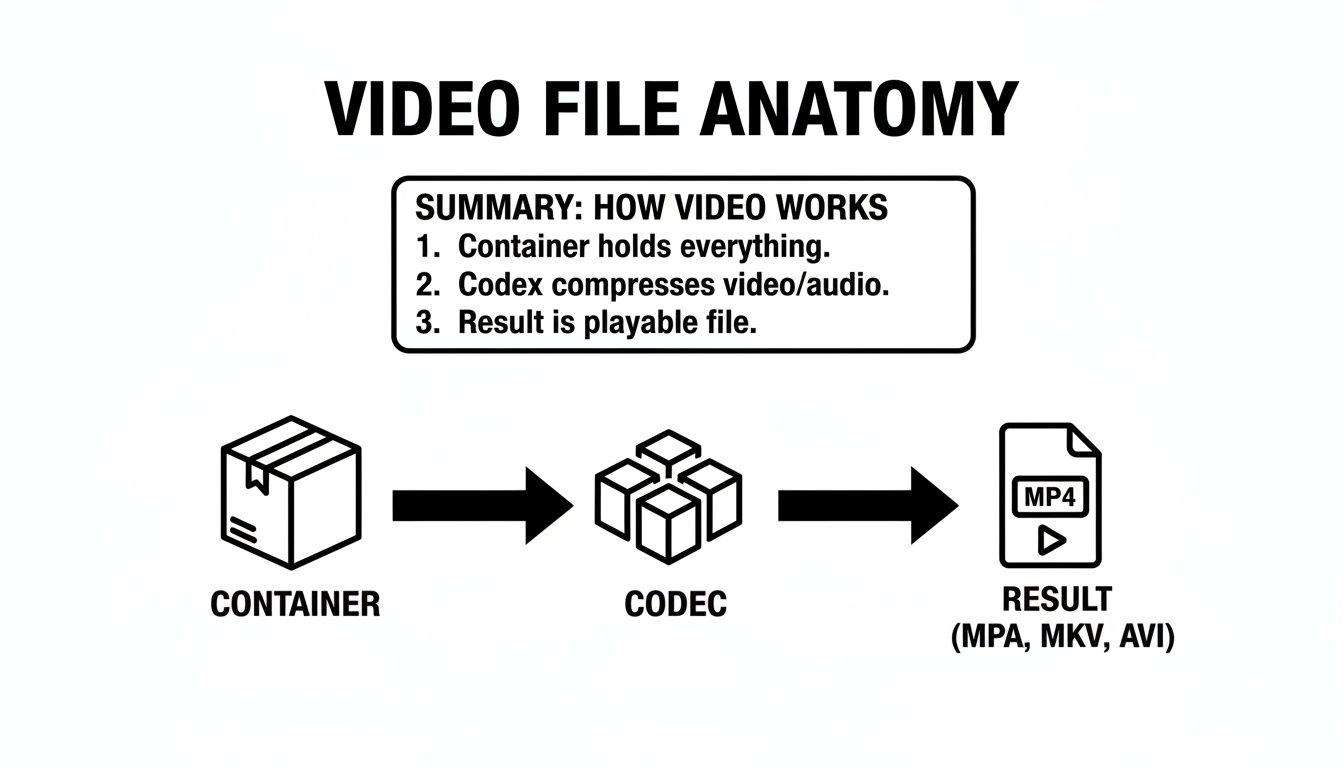
The key takeaway is simple: use the MP4 container (the box) and the H.264 codec (the packing method). That combo is the gold standard for Instagram.
Instagram Reels Export Settings
Reels are the engine for growth on Instagram right now, so getting their technical specs right is non-negotiable. Use these settings every single time to avoid blurry or awkwardly cropped content.
- Format/Container: MP4
- Codec: H.264
- Resolution: 1080 x 1920 pixels
- Aspect Ratio: 9:16 (This is the standard vertical screen on a smartphone)
- Frame Rate: 30 fps (frames per second) is perfect. Don't bother with 60 fps unless you’re going for a specific slow-motion effect; it just inflates your file size for no real benefit here.
- Bitrate: Aim for a target bitrate between 3 and 6 Mbps (megabits per second). It’s a common mistake to think higher is better, but going overboard just invites Instagram to compress your video more aggressively.
- Audio: AAC codec at a 44.1 kHz sample rate.
Getting this right for Reels is critical, especially since their dominance is only growing. Some projections even suggest that by 2026, Reels could drive 50% of the time spent on the platform.
Feed Video and Stories Export Settings
While Reels get all the glory, Feed videos and Stories are still vital for keeping your current audience engaged. The settings are mostly the same, with just a couple of key differences in the aspect ratio.
Pro Tip: Always start your project in the final aspect ratio. Don't edit a 16:9 (widescreen) video and then try to crop it to 4:5 or 9:16 at the last minute. You’ll just end up having to reframe every shot and will likely cut out important visual details.
Here’s a quick-reference table to help you nail the settings for each placement.
Instagram Video Export Settings Cheat Sheet
This table breaks down the essentials for the most common Instagram video placements. Save it, screenshot it, do whatever you need to keep it handy!
SettingInstagram ReelsInstagram Feed Video (Portrait)Instagram Stories
Resolution
1080 x 1920 px
1080 x 1350 px
1080 x 1920 px
Aspect Ratio
9:16
4:5
9:16
Frame Rate
30 fps
30 fps
30 fps
Bitrate
3 - 6 Mbps
3 - 6 Mbps
3 - 6 Mbps
Container
MP4
MP4
MP4
Codec
H.264
H.264
H.264
Audio
AAC
AAC
AAC
The biggest difference to note is the aspect ratio for portrait Feed videos. That 4:5 ratio is your secret weapon for taking up the most possible screen real estate in the main feed without getting cropped. It really maximizes your visual impact as people are scrolling.
If you have a video that’s not quite the right size and need a hand, you can easily resize videos for Instagram without sacrificing quality.
Sticking to these specs will solve the vast majority of quality issues creators run into. And if you want to make the process even smoother, exploring tools with dedicated Saucial's Instagram video upload features can help ensure your hard work always looks its best.
Common Mistakes That Ruin Your Video Quality
Even the most experienced creators fall into a few common traps that practically invite Instagram to destroy their video quality. Knowing the right settings is half the battle, but avoiding these simple mistakes is what makes the difference.
The goal here is simple: hand Instagram a file that it barely has to touch. The more you force the platform to resize, re-encode, or compress your video, the more you’re asking for that dreaded pixelated, blurry mess.
Uploading with the Wrong Aspect Ratio
This one is probably the most common—and most damaging—mistake out there. You spend hours editing a gorgeous 16:9 widescreen video, upload it as a Reel, and watch in horror as Instagram awkwardly chops it into a 9:16 frame. The sides are gone, your framing looks amateur, and the quality is shot.
This isn't just a simple crop; it's a destructive process. Instagram has to zoom in and re-render your video to make it fit, which immediately degrades the resolution.
- The Problem: Instagram is forced to crop your video to fit its required dimensions (like 9:16 for Reels), which lowers the resolution and clarity.
- The Fix: Start your project in the final aspect ratio from the get-go. If you're making a Reel, set your editing sequence to 1080x1920 before you even drop a clip on the timeline.
Using an Insanely High Bitrate
It seems logical, right? Higher bitrate equals higher quality. But on Instagram, this logic completely backfires. Uploading a video with a bitrate of 20, 30, or even 50 Mbps is like handing the algorithm a giant file and daring it to crush it into dust.
Instagram has its own bitrate targets, and if your file is way over the limit, it will compress it aggressively to get it down to size. This forced compression is almost always harsher and uglier than what your own editing software can do.
Actionable Insight: Don't force Instagram's hand. When you export your video with a controlled bitrate (around 3-6 Mbps), you dictate the terms of compression. You're essentially pre-compressing it in a high-quality, controlled environment, which results in a much cleaner final product.
Ignoring Your Audio Settings
Video gets all the glory, but messed-up audio settings can also trip you up. Instagram prefers a specific audio format, and if you give it something different, you risk sync issues or just plain bad sound after the upload.
The platform is optimized for AAC (Advanced Audio Coding) because it delivers great quality at a low bitrate—perfect for mobile streaming. Using another format forces Instagram to re-encode the audio, which can strip away its fidelity.
- The Problem: Mismatched audio formats get re-compressed poorly, making your audio sound flat, distorted, or out of sync.
- The Fix: Always select the AAC audio codec when you export. Stick to a sample rate of 44.1 kHz and set the bitrate to 128 kbps. This gives you clear, compatible sound that won't get mangled in the upload process.
How to Repurpose Content for Instagram Without Losing Quality
So, you've got a great widescreen YouTube video and want to turn it into a vertical Instagram Reel. It sounds simple enough, but a quick crop-and-export job is a recipe for disaster. Do it wrong, and you’ll end up with terrible framing, chopped-off visuals, and a blurry mess that screams "low effort."
To get it right, you need a smart approach that keeps your video looking sharp and tells the same great story, just in a new format.
The old-school way is a total grind. You’d have to create a new 9:16 project in your editing software, drop in your horizontal video, and then manually "punch in" and reframe every single clip. It works, but it takes forever, especially if your video is more than a couple of minutes long.
This is where things usually go wrong. All it takes is one missed clip, and suddenly your speaker's face is half out of the frame. Your audience will notice, and they’ll scroll right past.
A Better Way: AI-Powered Repurposing Tools
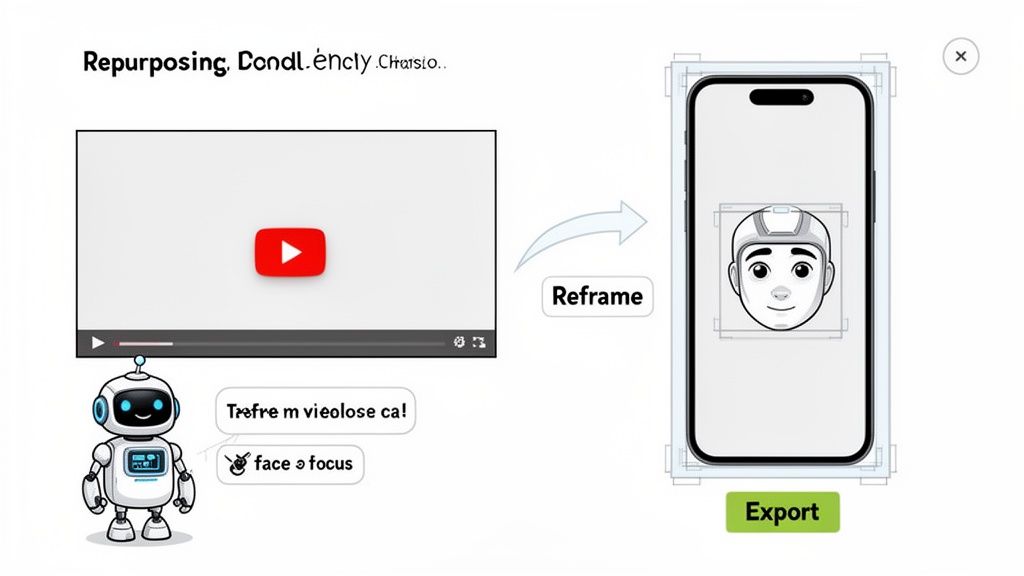
This tedious reframing work is exactly why AI tools like Klap were created. Instead of spending hours fighting with a timeline, you can hand off the heavy lifting to an algorithm designed to do one thing perfectly: turn long videos into short, vertical clips.
Here’s what these tools do for you, almost instantly:
- Find the Best Moments: The AI scans your video's transcript and visuals to pinpoint the most engaging, hook-worthy snippets that have the potential to go viral.
- Reframe Like a Pro: Using "speaker detection," the tool automatically finds the main subject—like a person speaking—and keeps them perfectly centered in the new vertical 9:16 frame. No more manual keyframing.
- Add Dynamic Captions: It generates and styles captions for you, which are absolutely essential for keeping viewers hooked when they're watching with the sound off.
- Export with Perfect Settings: The clips are automatically exported using the ideal video file format for Instagram, with the right codec, resolution, and bitrate to look crisp and clean on the app.
Let’s be real, video is king on Instagram. It now makes up 60% of the total time users spend on the platform. And with Reels getting an average reach rate of 30.81%—literally double that of other post types—you can't afford to ignore it.
Using an AI tool frees you from getting bogged down in the technical details so you can focus on the big picture. Getting the export settings right is a huge piece of the puzzle, but you still need a solid strategy for growth. Once you've nailed the technical quality, it's worth learning how to gain more real followers on Instagram to make sure your great-looking videos actually get seen.
Ready to make your life easier? You can see exactly how to make Reels from existing videos and start cutting your editing time down to almost zero.
Your Instagram Video Questions, Answered
Even after getting the settings right, a few tricky questions always seem to pop up. Let's tackle the most common ones head-on. This is your go-to cheat sheet for solving those nagging doubts about Instagram video formats.
We'll cover everything from tricky file types to why your pristine phone footage sometimes ends up looking like a blurry mess. Think of these as the final pieces of the puzzle, giving you the confidence to upload great-looking video every single time.
Can I Upload MOV Files to Instagram?
Technically, yes, Instagram accepts MOV files. But just because you can doesn't mean you should. The MOV container, while common on Apple devices, isn't as universally friendly on the web as its counterpart.
Your safest bet is always, always MP4. It’s the gold standard for online video and what Instagram’s whole system is optimized for. Sticking with MP4 is the easiest way to dodge those weird, unexplainable upload errors and compatibility headaches.
What Is the Maximum Video Length for Instagram?
This is where it gets interesting, because the limit changes depending on where you post. Instagram has different rules for each placement, all designed around how people actually watch content in that specific spot.
Here’s a quick breakdown of the current limits:
- Instagram Reels: You can record up to 90 seconds in the app, but you can upload clips up to 15 minutes long.
- Instagram Stories: Each individual Story slide maxes out at 60 seconds.
- Instagram Feed Videos: You can go all the way up to 60 minutes.
- Instagram Live: Your stream can run for a whopping 4 hours.
Just a heads-up: while you can upload a 15-minute Reel, it doesn't mean you should. The most successful content is almost always short, snappy, and tailored to the quick-scroll habits of the platform.
The data backs this up. Short-form vertical video is king right now, with 29.18% of marketers making it their top priority. And with 81% of consumers saying they want more short videos from brands, the demand is clear. Since 61% of marketers already view Instagram as their most effective video channel, leaning into this trend is a no-brainer. You can find more insights on the latest video marketing trends on Sellers Commerce.
Why Does My iPhone Video Look Bad on Instagram?
Ah, the classic creator frustration. Your video looks absolutely brilliant in your iPhone’s camera roll, but the second you upload it, it turns into a pixelated mess. The culprit is almost always a hidden setting in your phone.
By default, newer iPhones record video in a super-efficient format called HEVC (H.265). This is great for saving storage space on your device, but it’s not what Instagram’s compression engine is built to handle. When you upload an HEVC file, Instagram has to convert it to the web-standard H.264, and that forced conversion process often butchers the quality.
The fix is surprisingly simple. Just change one setting:
- Go to Settings > Camera > Formats.
- Switch from "High Efficiency" to "Most Compatible."
This tells your iPhone to start recording directly in H.264 from now on. You're essentially handing Instagram a file it already loves, which helps preserve all that beautiful clarity you worked so hard to capture.
Ready to stop wrestling with video settings and start creating viral shorts in minutes? Klap uses AI to find the best moments in your long-form videos, automatically reframes them for mobile, adds dynamic captions, and exports them with perfect settings every time. Turn your videos into viral shorts with Klap today!
