How to Trim an MP4 Video Without Losing Quality
Other

Knowing how to trim an MP4 isn't just a basic editing task—it's one of the most powerful skills you can have in today's content game. It’s all about cutting down longer videos to find those golden moments, letting you turn one big piece of content into a bunch of high-impact clips that are perfect for social media.
Why Trimming MP4s Is a Content Game Changer
Look, attention spans are shorter than ever. Trimming a video isn't just about cutting out mistakes anymore; it’s a core part of a smart content repurposing strategy. Think about that hour-long webinar or that detailed product demo you recorded. Hidden inside are dozens of potential clips just waiting to be set free.
By snipping out these key moments, you can build a whole library of content ready for platforms that run on short, punchy videos, like TikTok, Instagram Reels, and YouTube Shorts.
This isn't just about making your videos shorter. It's about making them work smarter. Each trimmed clip can zero in on a different key message, answer a specific question your audience has, or show off a single product feature. Suddenly, you've multiplied your content output without having to film a single new thing.
Amplify Your Reach and Engagement
The hunger for short, concise video is absolutely massive. The video editing software market hit USD 3.25 billion in 2024 and is on track to reach USD 4.83 billion by 2032, all because creators and marketers need better tools to trim content efficiently.
This makes total sense when you see that platforms like YouTube Shorts were pulling in 50 billion daily views way back in 2023. Learning how to create YouTube Shorts from an existing video lets you tap directly into that huge audience. You can dig deeper into the numbers in this video editing software market report.
Actionable Insight: A single long-form video can serve as the foundation for an entire social media campaign. Each trimmed segment becomes a new opportunity to capture attention, drive shares, and grow your audience.
Ultimately, trimming turns your content strategy from a "one-and-done" deal into a sustainable engine that keeps working for you. It’s the key to staying relevant and keeping your audience hooked, one powerful clip at a time. Mastering this sets the stage for the smarter, faster methods we'll get into next.
Choosing Your MP4 Trimming Toolkit
The right way to trim an MP4 really boils down to what you’re trying to do. It’s a balancing act between speed, precision, and your comfort level with the software. Not all tools are created equal—a quick trim for a social media story has totally different needs than a frame-perfect edit for a polished YouTube video.
We’re going to walk through four distinct paths you can take. Each one is built for a different kind of creator, from the busy marketer who needs instant results to the detail-oriented editor demanding absolute control. This isn't just a list; it’s a practical breakdown to help you match the tool to the task at hand.
Finding Your Perfect Workflow
Are you a YouTuber who needs to isolate a precise five-second clip from an hour-long recording? Or maybe you're a social media manager who just needs to quickly chop the beginning and end off a testimonial video? The answer will point you to the right toolkit.
For a lot of people, the first question is whether a trim is even necessary. This little flowchart helps simplify that initial thought process.
As the decision tree shows, if your video has any fluff or filler, trimming is almost always the right move to keep your audience hooked. To help you pick your method, let's compare the four main options side-by-side.
Video Trimming Methods At a Glance
Here’s a quick comparison of the four primary methods for trimming MP4 videos. We've highlighted their key strengths and weaknesses to help you figure out which one fits best into your workflow.
MethodBest ForLearning CurveSpeedQuality Control
Desktop Editors
Professional, high-precision projects requiring frame-perfect cuts and advanced effects.
High
Slow
Maximum
Online Trimmers
Quick, simple edits for social media or one-off tasks where speed is the priority.
Low
Fast
Variable
FFmpeg (Command-Line)
Developers and technical users needing lossless quality and automated, batch processing.
Very High
Fastest
Absolute
AI Platforms
Content creators and marketers looking to repurpose long-form videos into dozens of clips automatically.
Very Low
Fast
High (Automated)
Ultimately, understanding these trade-offs is everything. A desktop editor gives you incredible power but demands a serious time investment. On the flip side, online tools and AI platforms offer amazing speed and convenience, making them perfect for modern content repurposing where volume and consistency are non-negotiable.
Actionable Insight: The best choice is the one that removes the most friction from your workflow. If you spend 90% of your time making simple cuts, a complex desktop editor might be overkill, whereas an AI tool could save you hours.
Knowing what you need before you start is half the battle. Now, let’s get into the specifics of how to use each of these methods.
Precision Trimming with Desktop Video Editors
When you need absolute, frame-perfect control over your edits, nothing beats the power of a proper desktop video editor. While online tools are great for quick jobs, professional software gives you the granular precision needed for high-stakes projects where every single frame matters. This is the route for creators who don't just cut—they craft.
Let's walk through a typical workflow using a powerful (and free) editor like DaVinci Resolve. The core ideas here apply to just about any non-linear editor (NLE) you might use, whether it's Adobe Premiere Pro or Final Cut Pro. Spending a little time learning the software pays off big time with the control you get over the final product.
Importing and Setting Up Your Timeline
First things first, you need to get your footage into the project. You’ll start by importing your MP4 file into the media pool, which is basically the digital library for all your project's assets. From there, you just drag the video clip straight onto your timeline.
This timeline is your digital canvas. It lays out your video and audio tracks visually, letting you scrub through everything frame by frame. That’s a level of detail you just can't get with a simple online slider.
Making Precision Cuts with the Blade Tool
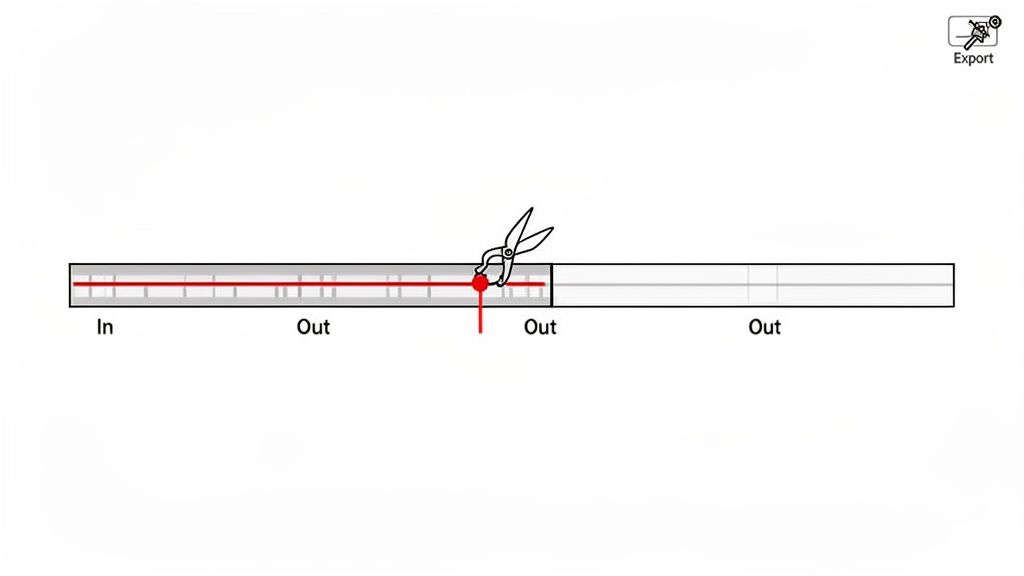
Now for the main event: the trim. The go-to method for isolating a specific segment is the blade tool. Just think of it as a pair of digital scissors.
- Find Your Starting Point: Use your mouse or keyboard shortcuts (the J, K, and L keys are your best friends here) to play, pause, and move through your footage. Find the exact starting frame for the clip you want to keep.
- Make the First Cut: Select the blade tool (usually the 'B' key is the shortcut) and click on the timeline right where your desired segment begins. This splits the original clip into two separate parts.
- Find Your End Point: Keep playing or scrubbing through the video until you reach the end of the segment you want to isolate.
- Make the Second Cut: Click again with the blade tool to make your final cut. Boom—you've now boxed in your target clip, with the unwanted footage sitting on either side.
- Clean It Up: Switch back to your selection tool (usually the 'A' key), click the unwanted parts before and after your clip, and hit delete. You're left with just the perfect take.
Actionable Insight: This is the perfect way to pull a powerful client testimonial from a long interview or isolate a quick product demo. The frame-by-frame accuracy means you won't accidentally chop off the first word or the final reaction.
Preserving Quality During Export
Knowing how to trim an mp4 video is only half the battle. Exporting it without destroying the quality is just as important. A bad export can make all your precise work look amateurish.
When you're ready to save your trimmed clip, you need to pay close attention to the export settings. To avoid ugly compression artifacts and a drop in quality, your main goal is to match the source settings as closely as you can.
- Resolution: If your source video is 1920x1080, export it at 1920x1080. Don't downscale unless you have a specific reason.
- Frame Rate: Always match the original frame rate (e.g., 29.97 fps, 24 fps). Mismatched frame rates can cause jerky playback.
- Bitrate: This one's huge. A lower bitrate means a smaller file but also lower quality. Try to match the original bitrate, or just pick a high-quality preset for your destination, like "YouTube 1080p."
Taking a few extra minutes on the export screen makes sure your final MP4 looks just as sharp and professional as the footage you started with.
Fast Edits with Free Online Trimming Tools
Need to trim an MP4 right this second without installing a single piece of software? This is where free online trimming tools shine. They’re built for one thing: speed. You can make quick cuts directly in your web browser, no downloads required.
This approach is a lifesaver for social media managers, small business owners, or really anyone who needs to make a fast, simple edit without the headache of a full desktop application. The workflow is almost always the same: upload your file, make your cut, and grab the finished product.
The Typical Online Trimming Workflow
The real beauty of browser-based tools is their simplicity. Most of them follow a super intuitive process that takes just a couple of minutes from start to finish.
- Upload Your Video: First, you’ll either drag and drop your MP4 file onto the website or just select it from your computer’s files.
- Use the Trimming Handles: Once it's up, your video appears in a simple timeline. You'll see handles (or sliders) at the beginning and end of the clip.
- Define Your Segment: From there, just drag these handles to set the new start and end points for your video. It’s a really visual and easy way to isolate the exact part you want to keep.
- Preview and Download: After setting your trim points, give the shortened clip a quick preview. If it looks good, hit the export or download button, and the new MP4 saves right to your device.
If you're on the lookout for budget-friendly options, there are tons of great resources that list the best free video creation software tools, which often pack in more than just basic trimming.
Understanding the Trade-Offs
While they’re incredibly fast, online tools come with a few potential drawbacks you should know about. They prioritize speed, which sometimes means sacrificing a bit of control and quality.
Actionable Insight: Online trimmers are built for the 80% of edits that are simple—chopping the start or end of a clip. They excel at this, but for more complex tasks, you might hit their limitations quickly.
Before you upload, keep these common factors in mind:
- File Size Limits: Many free services cap how big your file can be, often somewhere around 500MB to 1GB. This makes them less ideal for long, high-resolution videos.
- Watermarks: It’s pretty common for free platforms to add their logo or a watermark to your final video. This is usually how they nudge you toward a paid plan.
- Quality Compression: To process everything quickly, online tools often have to re-encode your video. This can sometimes lead to a slight loss in visual quality, meaning the final version might not be quite as crisp as the original.
These trade-offs are usually minor and totally fine for quick social media clips or informal videos. If you just need a hassle-free solution right now, our own browser-based tool is a great place to start. You can learn more about how our free video trimmer works and give it a try. For creators who value speed above all else for one-off tasks, the convenience is just unmatched.
Lossless Quality Trimming with FFmpeg
If you're comfortable with a command-line interface—or you're a developer or just a power user who wants the absolute best quality—then FFmpeg is your secret weapon for trimming MP4s. It’s a tool that runs without a graphical interface, which might look a bit old-school, but it delivers unmatched speed and, most importantly, lossless cuts.
Think of it this way: most video editors re-encode (compress) your video when you export it. That process can introduce tiny imperfections, like blocky artifacts or slight color shifts. FFmpeg, on the other hand, can simply copy the existing video and audio streams into a new file. It's the digital equivalent of snipping a piece of physical filmstrip instead of re-photographing it.
This method is insanely fast and keeps the original quality perfectly intact. It’s the go-to for automated workflows, like trimming hundreds of clips at once, or for any job where pristine quality is the top priority.
The Basic Command Explained
Getting started with FFmpeg is actually way easier than it looks. The core command for trimming a video only has a few parts. You just need to tell it which file to use, where to start, how long the new clip should be, and what to name the final file.
Here's a simple command you can copy and paste right into your terminal:
ffmpeg -i input.mp4 -ss 00:01:30 -t 00:00:15 -c copy output.mp4
Let’s break down what each piece of that command is doing:
ffmpeg: This just runs the program.-i input.mp4: The-iflag points to your input file. Just swapinput.mp4with the actual name of your video.-ss 00:01:30: This sets the start time for your trim. In this case, we're jumping 1 minute and 30 seconds into the video.-t 00:00:15: This flag tells FFmpeg the duration of the new clip. We're making a 15-second video from that start point.-c copy: Here's the magic. This tells FFmpeg to copy the streams directly without re-encoding anything. This is what makes it lossless.output.mp4: And finally, this is the name you want to give your newly trimmed video.
A command like this can slice up a gigabyte-sized MP4 in just a few seconds—a task that could easily take several minutes in a standard desktop editor.
Why Lossless Trimming Is a Big Deal Right Now
Short-form video is absolutely everywhere. Platforms like YouTube Shorts are pulling in 70 billion daily plays, and users spend 22% of their time on Instagram watching Reels. This massive demand means the video editing software market is set to grow from USD 2.38 billion in 2024 to USD 2.54 billion in 2025, all driven by the need to repurpose content.
But there’s a problem. A recent market research report found that 75% of creators struggle with the manual process of pulling clips from longer MP4s, often using tools that degrade the video quality with each export. FFmpeg's lossless approach solves this issue head-on, ensuring your short clips look just as sharp and clean as the original footage.
Actionable Insight: FFmpeg is the definitive answer for anyone who needs to trim an MP4 for archival purposes, professional delivery, or batch processing where even a minor drop in quality is unacceptable. It’s the tool the pros use behind the scenes.
Of course, a command-line tool isn't for everyone. While mastering FFmpeg opens up a whole new world of video processing, you might prefer a more visual or automated solution. If that's the case, other methods might be a better fit for your workflow.
Automated Trimming and Repurposing with AI
Imagine learning how to trim an MP4 video without ever touching a timeline. Instead of manually scrubbing through hours of footage, what if you could have an intelligent system find the best moments for you? This is exactly what AI-powered platforms are designed to do, turning a tedious chore into a fast, automated process.
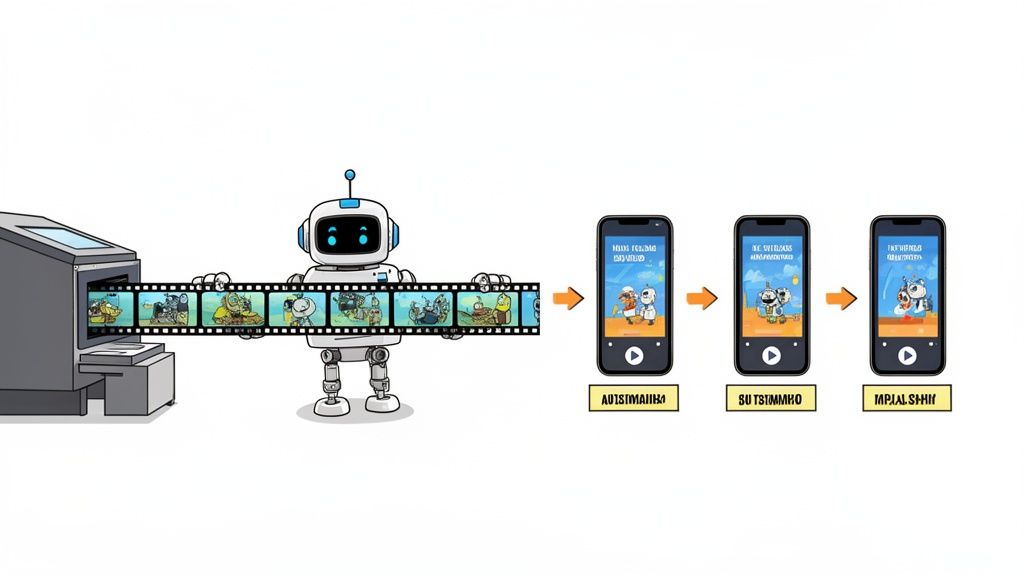
Tools like Klap completely change the game for creators and marketers. You just feed it a long-form video—either by uploading a file or pasting a YouTube link—and the AI gets to work. It analyzes the entire video, automatically identifying the most engaging hooks and compelling segments.
This is the definitive solution for scaling your video output without scaling your workload. The AI handles the heavy lifting, turning a single hour-long recording into a week's worth of shareable social media content in just minutes.
The AI-Powered Trimming Workflow
This process is all about efficiency. For beginners, manually trimming an MP4 can eat up 2-3 hours per video, which is a major cause of burnout for creators trying to post regularly. AI solutions can slash this time by over 90% by automating the most time-consuming parts of the job.
Here’s a look at how it generally works:
- Feed It Your Source Video: You start by either uploading your MP4 or just dropping in a link to an existing YouTube video.
- Let the AI Analyze: The platform’s AI scans the video's transcript and visual cues to pinpoint the most interesting and shareable moments. It's trained to look for questions, key takeaways, and emotional peaks in the conversation.
- Get Your Clips: Based on its analysis, the AI generates dozens of short clips, each trimmed to focus on a specific topic or highlight.
- Receive Smartly Reframed and Captioned Videos: Each clip is automatically reframed for vertical viewing (the 9:16 aspect ratio) and gets dynamic, animated captions to boost engagement on platforms like TikTok and Reels.
Actionable Insight: This workflow isn't just about trimming; it's about intelligent repurposing. The AI understands what makes a clip compelling and handles the technical details, freeing you up to focus on your content strategy.
Beyond Simple Trimming
The real power here is in the extra features that come standard. An AI-powered tool doesn't just cut your video; it gets it ready for modern social media feeds. This includes a few key enhancements that make a huge difference.
- Active Speaker Detection: The AI identifies who is speaking and ensures they are always centered in the frame—a must-have for interview or podcast clips.
- Customizable Branding: You can add your own logos, fonts, and brand colors to keep a consistent look across all your short-form content.
- Easy Final Adjustments: While the AI does most of the work, you still have the final say. You can easily tweak the start and end points of any clip or edit the captions before exporting.
This method effectively combines trimming, reframing, and captioning into one seamless step. For a deeper look into this process, you can explore the capabilities of an AI shorts maker. To expand your understanding of AI's role in video content, especially for repurposing, you might explore what's possible with an AI Video Generator. It's the smartest way to trim an MP4 for maximum impact.
Got Questions About Trimming MP4s? We've Got Answers
Even when you know the steps, trimming an MP4 file can throw a few curveballs your way. Let’s tackle some of the most common issues that pop up so you can get back to creating.
How Can I Trim an MP4 Without Wrecking the Quality?
This is the big one. Nobody wants to trim a crisp video only to end up with a blurry, pixelated mess. The secret to keeping your quality high is to avoid re-encoding the file whenever you can.
A command-line tool like FFmpeg using the -c copy command is the only truly lossless way to do it. It just repackages the existing video data without touching the compression. For desktop editors, your best bet is to dive into the export settings and match the resolution, frame rate, and bitrate to your original source file as closely as possible.
Actionable Insight: Quality loss almost always happens during the export or "rendering" phase. If your trimmed video looks blurry, check your export bitrate first—it's likely too low for the resolution you've chosen.
What’s the Best Format for Social Media Clips?
You’re starting with an MP4, but where the clip is going matters a lot. For platforms like TikTok, Instagram Reels, and YouTube Shorts, a few settings are pretty much non-negotiable if you want things to look right.
- Aspect Ratio: Always go with 9:16 (that’s vertical video).
- Resolution: 1080x1920p is the gold standard.
- File Format: Stick with MP4 using the H.264 codec. It gives you the best mix of quality and small file size, which is perfect for streaming.
Why Is My Audio Out of Sync After I Trim?
Ah, the dreaded audio drift. It's a frustratingly common problem, and it's usually caused by something called variable frame rate (VFR). Your phone or screen recorder often uses VFR to save space, but video editors really prefer a constant frame rate (CFR).
Here's a pro tip: before you even start trimming, run your MP4 through a free tool like HandBrake. Set it to convert the video to a constant frame rate. This one simple step upfront can save you a massive headache later by keeping your audio and video locked in perfect sync.
Tired of manual edits and troubleshooting? Klap uses AI to automatically find the best moments in your long-form videos, then trims, reframes, and captions them into dozens of social-ready clips in minutes. Turn your videos into viral shorts with Klap.
