How to Format Video for Instagram: A Practical Guide
Other

Formatting your video for Instagram is about so much more than just avoiding a blurry upload—it’s about making sure your content actually gets seen. The magic combination? An MP4 file, the H.264 codec, and aspect ratios that Instagram loves, like 9:16 for Reels and 4:5 for Feed posts. Nail these, and you’re set up to maximize visibility and engagement.
Why Your Instagram Video Format Is Make or Break
Ever spend ages perfecting a video, only for it to look cropped and pixelated once you upload it to Instagram? It's a common frustration, but it’s not random. When your video doesn't fit the platform's native, mobile-first experience, the algorithm often penalizes it, burying your hard work.
Imagine filming the perfect product demo, but the key feature gets completely cut off in Reels. Or even worse, a paid ad that looks so grainy and unprofessional it instantly tanks your brand’s credibility. These aren't just technical hiccups; they're engagement killers.
The Real Cost of Bad Formatting
Getting the specs right isn't about blindly following rules. It's a strategic move to make sure your message lands, your engagement soars, and your content actually has a chance to perform.
- Algorithm Favoritism: Instagram’s entire goal is keeping users on the app. Videos formatted correctly feel seamless to watch, so the algorithm is far more likely to push them to a wider audience.
- Audience Retention: A blurry, awkwardly cropped video is an instant scroll-past. This crushes your watch time—a key engagement metric—and tells the algorithm your content isn't worth showing to anyone else.
- Professionalism and Trust: Your video quality is a direct reflection of your brand. In a sea of content, sloppy formatting makes you look amateurish, plain and simple.
This chart is a great visual shortcut for the most important aspect ratios you'll be dealing with.
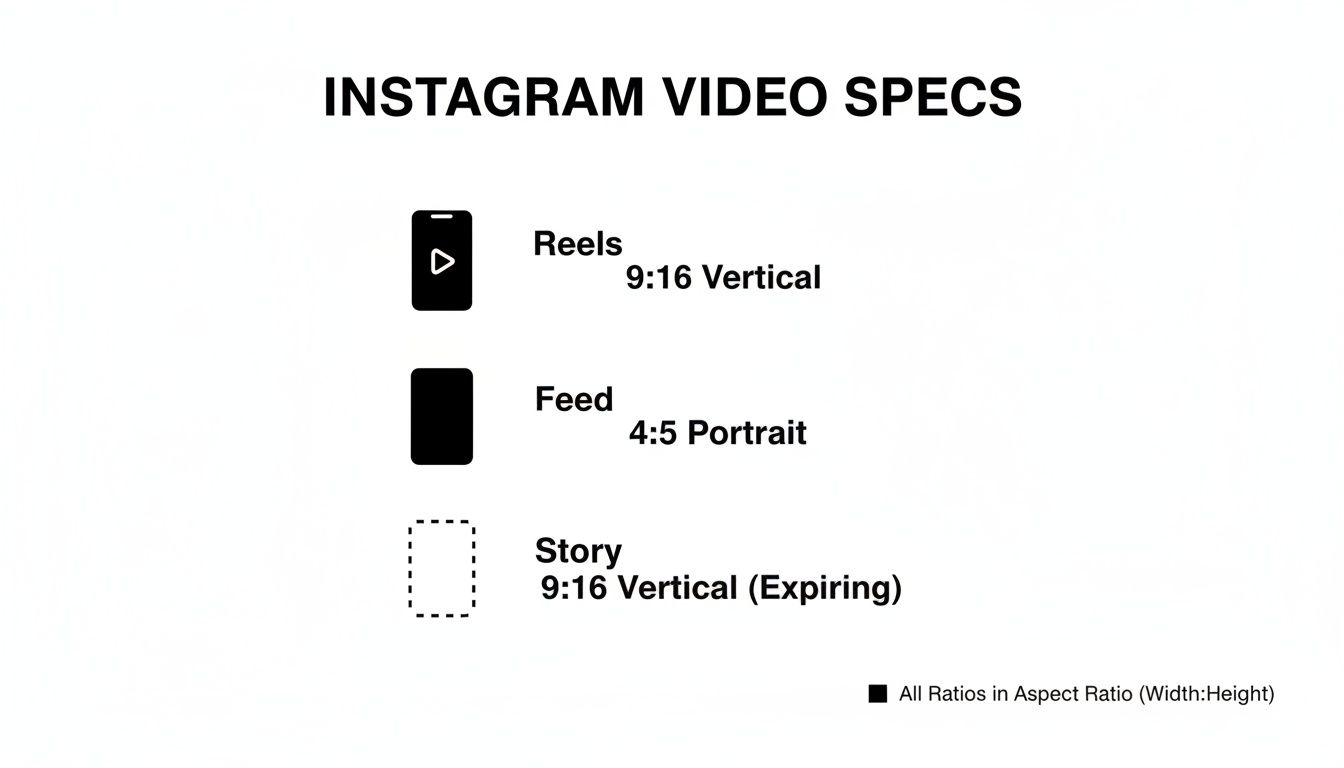
As you can see, vertical formats like 9:16 dominate Reels and Stories, while the 4:5 portrait is your best bet for taking up the most screen real estate in the main feed.
Mastering video specs is the first step toward creating content that doesn't just get posted but actually gets seen. It’s a non-negotiable part of a successful Instagram strategy.
With over 100 million photos and videos shared on the platform every single day, the competition is fierce. It's no surprise that short-form Reels now account for over 50% of the total time people spend in the app. The algorithm's top ranking factor is engagement, and high-resolution vertical videos are what drive it.
Ultimately, getting your video format right is a huge piece of the puzzle to get more engagement on Instagram.
Getting Your Video Right for the Instagram Feed
Think of your Instagram feed as your brand's digital storefront. It's where first impressions are made, and getting your video format right is non-negotiable for a polished, professional look. While Instagram lets you post a few different video shapes, the real choice boils down to two heavy hitters: the classic 1:1 square and the more commanding 4:5 portrait.
This isn't just a technical decision; it's a strategic one. A 4:5 portrait video, for example, physically takes up more screen space as someone scrolls through their feed. That extra real estate can be an absolute game-changer for stopping the scroll, making it perfect for standalone promotional content or big announcements.
On the flip side, the 1:1 square format gives you that clean, symmetrical vibe that looks fantastic in carousel posts, where you need visual consistency from one slide to the next.
Square vs. Portrait: Making the Right Call
Here’s a simple, actionable way to think about it: use the 4:5 format when you want a single video to make the biggest splash possible. Got a campaign launch or a key product feature to show off? That extra vertical space is your best friend. A square 1:1 video is your go-to when you're building a cohesive grid aesthetic or creating a multi-video carousel that tells a story.
No matter which one you pick, you have to be mindful of Instagram's "safe zones." These are the parts of the screen where crucial elements like your logo or captions won't get awkwardly cut off by the app's interface.
- Top & Bottom Margins: Always leave a little breathing room at the very top and bottom of your frame. This is especially critical for 4:5 videos, where the user's profile info and the caption can easily overlap your content.
- Grid Preview Crop: Don't forget, your feed videos get cropped to a 1:1 square on your main profile grid. Make sure the most compelling part of your video's thumbnail is dead center, so it still looks great in that cropped view.
The goal is to make your video feel like it belongs on the feed. A perfectly formatted 4:5 video can boost watch time simply because it’s more immersive and fills the screen, which is a strong signal to the algorithm that your content is worth pushing.
The Nitty-Gritty: Essential Technical Settings for the Feed
We've all seen it—a crisp, beautiful video that turns into a blurry, pixelated mess after uploading. To avoid Instagram's notorious compression, you need to give it a file that's already optimized. Exporting with these exact settings tells the platform, "Hey, I've got this handled," which dramatically reduces the chances of it being aggressively re-compressed.
- Codec: H.264 is the universal standard. It offers the best mix of quality and compatibility.
- Bitrate: Aim for 3,500 kbps (or 3.5 Mbps). Going much higher is just wasting file space, as Instagram will compress it down anyway.
- Frame Rate: 30 frames per second (fps) is the sweet spot. It delivers smooth motion without creating a massive file.
- Audio: Stick with AAC audio at a 44.1 kHz sample rate for the cleanest sound.
Nailing these details ensures your video looks exactly how you envisioned it. And if you're looking to skip the headache of memorizing specs, you can use a simple tool to resize videos for any social media platform and get it right every time.
Mastering Vertical Video for Reels and Stories
While Instagram Reels and Stories both use that immersive, full-screen 9:16 vertical format, they serve completely different purposes. Think of them as two distinct tools in your content kit: Reels are for discovery and getting in front of new eyeballs, while Stories are for strengthening the bond you already have with your followers.
This distinction is mission-critical when you're formatting a video. Your Reels are like blockbuster movie trailers—they need to hook total strangers in the first 3 seconds. Stories, on the other hand, are the casual, behind-the-scenes chats that give your existing community a reason to stick around.

The rise of Reels has completely reshaped the platform. They're now the undisputed king of user attention, accounting for over 50% of all time spent in the app.
Why? Because Instagram's algorithm aggressively pushes Reels to non-followers. Data shows Reels can generate up to 67% more engagement than standard feed videos, fueling viral growth through shares and the "Remix" feature.
Keep Your Content Out of the UI Danger Zone
A rookie mistake I see all the time is forgetting about the on-screen user interface. Instagram slaps buttons, captions, and profile info right on top of your video, which can easily cover up the good stuff.
To avoid this, you have to treat the center of your screen as a "safe zone." Always keep your most important elements—like key text, faces, or product shots—within this central area. Think of it as an invisible buffer around the edges of the frame. This ensures that when someone taps the "like" button or reads your caption, they aren't blocking the main subject of your video.
Your goal is to create a seamless viewing experience that feels native to the platform. When key visuals are hidden by UI elements, it signals to viewers—and the algorithm—that the content wasn't designed for its environment, which can hurt engagement.
For a super-detailed breakdown of the exact dimensions and specs for all placements, check out this Meta ad video size guide for all placements, including Instagram. It's a lifesaver.
Ideal Export Settings for Vertical Video
To make sure your vertical content really pops, you've got to nail your export settings. Get this wrong, and Instagram’s aggressive compression will turn your sharp video into a blurry, pixelated mess.
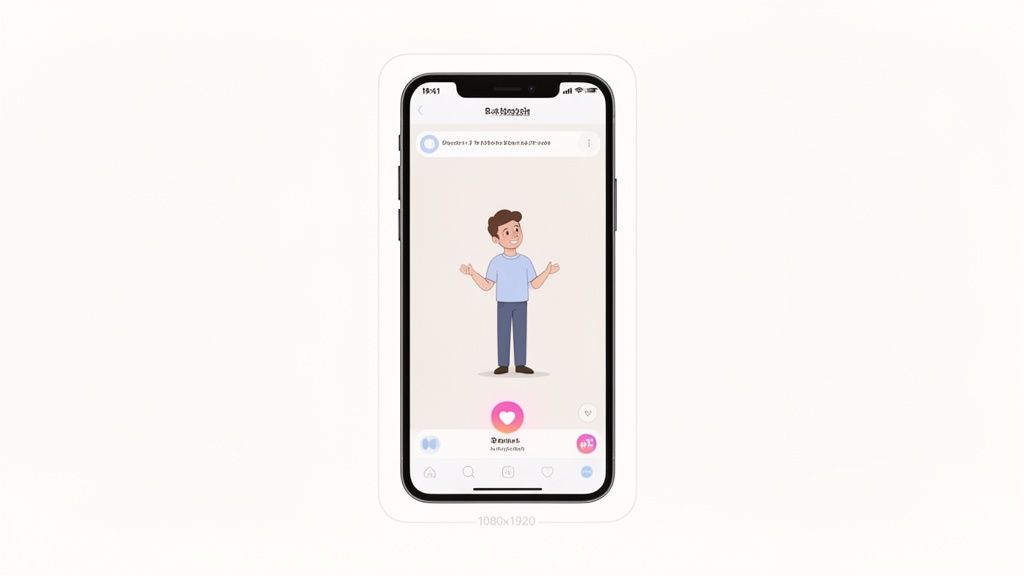
Here are the settings I always use for a crisp 1080x1920 video:
- Resolution: Stick with 1080x1920 pixels. It’s the sweet spot for quality without creating a massive file.
- Bitrate: While 3,500 kbps is a solid baseline, I recommend exporting at a slightly higher bitrate (around 4,000-5,000 kbps). This really helps preserve detail, especially if your video has a lot of movement.
- Frame Rate: 30 fps (frames per second) is the gold standard for smooth, natural-looking motion on Instagram.
- Audio: Always use AAC audio. It ensures your sound is clear and compatible.
These settings give your video the best fighting chance against compression. And if you're looking to speed things up, a good AI reel generator can handle a lot of this automatically, from clipping to formatting. Getting these technical details right is what separates amateur content from polished videos that are primed for maximum reach.
Common Formatting Mistakes and How to Fix Them
Even when you nail the aspect ratios, there are a few subtle mistakes that can quietly kill your video's performance on Instagram. Let's dig into some of the most common—and costly—errors that can tank your reach before you even hit "post."
It’s an easy trap to fall into, especially when you’re trying to quickly adapt a horizontal video for a vertical world. The platform is built for immersive, full-screen experiences. Anything less sticks out like a sore thumb.
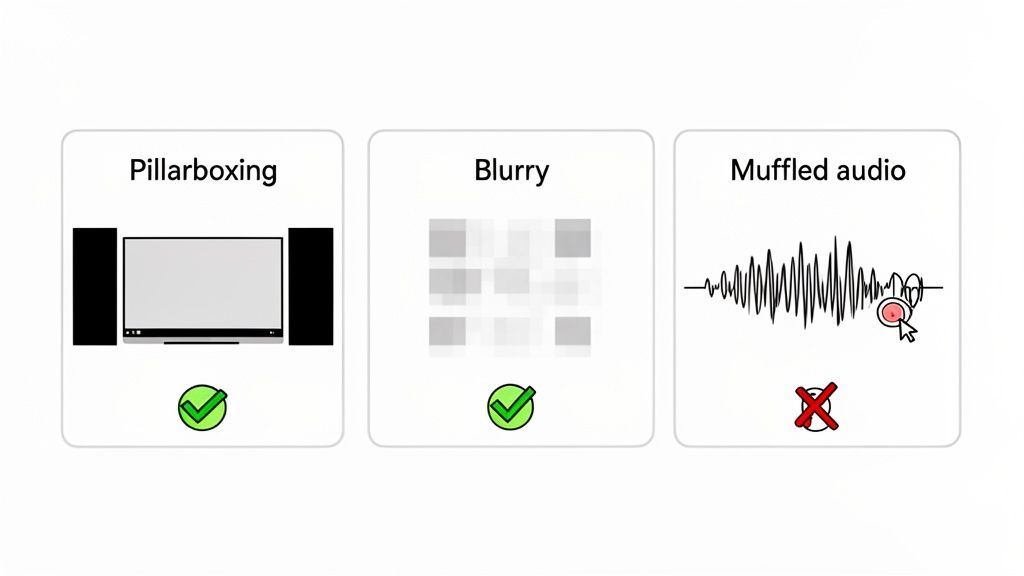
The Problem of Pillarboxing
You've seen them: those ugly vertical black bars flanking a horizontal video that’s been awkwardly squeezed into a vertical frame. This is called pillarboxing, and it's a dead giveaway that your content wasn't formatted with care.
- Why It's Hurting You: It screams "low-effort" to your audience and, more importantly, to the algorithm. All that wasted screen real estate translates to lower engagement, which tells Instagram not to bother showing your content to more people.
- The Fix: Don't just drop your horizontal video into a vertical timeline. The right way to do it is to reframe the content. This usually means cropping in on the most important part of the shot. Another option is to create a blurred background using a duplicate of your video layer, which looks way more polished and intentional.
Muffled and Unbalanced Audio
Here's another classic mistake: audio that sounds perfectly fine on your editing computer but comes out tinny, muffled, or distorted after you upload it. Instagram’s audio compression can be pretty aggressive, and it's especially unforgiving if your source file isn't optimized.
- Why It's Hurting You: With up to 60% of users now watching Stories with the sound on, clear audio is non-negotiable for holding attention. Bad audio makes your content feel amateurish and can make viewers scroll away in seconds.
- The Fix: Always export your audio in AAC format with a sample rate of 44.1 kHz. Before you export, take a moment to normalize your audio levels so they're consistent and not peaking into the red. This gives Instagram's compression a clean, balanced track to work with, which helps preserve the original clarity.
The explosive rise of short-form video underscores a broader marketing revolution. In fact, 29.18% of marketers worldwide have adopted formats like Reels as their top strategy. This trend is fueled by massive consumer demand, with 81% of users wanting more short-form brand videos. Read more about these video marketing trends and why getting the details right is so crucial.
Starting with a Low-Quality Source File
This one might seem obvious, but it’s a trap plenty of people fall into. You can't export a high-quality video from a low-quality source. If your original footage is blurry, pixelated, or poorly lit, no amount of formatting wizardry will save it.
- Why It's Hurting You: Instagram is going to compress your video, period. When it compresses a file that’s already low-quality, the result is a blurry, unwatchable mess that completely undermines your credibility.
- The Fix: Always, always start with the highest-quality source file you have, preferably shot in at least 1080p. This gives the compression algorithm more data to work with, resulting in a much sharper final video. Think of it as giving yourself a buffer—the better the source, the better the result.
Your Smart Workflow for Automated Formatting
Let's be real: manually reformatting every single video you make is a massive time-suck. If you're sitting on a goldmine of long-form content like podcasts or YouTube videos, the thought of chopping each one up into social-ready clips is enough to make you want to give up. The whole process of finding hooks, reframing shots, and adding captions is just plain tedious.
This is where a smarter workflow saves the day. Instead of losing hours in an editing suite, you can use AI-powered tools to handle the heavy lifting, turning a huge bottleneck into a content-generating machine. This isn't just about saving time; it's about actually being able to scale your content strategy.
Imagine turning a one-hour podcast into ten perfectly formatted, shareable Reels in minutes. That’s exactly what tools like Klap are built for.
From Long-Form to Viral Shorts Instantly
The magic behind this automated workflow is an AI that actually understands what makes a video interesting. It scans your long-form content, analyzing transcripts and audio cues to pinpoint the most compelling hooks and highlights—those moments most likely to stop someone from scrolling.
Here’s a practical look at how it works:
- AI-Powered Clip Discovery: The system automatically flags the most engaging parts of your video. No more scrubbing through hours of footage to find the good stuff.
- Intelligent Reframing: The AI detects who's talking and keeps them perfectly centered in the vertical 9:16 frame, even if they move around in the original shot. This auto-reframing is a lifesaver when you format video for Instagram and solves the problem of awkward, chopped-off heads.
- Dynamic Captions: Since up to 85% of social media videos are watched on mute, captions are non-negotiable. The AI generates and adds dynamic, eye-catching subtitles to every single clip, completely automatically.
This kind of smart automation can turn one long video into a full week’s worth of high-quality social media posts. It frees you up to focus on creating great original content instead of getting lost in repetitive editing tasks.
This shift from manual to automated formatting is a total game-changer for creators. It lets you squeeze every last drop of value out of your content, making sure every video gets the visibility it deserves.
Building a Scalable Content Machine
When you adopt an automated workflow, you stop trading your time directly for content. Instead of a one-to-one output (one edit equals one clip), you get a one-to-many result. A single upload can spit out a dozen assets, each one perfectly optimized for Instagram's different formats.
This approach is especially powerful for podcasters, educators, and marketers who have a huge backlog of existing content. You can even test out a long-to-short video converter to see just how fast you can breathe new life into your archives.
Ultimately, this isn't just a shortcut. It's a strategic way to build a sustainable content engine that consistently feeds the Instagram algorithm what it wants.
Your Instagram Video Formatting Questions Answered
Even when you follow all the rules, there are always a few lingering questions that pop up the second you hit "upload." It happens to everyone.
Let's clear up some of the most common doubts so you can post your next video with total confidence. Think of this as the final check-in before your content goes live.
What Is the Best Video Format for Instagram Overall?
If your goal is maximum reach and discovery, the 9:16 vertical video (1080x1920 pixels) for Instagram Reels is the undisputed king. The entire algorithm is practically built to push Reels to new audiences, making it your single most powerful tool for growth.
That said, for your main feed, a 4:5 portrait video (1080x1350 pixels) is an incredible choice. It takes up significantly more screen real estate than a standard square post, which is a massive advantage for stopping someone mid-scroll.
No matter where you post, these technical specs are your best bet for quality:
- File Type: MP4 is the gold standard. Don't use anything else.
- Codec: H.264 gives you the best balance of quality and file size.
- Audio: AAC audio will keep your sound crisp and clear, even after Instagram compresses it.
Why Does My Instagram Video Look Blurry After Uploading?
That dreaded, fuzzy look is almost always a result of Instagram's aggressive video compression. When you upload a file, Instagram re-encodes it to save space on its servers. If your original file isn't already optimized, the quality loss is huge and very noticeable.
The trick is to beat them to the punch. Start with a high-quality video, but export it at the exact resolution Instagram wants (e.g., 1080px wide). Don't upload a 4K video thinking it'll look better—it's actually counterproductive and forces even heavier compression.
Your sweet spot for a 1080p video is a variable bitrate between 3-6 Mbps. Also, a weak or spotty internet connection can trigger even more compression from Instagram's side, so always try to upload over a solid Wi-Fi signal.
Can I Post a Horizontal 16:9 Video on Instagram?
You can, but it's a terrible idea from a performance standpoint.
On the main feed, your horizontal video will get slapped with huge black bars on the top and bottom (a classic case of letterboxing). It looks tiny and fails to capture any attention in a vertical-first world.
If you try to post that same 16:9 video as a Reel, Instagram will awkwardly crop it to fit the 9:16 frame, which almost guarantees you'll lose the most important parts of your shot. The only good move here is to reframe your horizontal footage into a vertical format, keeping your subject centered and creating an experience that actually feels native to the platform.
What Is the Difference Between Instagram Video and Reels?
The main difference is their purpose and how the algorithm treats them. It really boils down to this:
- Reels: These are short, vertical videos (up to 90 seconds) built for viral discovery. The algorithm is designed to push them out to non-followers, making them the best tool for reaching brand-new audiences.
- Instagram Video: These are longer-form posts (up to 60 minutes) that live on your main feed. They are much better for sharing in-depth content with the community and followers you already have.
When it comes to pure growth and getting your content in front of as many new eyeballs as possible, Reels win. It's not even close.
Ready to stop wasting time on manual editing and start scaling your content? Klap uses AI to instantly turn your long videos into dozens of perfectly formatted, viral-ready shorts with captions. Try it now and see how easy it is to feed the algorithm what it craves. Learn more at Klap.
