Convert Videos to TikTok Format for Maximum Reach
Other
To get your videos noticed on TikTok, you have to start with the right foundation: a vertical 9:16 aspect ratio and a crisp 1080x1920 resolution. Just throwing a horizontal video onto the platform and hoping for the best is a surefire way to get ignored. You’ll end up with those awkward black bars or weird, automatic cropping that just screams "I don't belong here."
The real goal is to reframe your content so it feels like it was made for TikTok, not just dumped there.
Why TikTok Demands Perfectly Formatted Video
Let's be blunt: uploading a horizontal video straight to TikTok is a recipe for failure. This isn’t just about aesthetics; it’s about performance. The entire platform is built for a vertical, full-screen mobile experience, and data shows that correctly formatted videos simply perform better.
When a viewer sees a badly formatted video, their thumb instinctively keeps scrolling. That quick dismissal sends a clear negative signal to the TikTok algorithm, telling it your content isn't engaging. As a result, your video’s reach gets choked off before it ever has a chance to find an audience.
The Opportunity Cost of Poor Formatting
The core problem is that unformatted videos disrupt the seamless, almost hypnotic flow of the "For You" page. Users expect content that fills their entire screen, and anything less feels jarring and low-effort. This creates an immediate wall between you and your potential viewers.
Think about the user behavior driving this. The vertical 9:16 aspect ratio is the undisputed king on TikTok, completely reshaping how creators think about video. This format is non-negotiable because the platform's user base is deeply conditioned to it. With projections showing US adults will spend an average of 52 minutes daily on TikTok in 2025, you're fighting against powerful, established user habits if you ignore the standard. You can dig deeper into these TikTok content trends on RecurPost.
The real cost of not converting your videos is missing out on engagement. A properly formatted video feels native, holds attention longer, and is far more likely to be shared, liked, and commented on—all crucial metrics for algorithmic success.
From Technical Chore to Strategic Advantage
Thinking about how to convert videos to the right TikTok format shouldn't feel like a tedious chore. It’s a fundamental strategic decision. Every little detail, from how you crop the shot to where you place your captions, is an opportunity to boost viewer retention and get your message across more effectively.
When you fully embrace the vertical format, you unlock some serious advantages:
- Increased Screen Real Estate: You command the viewer's full attention without competing with anything else on the screen.
- Improved Readability: Your text, captions, and key visuals are bigger and clearer, making your content much more accessible.
- Higher Perceived Quality: A video that fits the platform just looks more professional and trustworthy, which in turn boosts your brand's credibility.
Ultimately, understanding why this matters gives purpose to the technical steps that follow. It turns video conversion from a boring task into a powerful tool for growth.
Your Technical Checklist for Perfect TikTok Exports
Getting the technical details right is what separates a video that looks crisp and professional from one that feels amateurish. When you're converting videos for TikTok, you have to start thinking like the platform itself.
TikTok’s algorithm has its own preferences, and a blurry or poorly formatted video is an instant scroll-past for viewers. Nailing your export settings isn't just about looking good—it's about giving your content the best possible chance to perform.
Mastering Resolution and Aspect Ratio
First things first: your video's dimensions. TikTok lives in a vertical world, and your content needs to fit right in.
- Resolution: Always aim to export at 1080x1920 pixels. This is the sweet spot—the standard Full HD vertical resolution that looks sharp on any smartphone without creating a massive file that's a pain to upload. If your source footage is 4K, even better. Downscaling from 4K to 1080p will give you an incredibly crisp final product.
- Aspect Ratio: This is non-negotiable. It has to be 9:16. This ratio makes sure your video fills the entire screen, pulling the viewer in and getting rid of those distracting black bars on the sides.
If you're looking for a quick way to get the dimensions perfect without fiddling with settings, a good tool to resize videos for social media can handle the heavy lifting and prevent common formatting mistakes.
Actionable Tip: Whatever you do, never upscale a lower-resolution video (like 720p) to 1080p. It doesn't magically add detail. All it does is stretch the existing pixels, leaving you with a blurry mess. Always start with the highest quality source file you have.
Codecs and Frame Rates for Smooth Playback
Beyond the size and shape, how your video is encoded plays a massive role in how it looks on TikTok. The right codecs and frame rates are key to ensuring smooth, clean motion that doesn't stutter or lag.
For video compression, the most reliable and widely accepted choice is the H.264 codec (sometimes called AVC). It strikes the perfect balance between high quality and a manageable file size, which is exactly why it’s the standard for web video. For audio, stick with the AAC codec for clear sound and universal compatibility.
When it comes to frame rate, you’ve got two main choices:
- 30 FPS (Frames Per Second): This is the standard for most online content. It gives you a clean, natural look that’s perfect for talking-head videos, vlogs, and interviews.
- 60 FPS: If your video has a lot of fast movement—think sports highlights, dance clips, or gaming footage—go with 60 FPS. The higher frame rate creates that ultra-smooth motion that makes the action much easier to follow and way more visually appealing.
To make it even simpler, here's a quick-reference checklist you can use every single time you export a video for TikTok.
Optimal TikTok Video Export Settings Checklist
Getting these settings right from the start saves you from the frustration of a low-quality upload. Think of this as your pre-flight checklist before launching any video.
SettingRecommendationWhy It Matters
Resolution
1080x1920 pixels
Delivers a sharp, high-quality image on mobile screens.
Aspect Ratio
9:16
Fills the entire screen for an immersive, native experience.
Frame Rate (FPS)
30 or 60 FPS
Ensures smooth motion (60 FPS for high-action content).
Video Codec
H.264 (AVC)
Provides the best balance of quality and file size for web video.
Audio Codec
AAC
Offers clear audio and is universally compatible with the platform.
File Format
.MP4
The most widely supported and recommended format for TikTok uploads.
Sticking to these specs ensures that what you see in your editor is exactly what your audience sees on their feed—crisp, clear, and professional.
Reframing Horizontal Video for a Vertical Screen
So, you've got some killer horizontal footage from a YouTube video or webinar, and now you want to slice it up for TikTok. Here’s the problem: just dropping a 16:9 video into a 9:16 frame is a recipe for disaster. You end up with a tiny little video swimming in a sea of black bars, and that’s the fastest way to get someone to swipe away.
The trick isn't just about cropping. It’s about creatively reframing the whole story so it feels like it was made for a vertical screen. This is less of a technical fix and more of an artistic one. You have to rethink your shot and guide the viewer’s eye in a completely different, much narrower space.
For instance, that wide shot of two people talking? On TikTok, that's better off as a series of quick, dynamic close-ups that bounce between the speakers to keep the energy up. Mastering this is one of the most effective content repurposing strategies you can learn, letting you squeeze every last drop of value from your original work.
Finding the Action with a Center Cut
The simplest and most common method is the good ol' center cut. This is your go-to when the main subject—like a speaker in a tutorial or a product in a review—stays put right in the middle of the frame. You literally just chop off the sides, and voilà, the focus is right where it needs to be.
But it’s not a silver bullet. If your subject moves even slightly off-center, or if there's important context happening on the sides of the screen, a static center cut is going to fail you. It's a solid starting point for basic shots, but it's rarely the final answer.
Dynamic Pan and Scan to Follow the Story
What about more complex scenes where things are moving around? For that, you need a more active approach. This is where "pan and scan" comes into play. It’s all about creating artificial camera movements inside your original horizontal frame to keep the subject in the spotlight.
Think about a speaker pacing across a stage. A static crop would just cut them out of the shot as they move. Instead, you animate the 9:16 frame to follow them. This little bit of movement makes the video feel much more dynamic and ensures your audience doesn't miss a thing.
A lot of modern editing software, especially AI-powered tools, can actually do this for you by automatically tracking the subject. If you want more control, you can do it manually with keyframes. For anyone who needs that kind of precision without a full-blown editing suite, a dedicated tool to crop video online can make setting up these dynamic frames much easier.
After you've figured out your reframing strategy, you need to nail the technical side of things. This flowchart breaks down the ideal settings from resolution to format.
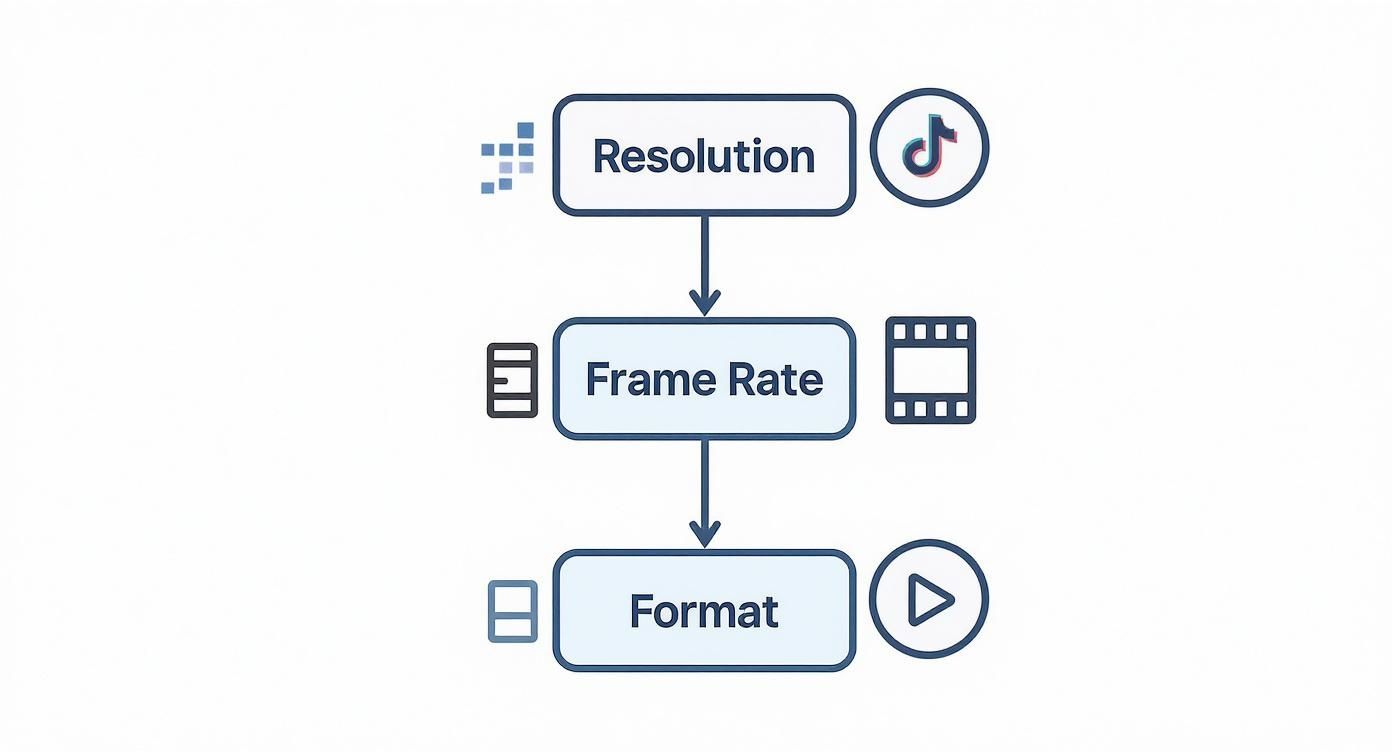
Getting the creative reframing right is half the battle; this visual guide handles the other half by making sure your export settings are perfect.
Creative Layouts for Maximum Impact
Sometimes, one cropped frame just doesn't cut it. The story needs more, and that’s when you can get really creative with how you use that vertical space.
Here are a couple of my favorite layouts:
- Blurred Background Layout: This one is a classic. You place your horizontal video in the middle of the 9:16 frame, then use a stretched-out, blurred version of that same video as the background. It instantly fills the screen, gets rid of the ugly black bars, and keeps the viewer’s focus locked on the action.
- Stacked Clip Layout: Need to show two things at once? Split the screen and stack two different horizontal clips on top of each other. This is perfect for interviews, Q&A sessions, or showing a reaction right next to whatever is causing it.
By thinking beyond a simple crop, you transform a technical limitation into a creative opportunity. The goal is to make the video feel intentionally designed for TikTok, not just passively adapted.
Choosing Your Conversion Toolkit: Manual vs. AI Tools
Alright, you've got your reframing strategy locked in. Now comes the fun part: picking the tools to actually get the job done. This is a bigger decision than it seems, as it'll define your entire workflow, how fast you can pump out clips, and the final creative touch.
When you convert videos to TikTok format, you're really looking at two main paths: the old-school, hands-on manual route, or the much faster, AI-driven approach.
There's no "right" answer here. The best tool is the one that fits your specific needs, your deadline, and your budget. Let's break down which one makes sense for you.
https://www.youtube.com/embed/PR_utIj7Rmo
The Manual Method for Precision Control
Going manual means firing up professional-grade software like Adobe Premiere Pro, Final Cut Pro, or DaVinci Resolve. This workflow gives you absolute, pixel-perfect control over every single frame. It's the go-to for seasoned video editors, filmmakers, and brands that need a highly polished, bespoke look that can't be left to chance.
Think about a brand trying to repurpose a high-end commercial for TikTok. They'd need to:
- Manually keyframe the reframe to perfectly track a specific product shot as it moves across the screen.
- Layer in custom color grades and branded motion graphics that an AI wouldn't understand.
- Fine-tune every audio transition and sound effect with surgical precision.
This path gives you unparalleled creative freedom, but it's a massive time sink. A single one-minute clip can easily take hours to perfect, which just isn't realistic for creators who need to churn out content daily.
The real trade-off with manual editing is speed versus control. If your brand's reputation hinges on flawless execution and you have the resources to back it up, the manual path is often the right choice.
The AI Route for Speed and Efficiency
On the flip side, you have AI-powered tools like Klap, Veed, or Descript. These platforms were built from the ground up for one thing: turning long videos into social-ready shorts as fast as possible. They completely automate the most tedious, time-consuming parts of the editing process.
This is the dream workflow for podcasters, YouTubers, and social media managers who live and die by batch creation. Picture a podcaster with a two-hour interview. Instead of scrubbing through it for hours, they just upload the video to an AI tool, which will automatically:
- Pinpoint the most engaging, hook-worthy soundbites.
- Reframe the shot to keep the speaker perfectly centered, even if they move around.
- Generate and animate dynamic captions to keep viewers hooked.
The whole point is to get you from a long video to a ready-to-post short clip in minutes, not hours.
This kind of efficiency is a game-changer. Properly formatted vertical videos have a direct impact on whether a user stops scrolling. And with over 135.79 million users in the United States alone, TikTok is a beast, converting 45.5% of them into buyers—a rate that even outpaces Facebook.
The key takeaway? A whopping 63% of top-performing ads get their message across instantly through proper formatting. That's exactly what AI tools are designed to do, but at scale. You can discover more insights about these TikTok marketing stats on Meltwater. If you're curious to see what else is out there, we've put together a guide on the best TikTok editing apps to help you explore more options.
Optimizing Your Converted Video for the Algorithm
Alright, so you’ve got your video converted into the perfect TikTok format. That’s a huge first step, but it's only half the battle. Getting the technical specs right is just the price of entry.
Now, we shift from the technical side to the strategic side. The real goal is to create something that doesn't just look like a TikTok video but also feeds the algorithm exactly what it wants. This is less about codecs and resolutions and more about human behavior—stopping the scroll, holding attention, and getting that tap or share.
The First Two Seconds Are Everything
Let's be real: on TikTok, you have zero time for a slow buildup. The algorithm makes snap judgments based on what viewers do in the first couple of seconds. If they swipe away, your video is dead in the water.
This makes your hook the single most important part of your video. It has to be punchy, intriguing, and get straight to the point.
Here are a few actionable ways to nail that opening:
- Ask a provocative question. "Why do 90% of creators fail at this?" Get them thinking and make them curious enough to stick around for the answer.
- Show the end result first. "Here's how I made $10,000 in 3 days." Reveal the amazing outcome, then spend the rest of the video showing how you got there.
- Make a bold, even controversial, statement. This sparks immediate curiosity and often drives comments.
That first burst of engagement is what signals to the algorithm that your video is worth showing to more people. A weak hook means your perfectly formatted video gets seen by almost no one.
The Strategic Value of Captions and Video Length
Captions aren't just for accessibility anymore—they're a critical tool for boosting watch time. In fact, 85% of social media videos are watched with the sound off. Dynamic, easy-to-read captions make sure your message still lands and keeps viewers locked in.
The length of your video also plays a massive role in how it performs. While the old advice was "shorter is always better," the reality is a lot more nuanced and depends entirely on your niche.
Optimizing your video's length is something you should consider before you even convert it for TikTok. While videos between 15-30 seconds tend to have the highest completion rates, content that runs anywhere from 3-10 minutes can actually get better engagement in certain categories.
This is especially true for tutorials, which happen to be the most preferred content format for 62% of users. People will absolutely watch a longer video if it's teaching them something valuable.
Leveraging Trends and Hashtags for Reach
Finally, you need to give the algorithm clear signals about your video. What is it about? Who should see it? This is where trends and hashtags are your best friends.
- Trending Audio: Using a trending sound is probably the fastest way to get your video discovered. The algorithm is literally designed to push content that uses popular audio, so you’re tapping into an existing wave of attention.
- Strategic Hashtags: Don't just throw in a bunch of generic tags like #fyp. Use a smart mix of broad, niche, and trending hashtags. Aim for 3-5 highly relevant tags that accurately describe your content and its intended audience.
When you combine a technically perfect video with a killer hook, the right length, and smart use of trends, you have the complete formula. To really dig in and make sure your converted videos hit their full potential, it's worth understanding the fundamentals of how to go viral on TikTok.
Common Questions About Turning Videos into TikToks
Even with the best game plan, a few questions always pop up once you start chopping up your videos for TikTok. Let's run through the most common ones I hear, so you can move forward without any second-guessing.
Will I Lose Video Quality When I Convert My Video?
This is a big one, but the short answer is: not if you do it right.
Massive quality loss usually comes from one of two things: trying to blow up a low-resolution video or using terrible compression settings. The format change itself isn't the real enemy here.
To keep things looking crisp, always start with the highest-quality version of your video you can get your hands on—like a 4K export from your original edit. When you export for TikTok, lock in your resolution at 1080x1920 and use a solid bitrate between 5-10 Mbps. This hands TikTok a clean, high-quality file, which seriously cuts down on the ugly compression artifacts they might add on their end.
What's the Best Free Software to Reframe a Horizontal Video?
You’ve got a couple of killer free options, and the right choice really boils down to whether you need more control or more speed.
- For pro-level manual control: DaVinci Resolve is the undisputed champ. It’s the same full-blown editing suite used in Hollywood, and it’s completely free. It gives you insanely precise control over keyframing, color grading, and audio.
- For speed and ease of use: CapCut, made by the same company as TikTok, is your go-to. It was built from the ground up for social media, with super intuitive tools for reframing, cropping, and adding captions on both desktop and mobile.
Can I Upload a Video That Isn't a 9:16 Aspect Ratio?
Technically, you can. But you really, really shouldn't.
When you upload a horizontal or square video, you're forcing TikTok to make a decision for you, and neither outcome is good for your views. The platform will either slap ugly black bars on the top and bottom, making your video look tiny and out of place, or it'll crop in automatically, likely cutting off something important in your shot.
Taking a few extra minutes to properly reframe your video into a native 9:16 aspect ratio before you upload is non-negotiable. It means you keep full creative control, your final video looks professional, and you give viewers the immersive experience they expect on the platform.
Ready to stop editing and start publishing? Klap uses AI to turn your long videos into viral shorts in minutes. Ditch the manual work and let our smart AI find the best hooks, reframe your shots, and add dynamic captions for you. Get started for free at Klap.app.
